10400 Clarence Drive, Frisco, TX 75033
Support 24/7: 945-777-3345

How Do Rats Get Into North Texas Homes?8 Entry Points

Rats usually get into North Texas homes through small structural gaps around the roofline, soffits, vents, utility penetrations, foundations and garage doors. They do not necessarily need an obvious hole. A damaged vent screen, separated roof edge, deteriorated seal around a pipe or gap beneath a door may provide enough access.

For Dallas-area homeowners, the location of the activity provides an important clue. Texas A&M AgriLife notes that roof rats commonly nest in attics and wall spaces, while Norway rats are more closely associated with burrows beneath foundations, floors and accumulated materials. Roof rats are also skilled climbers, making upper-level openings particularly important to inspect.

Finding the entry point matters just as much as removing the rats already inside. If the opening remains accessible, trapping a few animals may address the current activity without solving how rodents are entering the structure.

Table of Contents

  1. How Small an Opening Can a Rat Get Through?
  2. Roof, Eave and Soffit Gaps
  3. Attic and Roof Vents
  4. Gaps Around Utility Lines and Pipes
  5. Garage Doors and Exterior Doors
  6. Foundation and Crawlspace Openings
  7. Chimneys, Flashing and Roof Intersections
  8. Damaged Fascia, Siding and Exterior Materials
  9. Openings Reached From Trees, Fences and Utility Routes
  10. How Do You Find a Rat Entry Point?
  11. Should You Seal a Rat Hole Immediately?
  12. DIY Rat-Proofing vs. Professional Exclusion
  13. How to Make Your North Texas Home Less Attractive to Rats
  14. Frequently Asked Questions

How Small an Opening Can a Rat Get Through?

Some rats can use openings roughly 1/2 to 3/4 inch wide, depending on the species and animal, while mice can use even smaller openings.

CDC rodent-exclusion guidance recommends inspecting and sealing small gaps throughout a home, particularly around roofs, eaves, soffits, vents, doors, foundations and utility penetrations. Texas A&M guidance likewise recommends covering rodent-accessible openings with rat-resistant materials.

This is why a home can appear well sealed from the driveway yet still have a rodent-access problem.

A rat also may not need to find a perfectly sized opening. Rodents gnaw, and existing deterioration can sometimes be enlarged enough to improve access. Texas A&M identifies gnaw marks, droppings, tracks, grease smears and established runways as useful signs when investigating rodent activity.

Roof rats vs. Norway rats: where should you look first?
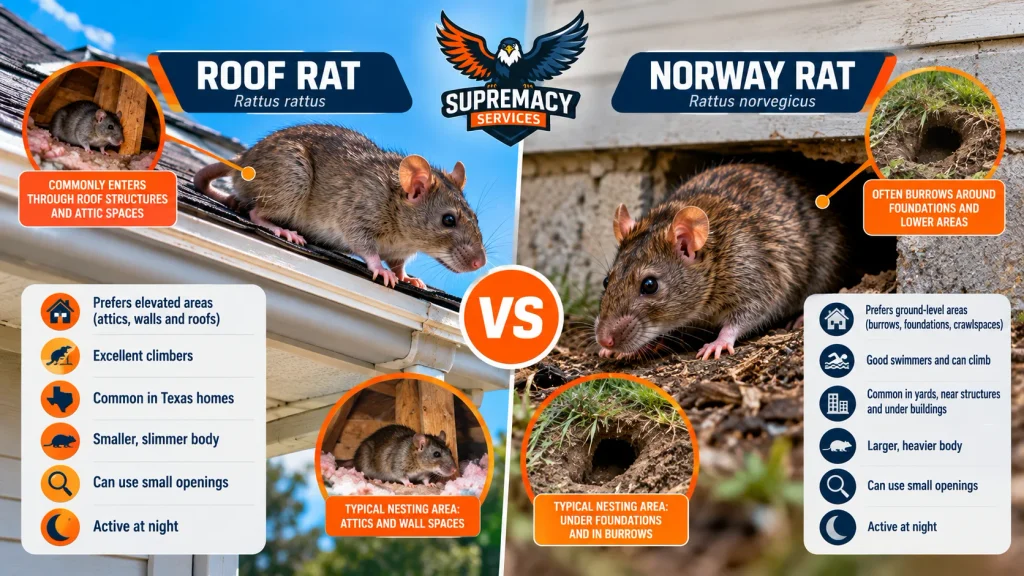
Comparison of roof rats using elevated attic and roof entry points versus Norway rats using ground-level foundation and burrow areas.
Roof rats are strongly associated with elevated areas such as attics and rooflines, while Norway rats are more commonly associated with ground-level areas and burrows.
ClueRoof ratNorway rat
Typical nesting tendencyElevated areas, walls and atticsBurrows and lower areas
Climbing abilityExcellentCapable, but more ground-oriented
First exterior areas to inspectRoofline, soffits, vents, upper openingsFoundation, ground-level openings, crawlspace
Attic noisesStrong cluePossible, but less characteristic
Burrows near foundationLess characteristicStronger clue

Texas A&M describes roof rats as the rat most commonly encountered in Texas homes and notes their ability to enter around roofs and soffits.

1. Roof, Eave and Soffit Gaps
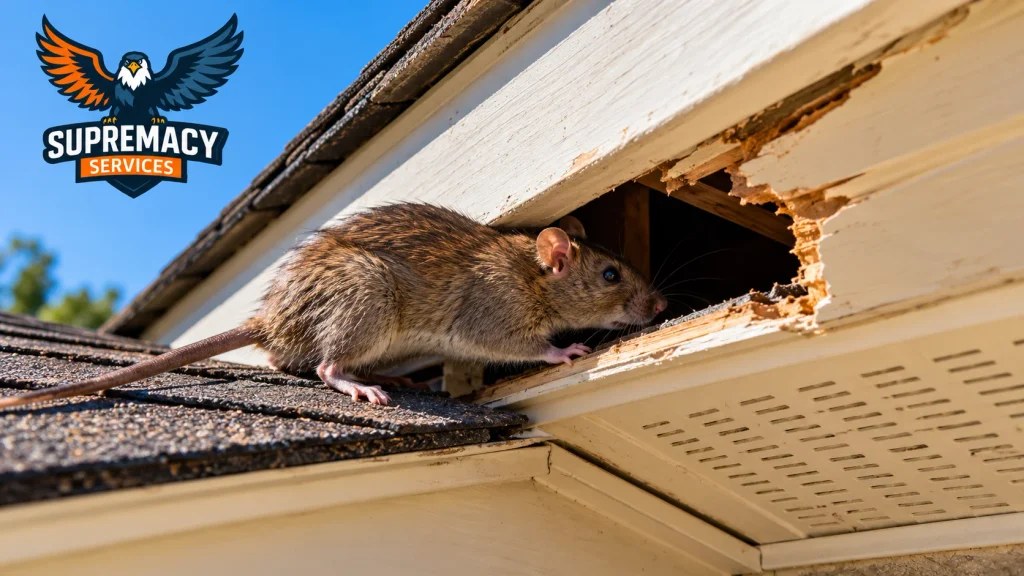
Rat entering a damaged soffit opening beneath the roof of a North Texas home.
Damaged soffits, eaves and roofline gaps can provide rats with access to attic spaces.

Roof edges, eaves and soffits are among the first places to inspect when rats are active in an attic.

A soffit does not need to be completely missing. Look for:

  • separated soffit panels;
  • deteriorated corners;
  • gaps where different roof sections meet;
  • openings behind fascia;
  • damaged trim;
  • construction gaps;
  • previous repair areas that have reopened.

Roof rats are particularly relevant here because of their climbing behavior and preference for elevated nesting areas.

A homeowner hearing movement above the ceiling at night should therefore inspect the exterior roofline rather than assuming the animal entered somewhere near ground level.

Do not climb onto a steep or high roof simply to look for a rat hole. Much of the initial inspection can be performed safely from the ground with binoculars or a camera with zoom.


Hearing activity in the attic but cannot locate the opening? A professional rodent inspection can trace likely travel routes from the attic to exterior roofline vulnerabilities.

2. Attic and Roof Vents
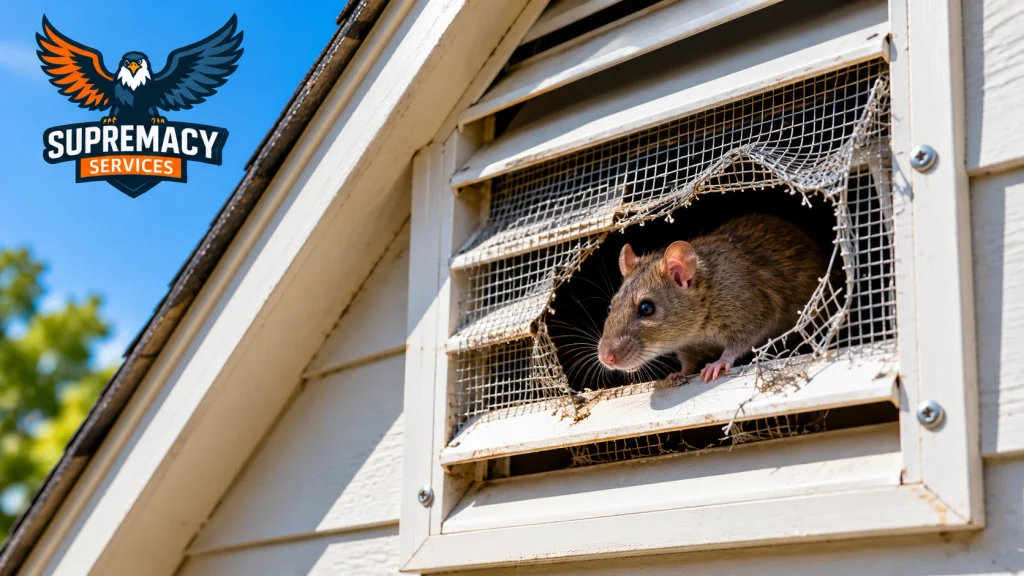
Rat emerging through damaged screening on an attic vent of a residential home.
Damaged or poorly protected attic vents can create direct access into the attic while appearing relatively minor from the ground.

Damaged, unscreened or poorly fitted vents can provide direct access to attic spaces.

Check:

  • attic vents;
  • gable vents;
  • roof vents;
  • crawlspace vents;
  • vent screens;
  • gaps around vent housings.

CDC specifically recommends checking attic and crawlspace vents when rodent-proofing a structure.

The important distinction is between blocking airflow and excluding rodents. A ventilation opening still needs to perform its intended function. Appropriate pest-resistant screening or another properly designed exclusion method should preserve necessary ventilation while preventing animal access.

If you see bent screening, gnawing, dark rub marks or an opening along the vent perimeter, inspect the surrounding attic area for additional evidence.

3. Gaps Around Utility Lines and Pipes
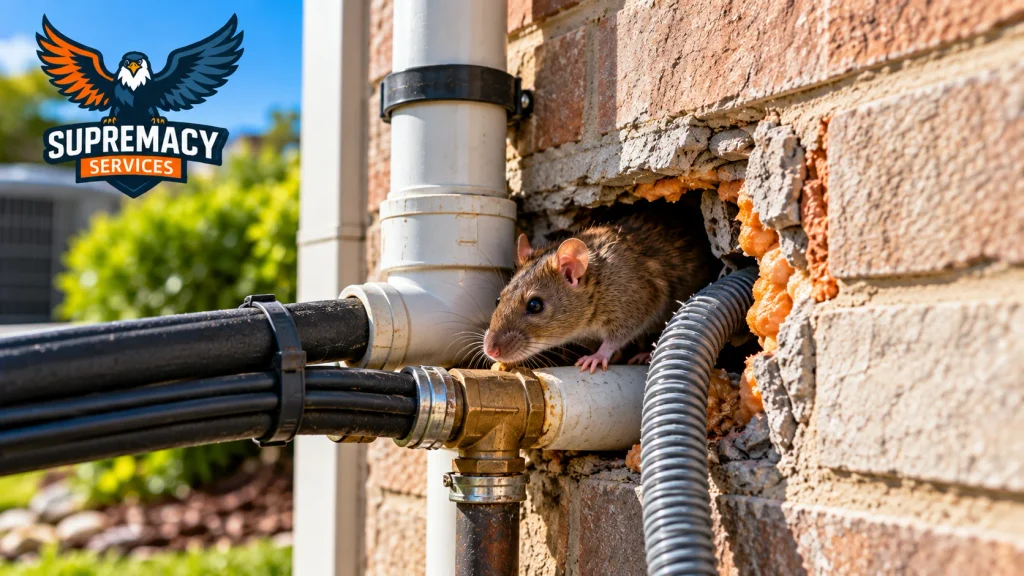
Rat beside an unsealed opening where pipes and utility lines penetrate a brick exterior wall.
Oversized or deteriorated openings around plumbing, electrical and other utility penetrations are important areas to inspect for rodent access.

The openings created where plumbing, electrical, cable, HVAC or gas lines pass through an exterior wall are common places for rodents to exploit.

Construction requires penetrations through walls and foundations. If the finished opening is larger than the line passing through it—or if an old seal deteriorates—a usable gap can remain.

CDC specifically advises checking around:

  • electrical lines;
  • water lines;
  • gas lines;
  • sewer lines;
  • pipes beneath sinks;
  • water-heater and furnace piping;
  • cable penetrations.

Walk slowly around the outside of the house and examine every place where a line disappears through brick, siding, masonry or another exterior material.

Pay particular attention to penetrations hidden behind landscaping or equipment. These can be easy to miss during a quick inspection.

What does an active entry point look like?

An opening becomes more suspicious when you also find:

  • dark or greasy rub marks;
  • fresh gnawing;
  • droppings nearby;
  • disturbed insulation inside;
  • a worn travel path;
  • nesting material;
  • repeated sounds from the corresponding wall or ceiling.

One clue alone does not prove that a particular hole is active. Multiple signs in the same location make the case stronger.

4. Garage Doors and Exterior Doors
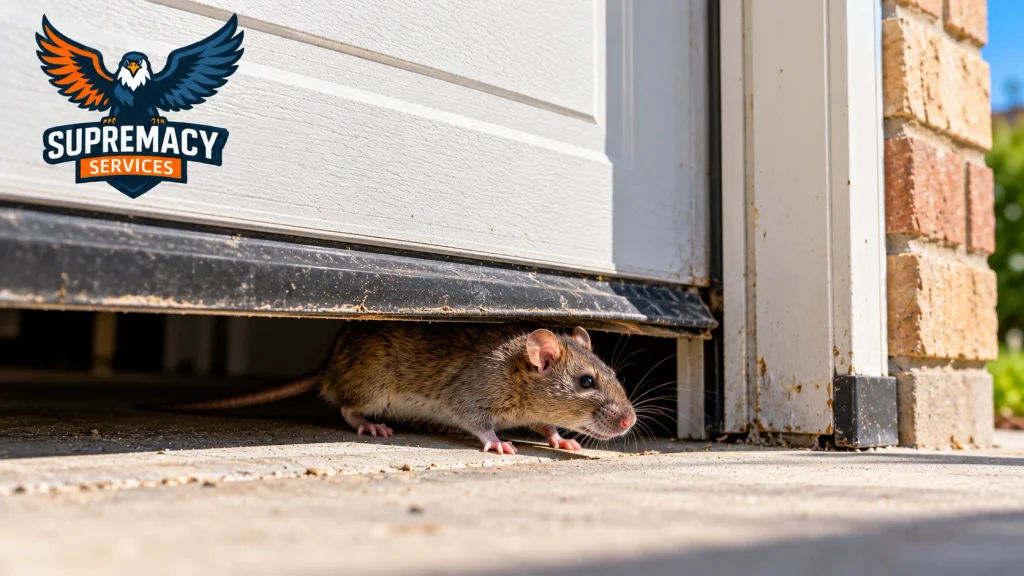
Rat entering beneath a garage door through a gap caused by a worn or poorly fitting bottom seal.
Even a relatively small opening beneath a garage door can give rodents access to the garage and potential routes farther into the home.

A gap beneath or beside a garage or exterior door can function like an open entrance for rodents.

Check the door while it is completely closed.

Look for daylight beneath the bottom seal and inspect:

  • worn garage-door weather seals;
  • damaged corners;
  • gaps at door jambs;
  • poorly fitting side doors;
  • warped exterior doors;
  • missing weather stripping.

CDC includes exterior doors and areas without effective weather stripping among the places homeowners should inspect for rodent access.

Garages deserve particular attention because they often contain stored pet food, bird seed, grass seed, cardboard boxes or other materials that can provide food or shelter.

A rat that reaches the garage may subsequently find another opening leading into a wall, ceiling or living area.

5. Foundation and Crawlspace Openings

Rats can enter through gaps where the foundation meets the structure, damaged crawlspace vents and other low-level openings.

These locations are especially important when the evidence appears closer to ground level.

Texas A&M notes that Norway rats typically burrow beneath foundations, floors, stored materials and rubbish rather than nesting primarily in high attic spaces.

Inspect for:

  • foundation penetrations;
  • damaged crawlspace screening;
  • openings beneath siding;
  • gaps around plumbing;
  • burrows near slabs or walls;
  • deteriorated masonry;
  • openings beneath porches or additions.

A burrow does not automatically prove that rats have entered the house, but burrowing activity adjacent to a structure deserves closer inspection.

6. Chimneys, Flashing and Roof Intersections

Complex roof intersections can create hidden openings that are difficult to see from ground level.

Pay attention to areas around:

  • chimney flashing;
  • roof-to-wall intersections;
  • roof valleys;
  • dormers;
  • loose shingles;
  • roof penetrations;
  • remodeling transitions.

Texas A&M specifically recommends checking entry points around chimneys and loose shingles when excluding rodents from homes.

These locations are particularly relevant to roof rats because an animal capable of reaching the roof does not need a ground-level entrance.

The actual opening may also be several feet from where the homeowner hears the animal. Once inside an attic or wall system, rodents can travel within concealed structural spaces.

7. Damaged Fascia, Siding and Exterior Materials

Rot, storm damage, previous construction work and ordinary deterioration can expose gaps that were not originally accessible.

Inspect the exterior for:

  • loose fascia;
  • separated trim;
  • broken siding;
  • rotted wood;
  • gaps from previous cable or plumbing work;
  • missing exterior covers;
  • deteriorated patches.

Rodents are persistent gnawers. Texas A&M reports that rats and mice can damage wood, doors, walls, pipes and other building materials.

That means a marginal weakness in the exterior should not be ignored simply because it does not initially look large enough.

Materials used for exclusion should be selected for the opening and building component involved. Texas A&M recommends rodent-resistant materials such as hardware cloth, steel wool, sheet metal or concrete in appropriate applications. CDC similarly recommends metal, hardware cloth, cement and other durable materials for larger holes.

8. Openings Reached From Trees, Fences and Utility Routes

Tree branches, vines, fences and structural features can help climbing rats reach upper portions of a house—but the final problem is still an opening in the building.

A tree touching a roof does not by itself create an infestation. It can, however, provide a route toward an accessible roofline opening.

Roof rats are strong climbers and favor elevated locations. Texas A&M’s rodent-management guidance describes roof rats as using elevated nesting sites such as attics, walls and roofs.

Look around the house for:

  • branches touching or overhanging the roof;
  • dense vines against exterior walls;
  • fences connecting with the structure;
  • utility routes leading toward upper walls;
  • shrubs that conceal lower-level openings.

The goal is not simply to remove vegetation. It is to understand how a rat reaches the building and where it crosses the building envelope.

Quick Rat Entry-Point Inspection Checklist

AreaWhat to check
RooflineGaps, separated materials, gnawing
Soffits/eavesLoose panels, damaged corners
Attic ventsBroken or missing screening
ChimneyFlashing and perimeter gaps
Utility linesOversized or deteriorated penetrations
GarageBottom and corner door gaps
FoundationCracks, penetrations, burrows
CrawlspaceDamaged vents or screening
Siding/fasciaRot, gaps, loose materials
LandscapingRoutes toward roof or concealed openings

How Do You Find a Rat Entry Point?

Start where you have evidence inside the house, then trace outward to the nearest exterior vulnerabilities.

A systematic inspection is more useful than randomly filling holes.

Step 1: Identify where activity is strongest

Record where you hear scratching, find droppings or see gnawing.

If the evidence is concentrated in an attic, begin with the roofline and upper exterior. If it is concentrated near a garage, kitchen or crawlspace, inspect nearby lower-level penetrations first.

Step 2: Inspect the corresponding exterior area

Look at the outside of the wall, ceiling or attic zone where activity occurs.

Check vents, roof edges, pipes, cables, door seals and construction transitions.

Step 3: Look for evidence of repeated use

Texas A&M identifies droppings, tracks, gnawing, greasy smears and established runways as indicators of rodent activity.

Step 4: Inspect the entire building envelope

Do not stop after finding the first suspicious hole.

There may be more than one entry point.

A proper exclusion inspection should work from the roofline to the foundation, because sealing one opening accomplishes little if another remains accessible.

If you are finding several possible openings—or rats keep returning after trapping—schedule a complete rodent exclusion inspection to identify active entry routes and vulnerabilities from the roofline to the foundation.

Should You Seal a Rat Hole Immediately?

Not always. If rats are already inside, blindly closing an active opening can leave animals trapped within the structure.

Exclusion needs to be coordinated with control of the animals already indoors.

CDC recommends checking how rodents entered, sealing openings and trapping rodents that remain inside.

This is one reason a significant infestation can be more complicated than simply applying expanding foam to a visible gap.

You need to answer three questions:

  1. Is the opening actually being used?
  2. Are rodents still inside?
  3. Are there additional entrances elsewhere?

Closing the wrong opening at the wrong stage can leave the underlying infestation unresolved.

DIY Rat-Proofing vs. Professional Exclusion

Small, accessible maintenance issues may be reasonable for a homeowner to correct. A deteriorated door sweep, for example, is very different from an active opening at a second-story soffit.

SituationDIY may be reasonableProfessional inspection is more appropriate
Worn door sweep✓
Simple accessible utility gap with no activity✓
Repeated attic noises✓
Multiple possible entry points✓
High roofline opening✓
Active infestation✓
Rats returning after trapping✓
Extensive droppings/nesting✓
Uncertain animal identification✓

What should professional rodent exclusion include?

A thorough service should focus on both the animals and the structure.

Depending on the property and infestation, that can include:

  1. inspecting the attic and interior evidence;
  2. identifying whether rats, mice or another animal are responsible;
  3. tracing likely travel routes;
  4. inspecting the roofline, vents, utility penetrations, doors and foundation;
  5. identifying active and potential entry points;
  6. controlling rodents already inside;
  7. sealing appropriate openings with durable exclusion materials;
  8. evaluating whether contamination or nesting material requires cleanup;
  9. reassessing activity after control measures are installed.

Supremacy Services’ current Rodent Control & Exclusion service describes a similar sequence: property inspection, targeted trapping, exterior exclusion and follow-up/sanitation.

How to Make Your North Texas Home Less Attractive to Rats

Exclusion works best when rats also have fewer reasons to remain around the property.

CDC recommends reducing access to food, water and shelter around homes.

Practical steps include:

  • keep garbage containers closed;
  • avoid leaving pet food outside overnight;
  • clean spilled bird seed and animal feed;
  • address accessible water sources and leaks;
  • remove unnecessary clutter;
  • keep storage organized;
  • clean around outdoor cooking areas;
  • reduce dense vegetation immediately against the structure;
  • inspect garages and sheds as well as the main house.

These measures do not replace exclusion when rats are already entering the structure. They reduce the conditions that make the property attractive while structural access points are being addressed.

Are Rats Really the Animal Making the Noise?

Not every attic sound is a rat.

North Texas homes can also be entered by mice, squirrels and larger wildlife. The timing, location, type of sound, droppings and physical damage can help narrow the possibilities.

Roof rats tend to be active after dark, and Texas A&M notes that noises in attics or ceilings at night can indicate roof-rat activity.

Daytime movement may raise suspicion of squirrels, although timing alone should not be treated as definitive identification.

If you cannot identify the animal, avoid choosing a control strategy solely from the noise.

Frequently Asked Questions

What is the most common way rats get into a house?

There is no single entry point for every house. Common vulnerabilities include roof and soffit gaps, vents, utility penetrations, door gaps and foundation openings. In Texas homes with roof-rat activity, upper roofline openings deserve particular attention.

Can rats get into a house through the roof?

Yes. Roof rats are skilled climbers and commonly use elevated nesting areas. Gaps around soffits, eaves, vents, flashing and other roof components can provide access to an attic.

Can rats enter through attic vents?

They can enter through damaged, unscreened or poorly protected vent openings. Ventilation should not simply be blocked; appropriate rodent-resistant screening should preserve the vent’s intended function.

Can rats come in under a garage door?

Yes. A sufficiently large gap beneath or around a garage door can provide access. Check worn bottom seals, corners and side weather stripping.

How do I know where rats are getting in?

Start near the area with the strongest indoor evidence and inspect the corresponding exterior. Look for openings accompanied by gnawing, grease marks, droppings, tracks or disturbed materials.

Can rats climb walls?

Roof rats are particularly capable climbers. They can use vegetation and structural features to reach elevated portions of buildings, which is why attic infestations should trigger an inspection of the entire roofline.

Should I use spray foam to close a rat hole?

Foam alone should not automatically be considered a durable rodent barrier. CDC and Texas A&M recommend rodent-resistant materials such as metal, hardware cloth and other durable materials depending on the opening.

Should I seal a hole if a rat is already inside?

The infestation and exclusion process should be coordinated so rodents are not inadvertently trapped inside inaccessible parts of the structure. Identify active entrances and address the animals already indoors as part of the plan.

Why do rats keep coming back after I trap them?

Trapping removes individual animals but does not necessarily eliminate structural access. If exterior openings remain, other rodents can enter later.

When should I call a professional?

Professional help is particularly useful when rats are active in an attic or walls, several entry points are possible, openings are located on a difficult roofline, the infestation persists after trapping, or you cannot safely determine where animals are entering.


Stop the Entry Point, Not Just the Rat

Finding a rat indoors answers only half of the problem.

The more important question is:

How did it get inside?

For North Texas homeowners, that investigation should cover the entire exterior—from roof vents, soffits and chimney flashing to utility penetrations, garage doors, crawlspaces and foundation gaps.

Removing active rodents without correcting access can allow the problem to return. Likewise, sealing random gaps without understanding whether animals remain inside can create a different problem.

A successful approach combines identification, removal or trapping, structural exclusion and prevention.

Hearing rats in your attic or finding droppings, gnaw marks or suspected entry holes? Supremacy Services provides rodent inspections, targeted control and exterior exclusion throughout Dallas and the DFW Metroplex. Schedule a rodent inspection to find where they are getting in and develop a plan to close the access points.
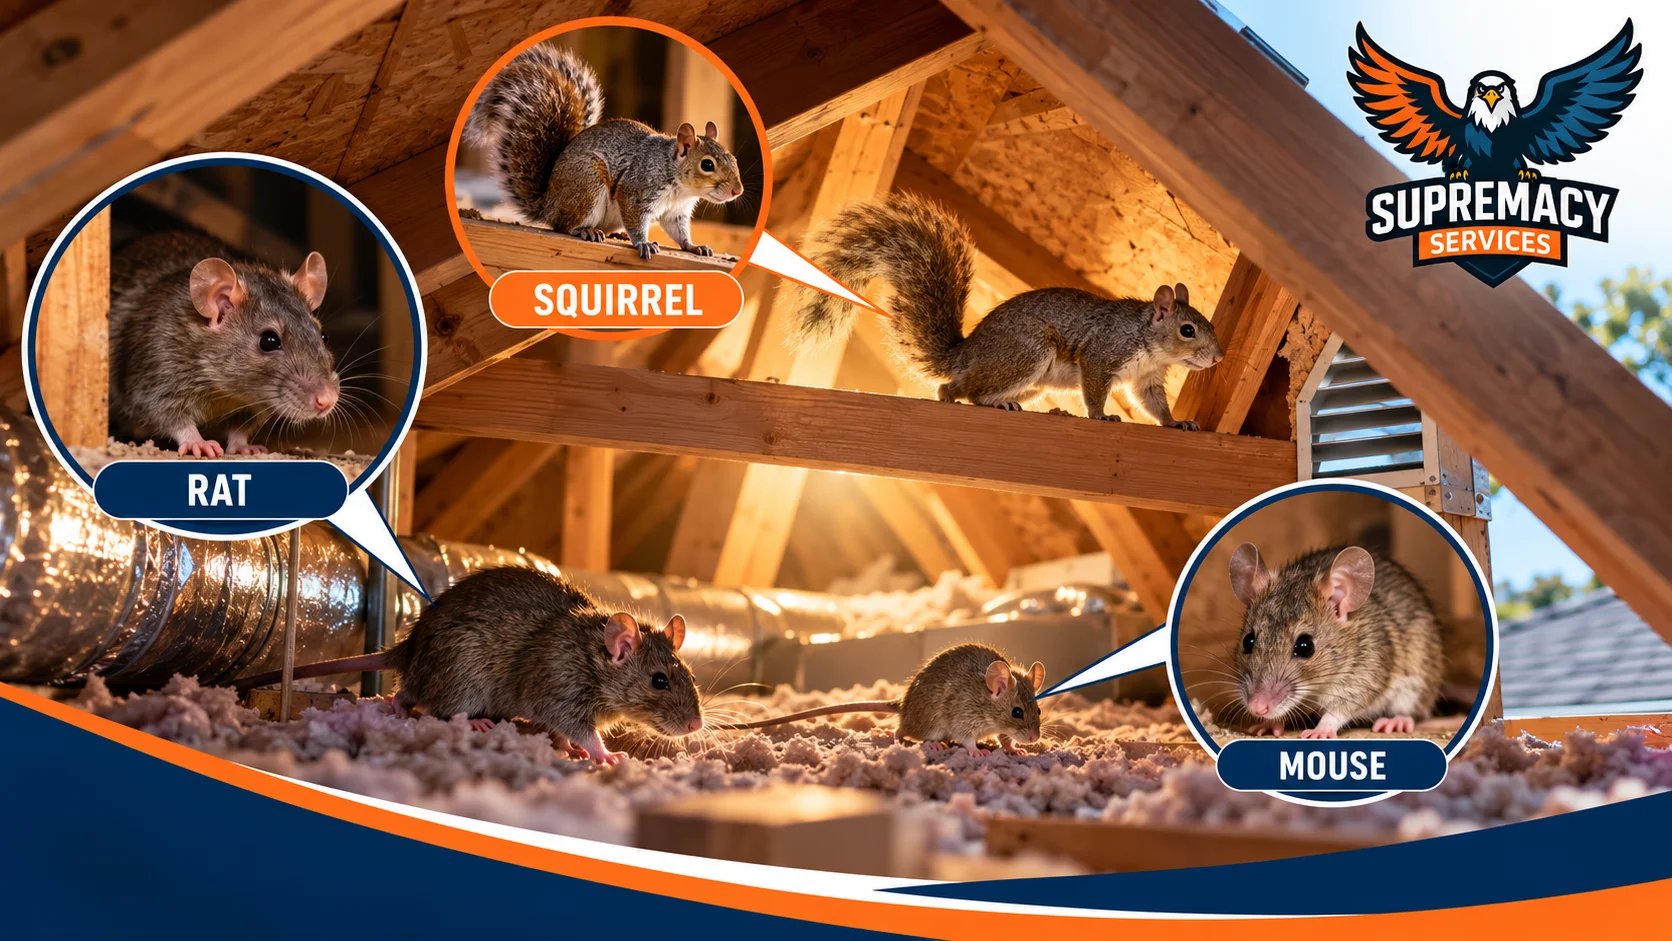
Rat, mouse and squirrel inside a residential attic showing possible sources of scratching noises

What’s Making Scratching Noises in My Attic? Rats, Mice or Squirrels?

If you hear scratching noises in your attic, the time of day, volume of the sound and physical evidence around the attic can help narrow down the culprit. In Dallas-area homes, rats, mice and squirrels are all possibilities—but they do not usually leave exactly the same clues.

A useful starting point is timing. Scratching, running or gnawing during the day often points toward squirrels, while activity after dark is more consistent with rats or mice. Texas A&M AgriLife specifically notes that daytime running or gnawing in an attic can indicate squirrels, while running, squealing and gnawing at night generally points toward rats.

Sound alone, however, cannot confirm the animal. Droppings, gnaw marks, nesting material, tracks and the location of entry points provide much stronger evidence.

Table of Contents

  1. Quick Comparison: Rat vs. Mouse vs. Squirrel
  2. What Does the Time of the Noise Tell You?
  3. What Do Rats Sound Like in an Attic?
  4. What Do Mice Sound Like in an Attic?
  5. What Do Squirrels Sound Like in an Attic?
  6. How Can You Identify the Animal?
  7. Where Are Animals Getting Into the Attic?
  8. Are Attic Rodents Dangerous?
  9. What Should You Do If You Hear Scratching?
  10. DIY vs. Professional Removal
  11. How Professional Attic Inspection and Exclusion Works
  12. How to Prevent Animals From Returning
  13. Frequently Asked Questions

Quick Comparison: Rat vs. Mouse vs. Squirrel

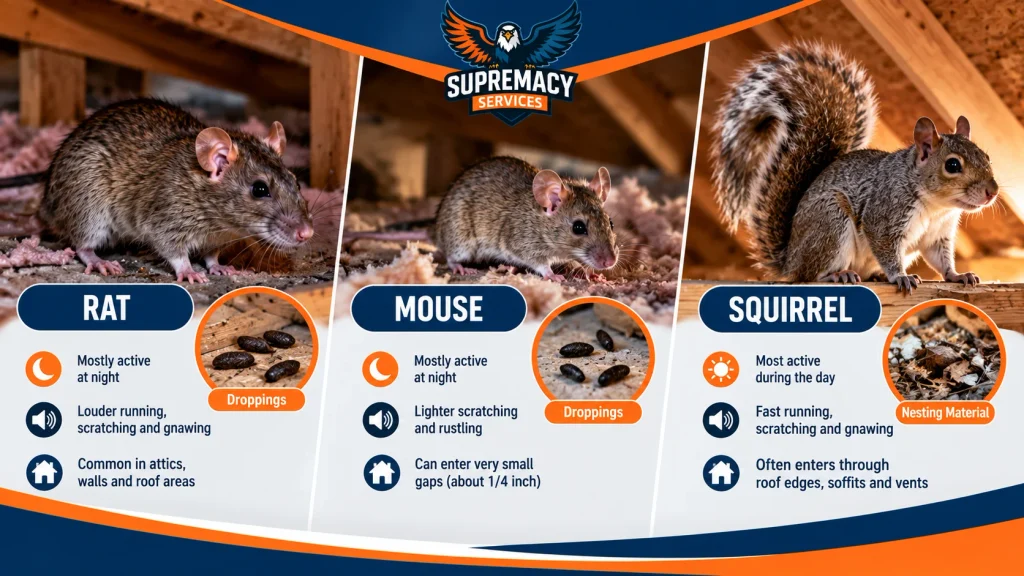
Comparison of rat, mouse and squirrel attic activity, sounds and entry signs
The time of activity, type of noise and physical evidence can help distinguish rats, mice and squirrels.

The easiest first clue is when the noise occurs. Rats and mice are primarily active after dark, while tree squirrels are typically active during daylight hours.

ClueRatsMiceSquirrels
Typical activityMostly nighttimeMostly nighttimeDaytime
Common attic soundRunning, scratching, gnawingLight scratching, rustling, squeakingFast running, scratching, gnawing
Relative soundMore noticeable/heavierUsually lighterOften fast and obvious
Common evidenceDroppings, rub marks, gnawingSmall droppings, shredded nesting materialNuts, leaves, nesting material, gnawing
Likely attic accessRoof/soffit gaps, vents, openingsVery small structural gapsRoof edges, soffits, vents, damaged openings
Dallas clueRoof rats commonly use elevated areasCan exploit very small gapsDaytime attic activity is especially useful

Do not identify an animal solely from the sound. A professional inspection combines the noise pattern with droppings, tracks, nesting material, damage and exterior entry points.

What Does the Time of the Noise Tell You?

Scratching noises at night

If the activity consistently begins after sunset, rats or mice become stronger possibilities.

Texas A&M AgriLife reports that rodent activity increases after dark. Roof rats are particularly relevant to attic investigations because they commonly nest in elevated spaces such as attics and walls.

Nighttime sounds may include:

  • scratching;
  • light or rapid running;
  • gnawing;
  • squeaking;
  • rustling in insulation;
  • movement inside wall or ceiling cavities.

The location also matters. Loud movement directly above a ceiling does not automatically mean a rat is sitting on top of that exact spot. Sound can travel through framing, ductwork and wall cavities.

Scratching noises during the day

Consistent daytime running and gnawing is a stronger squirrel clue.

Texas A&M AgriLife specifically says that sounds of running or gnawing in an attic during the day often indicate squirrels. Tree squirrels may enter roof spaces and can damage insulation or gnaw electrical wiring once inside.

Early morning activity can be particularly noticeable.

What if you hear noises both day and night?

Do not assume you have multiple animals.

Activity patterns are useful clues, not absolute rules. An animal may occasionally move outside its typical schedule, and noises from outside the roof can sound as though they originate inside the attic.

Look for physical evidence before deciding what is living above the ceiling.

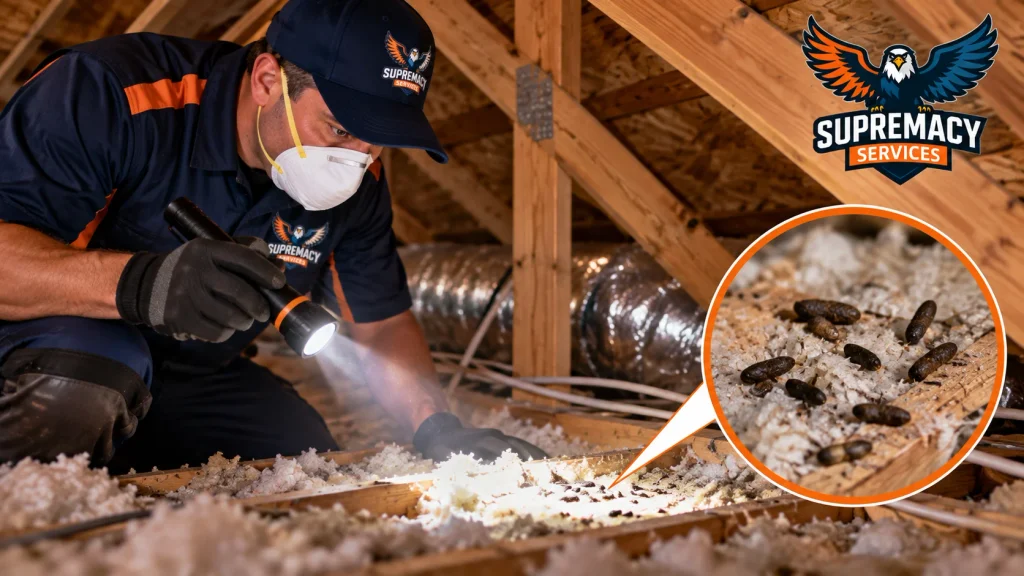
Supremacy Services technician inspecting attic insulation for rodent droppings and signs of activity
Droppings, gnaw marks, tracks and disturbed insulation can provide stronger evidence than sound alone.

What Do Rats Sound Like in an Attic?

Rats can produce scratching, running, squealing and gnawing sounds, particularly after dark.

For Dallas homeowners, roof rats deserve particular attention. Texas A&M identifies roof rats as strong climbers that prefer elevated nesting areas, including attics, walls and roofs.

Signs supporting a rat diagnosis include:

  • nighttime running or scratching;
  • droppings;
  • gnawed materials;
  • greasy rub or smear marks along frequently traveled surfaces;
  • tracks in dusty attic areas;
  • nesting evidence;
  • openings around the roofline, soffits or utility penetrations.

Finding several of these signs together is more useful than trying to identify a rat by sound alone.

Rats vs. mice: listen for scale, then verify

A rat generally creates more noticeable movement than a mouse, but ceiling construction and insulation can dramatically change how loud an animal sounds.

Instead of relying on volume, inspect the evidence.

Texas A&M recommends using clues such as droppings, tracks, gnawing, smears and runways when evaluating rats and mice.

What Do Mice Sound Like in an Attic?

Mice usually create lighter scratching, rustling and small running sounds, particularly at night.

Because they are small and capable climbers, mice may occupy attic insulation, structural voids and other protected spaces without producing the heavier movement a homeowner might associate with a larger animal.

Common mouse evidence includes:

  • small droppings;
  • gnawed materials;
  • finely shredded nesting material;
  • tracks;
  • a persistent musky odor when activity is established;
  • tiny structural openings.

The CDC notes that mice can enter openings about 1/4 inch (6 mm) wide, which means a home does not need an obvious roof hole to have a mouse problem.

That is why finding and sealing small openings is an important part of long-term mouse control.

What Do Squirrels Sound Like in an Attic?

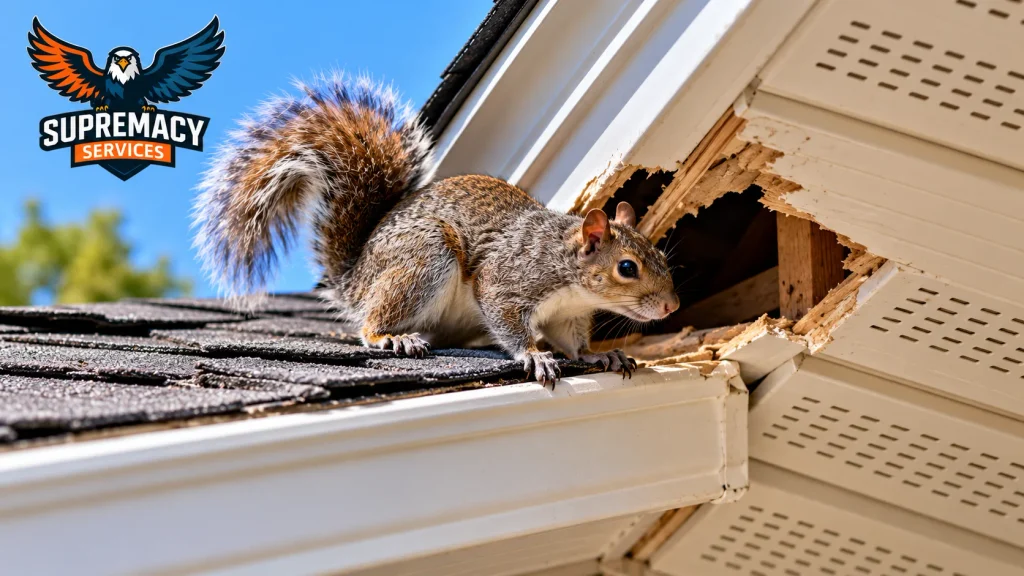
Squirrel beside a damaged soffit opening along a residential roofline
Damaged soffits, fascia and other roof-level openings can provide squirrels with access to an attic

Squirrels typically produce quick running, scratching and gnawing sounds during daylight hours.

You may hear activity across a larger section of the attic because squirrels are substantially larger and more mobile than house mice.

Other clues can include:

  • leaves or twigs used as nesting material;
  • nuts, shells or food remnants;
  • disturbed or shredded insulation;
  • gnawed wood;
  • damage around soffits, fascia or vents;
  • a visible opening high on the structure.

Texas A&M notes that squirrels usually enter attic spaces from the roof and that overhanging tree limbs can help provide access.

One important caution: there may be young squirrels inside

If squirrels have established a nest, simply closing the visible entrance can create a larger problem if animals remain inside.

Before permanently sealing a wildlife entry point, determine whether the attic is still occupied and whether dependent young are present.

That is one reason wildlife exclusion can require a different approach from ordinary mouse or rat control.

How Can You Identify the Animal?

Use several clues together.

1. Record when you hear the noise

Write down whether activity occurs:

  • before sunrise;
  • during the morning;
  • during the afternoon;
  • shortly after sunset;
  • late at night.

Repeated daytime activity favors squirrels. Repeated nighttime activity favors rats or mice.

2. Look for droppings—but don’t handle them casually

Droppings can help confirm rodent activity, but avoid sweeping or vacuuming dry rodent waste.

The CDC advises wetting rodent urine and droppings thoroughly with disinfectant before cleanup rather than sweeping or vacuuming them, because disturbing contaminated material can put particles into the air.

3. Check for gnaw marks

Fresh gnawing is another strong sign of rodent activity.

Look around:

  • wood framing;
  • stored boxes;
  • pipe penetrations;
  • wiring areas;
  • vents;
  • roof-access points.

Gnawing alone may not tell you which species is responsible, but it helps distinguish animal activity from ordinary building noises.

4. Look for nesting material

Mice commonly use finely shredded fibrous materials.

Squirrel nests may contain leaves, twigs and other larger materials in addition to disturbed insulation.

5. Inspect the outside of the house

The most important evidence may be outside rather than inside the attic.

Check from a safe location for:

  • damaged soffits;
  • fascia gaps;
  • loose or damaged vents;
  • openings around roof intersections;
  • utility penetrations;
  • gaps around pipes;
  • openings near eaves;
  • damaged screens.

Avoid climbing onto a steep or high roof simply to investigate an attic noise.

Where Are Animals Getting Into the Attic?

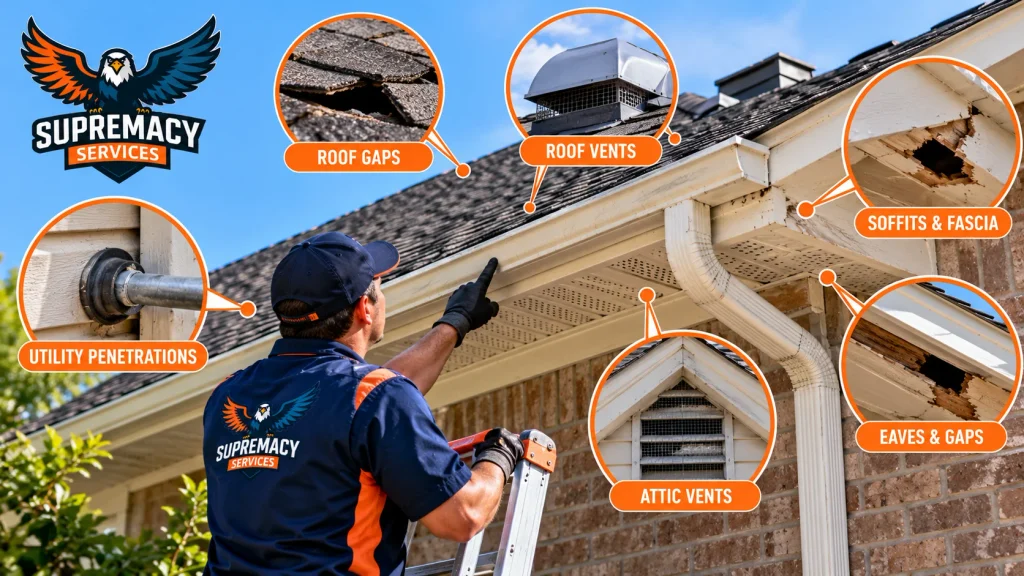
Roof gaps, vents, soffits, fascia and utility penetrations that may allow rodents or wildlife into an attic
Finding and correcting entry points is an important part of preventing recurring attic animal activity.

Animals enter when they find an opening connecting the exterior of the house to a protected interior space.

Potential entry areas include:

  • soffits and fascia;
  • roof vents;
  • gaps around eaves;
  • utility penetrations;
  • plumbing or mechanical penetrations;
  • damaged screens;
  • gaps around doors or attached garages;
  • construction gaps;
  • deteriorated exterior materials.

Mice are especially challenging because the necessary opening can be surprisingly small. CDC guidance states that mice can fit through a hole about the width of a pencil.

Roof rats present a different challenge because they are skilled climbers and frequently use elevated nesting areas.

Squirrels can exploit roof-level openings and may enlarge vulnerable areas through gnawing.

This is why effective control involves more than removing the animal you hear.

If you are repeatedly hearing nighttime scratching and finding droppings or gnawing, a full attic and exterior inspection can determine whether rats or mice are entering the structure. Learn more about Supremacy Services’ rodent control and exclusion in DFW.

Are Attic Rodents Dangerous?

An animal in the attic should be treated as more than a noise problem.

Contaminated areas

The CDC states that rodents can spread disease through contact with urine, droppings and saliva. Safe cleanup procedures are therefore important when rodent waste is found.

Never dry-sweep or vacuum rodent droppings.

Gnawing damage

Rats, mice and squirrels all gnaw.

Depending on where they travel, that can affect stored belongings, wood and other building materials. Squirrels are also documented to gnaw electrical wiring.

If you see visibly damaged electrical wiring, avoid touching it and have the condition evaluated appropriately.

Insulation and nesting

Animals may compress, move or contaminate insulation while creating travel routes and nests.

Removing an animal without addressing contaminated nesting material or access points can leave part of the problem unresolved.

What Should You Do If You Hear Scratching?

Follow a diagnostic process rather than immediately placing poison or sealing the first hole you find.

Step 1: Identify the timing

Day or night is your fastest initial clue.

Step 2: Look for evidence

Check accessible areas for droppings, gnaw marks, nesting material, tracks and disturbed insulation.

Step 3: Inspect the exterior

Look for potential access points from ground level.

Step 4: Avoid disturbing rodent waste

Do not sweep or vacuum dry droppings or nesting debris.

Step 5: Determine whether you are dealing with rodents or wildlife

Rats and mice fall into a different control situation from squirrels and other wildlife.

Step 6: Remove the occupants before permanently closing active openings

An entry hole should ultimately be excluded, but closing an occupied structure can trap animals inside.

Step 7: Seal the structure

Once occupancy has been properly addressed, close access points with materials appropriate for the location and animal.

The objective is not merely to stop tonight’s scratching. It is to prevent another animal from using the same vulnerability.

DIY vs. Professional Removal

A small, clearly identified mouse problem may sometimes be manageable with appropriate trapping, sanitation and exclusion.

The CDC recommends traditional snap traps for household rat and mouse control and emphasizes placing traps where rodent activity is present while keeping traps and baits away from children and pets.

Professional help becomes more appropriate when:

  • you cannot identify the animal;
  • noises continue despite trapping;
  • activity is inside inaccessible ceiling or wall cavities;
  • multiple entry points are present;
  • the roofline needs inspection;
  • you suspect squirrels or other wildlife;
  • young animals may be present;
  • there is substantial contamination;
  • you cannot safely reach the affected area;
  • damage needs to be evaluated;
  • repeated infestations indicate an unresolved exclusion problem.

Texas also regulates structural pest-control work performed for compensation. The Texas Department of Agriculture’s Structural Pest Control Service licenses businesses and individuals performing covered structural pest-control activities.

For recurring attic activity, consider an inspection that looks at both the animal and how it entered the home. Supremacy Services’ rodent exclusion service is designed around inspection, removal and closing structural access points rather than treating the sound alone.

How Professional Attic Inspection and Exclusion Works

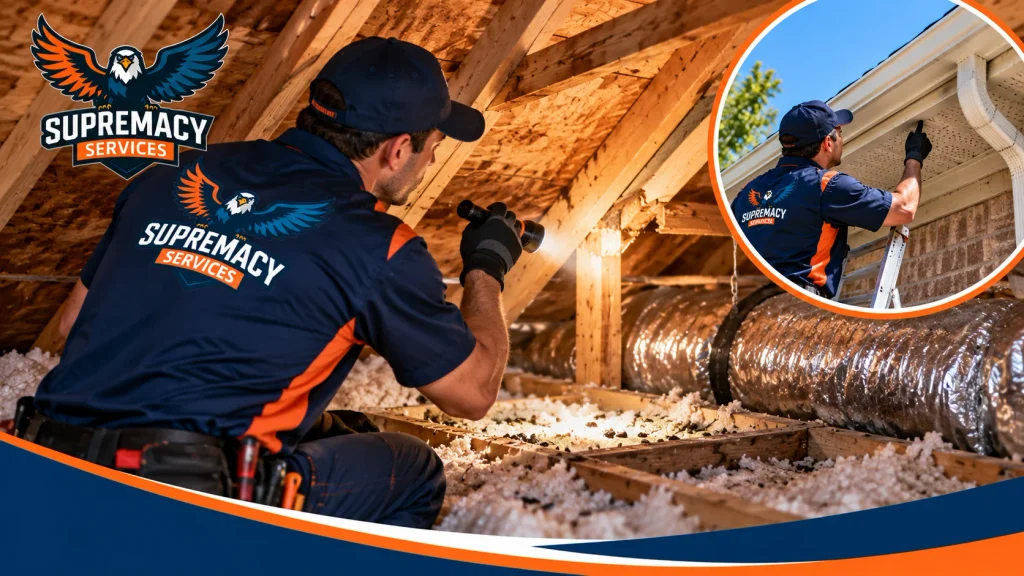
Supremacy Services technician inspecting an attic and exterior roofline for possible animal entry points
A thorough inspection looks for both evidence inside the attic and potential access points around the exterior of the home.

The exact process depends on whether the animal is a mouse, rat, squirrel or another wildlife species, but a thorough service generally begins with identification.

1. Attic inspection

The technician looks for:

  • droppings;
  • nesting areas;
  • travel paths;
  • gnawing;
  • disturbed insulation;
  • contamination;
  • possible entry locations.

2. Exterior inspection

Rooflines, soffits, vents, penetrations and other vulnerable areas are checked for openings.

3. Species identification

The evidence determines whether the appropriate solution is rodent control, wildlife removal or another service.

4. Removal or control

The approach should match the animal.

Rodent trapping and wildlife removal should not automatically be treated as interchangeable services.

5. Exclusion

Once animals have been addressed, accessible entry points are closed with materials suitable for resisting future entry.

6. Follow-up

The attic should be monitored for fresh droppings, noises or other evidence that activity continues.

How to Prevent Animals From Returning

Removing an animal solves only half of an attic problem. Prevention requires reducing both access and attractants.

Seal structural openings

Inspect:

  • roof edges;
  • soffits;
  • vents;
  • pipe penetrations;
  • utility openings;
  • doors;
  • foundation penetrations;
  • damaged exterior screens.

CDC guidance recommends checking the interior and exterior of a home for gaps and holes and sealing them to prevent rodents from entering.

Manage tree access

Tree squirrels frequently reach structures from above.

Texas A&M recommends trimming limbs approximately 8–10 feet back from a roof when squirrels are using them for access.

Reduce food sources

Keep food and garbage securely contained.

Also consider whether outdoor pet food, accessible garbage or bird feeding is attracting rodents close to the structure.

Monitor previously repaired areas

A repaired entry point should periodically be inspected for deterioration or fresh gnawing.

Dallas and DFW Attic Considerations

The animal’s behavior matters more than forcing a Dallas-specific explanation onto every attic problem.

However, North Texas homeowners should know that roof rats are an established structural pest in Texas and commonly use elevated nesting areas, making roofline inspection particularly relevant when nighttime activity is heard overhead.

Tree squirrels also occur in urban environments and may nest in attics when roof-level access is available.

The practical Dallas takeaway is simple:

Nighttime activity + rodent evidence → investigate rats or mice.

Daytime attic running/gnawing + roof-level wildlife evidence → investigate squirrels.

If those clues do not match, do not force the diagnosis. Other animals—or even non-animal building sounds—may need to be considered.

Could the Noise Be Something Other Than Rats, Mice or Squirrels?

Yes.

Not every attic sound is caused by these three animals.

Possible alternatives include:

  • birds;
  • raccoons or other wildlife;
  • branches contacting the roof;
  • loose exterior materials;
  • duct or HVAC expansion and contraction;
  • plumbing movement;
  • building materials responding to temperature changes.

Larger, heavier footsteps or thumping may warrant investigation for a larger animal rather than a mouse, rat or squirrel.

A good inspection identifies evidence instead of diagnosing solely from the homeowner’s description of the sound.


Frequently Asked Questions

What animal makes scratching noises in the attic at night?

Rats and mice are strong possibilities because both are primarily active at night. Look for droppings, gnawing, tracks and nesting material to confirm rodent activity.

What animal scratches in the attic during the day?

Daytime running, scratching or gnawing often points toward squirrels. Texas A&M specifically identifies daytime attic running or gnawing as a common squirrel clue.

How can I tell if I have rats or squirrels in my attic?

Start with timing. Rat activity is usually strongest after dark, while tree squirrels are active during the day. Then compare droppings, nesting material, gnawing and exterior entry points.

Why do I hear scratching in my ceiling only at night?

Nighttime scratching can indicate rats or mice moving through an attic, wall void or ceiling cavity. The sound alone cannot confirm the species, so inspect for physical evidence.

Can mice really live in an attic?

Yes. House mice can climb and nest in protected structural spaces. Because they can enter through very small openings, their access point may be difficult to spot.

Should I seal a hole as soon as I find it?

Not necessarily. First determine whether the opening is active and whether animals remain inside. Permanently closing an occupied opening can trap an animal in the structure.

Can I vacuum mouse or rat droppings in my attic?

No. CDC guidance says not to sweep or vacuum rodent urine, droppings or nesting material. The material should first be thoroughly wetted with an appropriate disinfectant and cleaned according to CDC procedures.

Will attic noises go away if I use traps?

Traps may remove individual rats or mice, but recurring problems can continue if exterior entry points remain open. Long-term control usually requires identifying and correcting how rodents are entering.

When should I call a professional for scratching noises?

Consider professional inspection when the species is unclear, noises continue, contamination is significant, the activity is in inaccessible areas, roof inspection is needed, wildlife or dependent young may be present, or previous DIY control has not solved the problem.


Final Takeaway

The time of day is one of the best first clues when identifying scratching noises in an attic.

Daytime running and gnawing suggests squirrels. Nighttime scratching, running or squeaking makes rats and mice stronger suspects. But sound should only begin the investigation—not end it.

Droppings, gnawing, nesting material, tracks and exterior entry points provide the evidence needed to identify the animal and choose the correct response.

For Dallas and DFW homeowners dealing with recurring attic noises, the long-term goal should be identification, appropriate removal or control, and exclusion of the entry points that allowed the problem to develop.

Hearing scratching overhead and unsure what’s inside? Schedule an attic and exterior inspection with Supremacy Services to identify the source, locate potential entry points and determine whether rodent control or wildlife removal is appropriate.

Cutaway of a Dallas home showing a leaking water pipe beneath the concrete slab foundation

Slab Leak Repair Cost in Dallas: Detection, Repair Methods & Pricing

A slab leak can be one of the harder plumbing problems to diagnose because the leaking water line may be buried beneath the concrete foundation rather than exposed inside a wall or cabinet.

For Dallas homeowners, slab leak repair cost depends heavily on where the leak is located, how easily the pipe can be reached, whether the damaged section can be repaired directly, and whether rerouting part of the plumbing system makes more sense.

As a broad 2026 market reference, Angi reports national slab-leak projects commonly ranging from approximately $630 to $4,400, with an average around $2,280, including detection. Those figures are not a Dallas price quote. A complicated under-slab repair involving concrete removal, flooring restoration or extensive repiping can differ substantially.

The most useful first step is therefore not choosing a repair method—it is determining exactly where the leak is and which pipe has failed.

Table of Contents

  1. What Is a Slab Leak?
  2. How Much Does Slab Leak Repair Cost in Dallas?
  3. What Affects Slab Leak Repair Cost?
  4. How Are Slab Leaks Detected?
  5. Slab Leak Repair Methods
  6. Repair Through the Slab vs. Rerouting
  7. Warning Signs of a Slab Leak
  8. What Causes Slab Leaks?
  9. Slab Leak or Another Plumbing Problem?
  10. Can You Repair a Slab Leak Yourself?
  11. What to Expect During Professional Repair
  12. Dallas Permits and Water-Bill Considerations
  13. How to Reduce the Risk of Future Leaks
  14. FAQs

What Is a Slab Leak?

A slab leak is a plumbing leak in a water line located beneath or within a home’s concrete slab foundation.

Unlike a leaking faucet or exposed pipe, the source may not be visible. Water can escape below the flooring or foundation for some time before homeowners notice obvious symptoms.

Slab leaks should also be distinguished from several other problems:

  • a leaking water service line outside the foundation;
  • a drain or sewer-line failure;
  • a leaking appliance connection;
  • a toilet or fixture leak;
  • moisture entering from outside the structure; or
  • an above-slab pipe leaking inside a wall.

Determining which problem you actually have matters because the appropriate repair—and its cost—can be completely different.


How Much Does Slab Leak Repair Cost in Dallas?

There is no reliable single flat price for slab leak repair in Dallas because accessibility and repair method can change the scope dramatically.

Current national consumer-market data from Angi places many slab-leak projects between approximately $630 and $4,400, with a reported 2026 average of about $2,280 including detection. Treat that as a budgeting benchmark rather than a Dallas-specific quote.

Angi separately reports that ordinary pipe-leak repairs in Dallas average around $516, with many projects between approximately $258 and $876. That Dallas figure covers pipe-leak repair generally and should not be interpreted as the expected price of an under-slab project.

Why slab-leak pricing varies so much

Consider two homes with similar leaking pipes.

In the first, the plumber pinpoints a leak beneath an accessible utility area and can expose a small section of slab.

In the second, the failed line runs beneath finished flooring, cabinets or another difficult area. The plumber may recommend rerouting the line rather than opening the slab.

Both homes technically have a “slab leak,” but the labor, access and restoration requirements are very different.

Budget for the entire project—not just the pipe

A complete estimate may need to account for:

Cost componentWhy it matters
Leak detectionDetermines where the leak is before demolition begins
Plumbing repairRepairs, isolates or replaces the failed line
AccessMay involve opening concrete, flooring, walls or ceilings
Pipe material and lengthInfluences materials and labor
Rerouting/repipingMay replace the need to access the pipe beneath the slab
Concrete restorationRequired when direct slab access is used
Flooring/finish restorationTile, hardwood, cabinets or drywall may require separate work
Permit/inspectionDepends on the scope and local requirements
Water damage remediationSeparate from the plumbing repair if significant damage occurred

Homeowner tip: When comparing estimates, ask whether the quote includes leak detection, access, plumbing work, concrete repair and finish restoration—or only the plumbing portion.


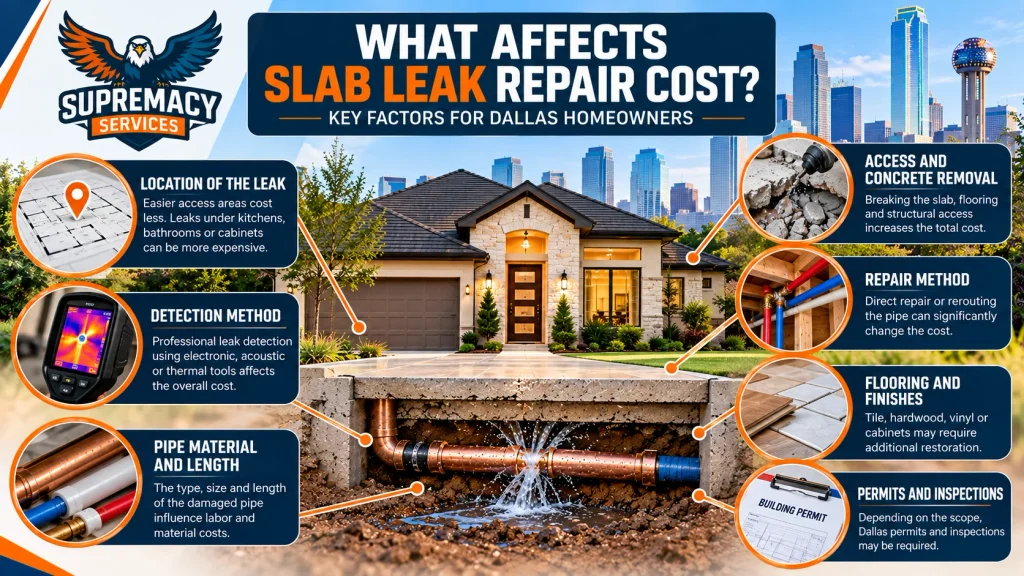
What Affects Slab Leak Repair Cost?

Infographic showing leak location, detection, pipe material, concrete access, repair method, flooring and permits as slab leak cost factors.
Slab leak repair costs vary because accessibility, pipe condition, repair method and restoration requirements differ from home to home.

1. The exact location of the leak

Accessibility is one of the largest cost variables.

A leak underneath an open utility area can be much simpler to reach than one underneath a kitchen island, bathroom, built-in cabinetry or expensive finished flooring.

2. Whether the leak has already been located

Accurate diagnosis helps prevent unnecessary exploratory demolition.

A plumber may first confirm that the pressurized water system is losing water and then use specialized equipment to narrow down the leak location.

3. Direct repair versus rerouting

Sometimes accessing the damaged pipe through the concrete is practical.

In other situations, abandoning the failed underground section and installing a new route through accessible walls, ceilings or attic areas may reduce structural disruption.

The best choice depends on the plumbing layout, pipe condition and leak location—not simply which option sounds less invasive.

4. How much piping is affected

One isolated failure may justify a localized repair.

Repeated leaks or deterioration across a larger piping system may prompt a discussion about rerouting or repiping rather than continuing to repair individual failures.

5. Flooring and interior finishes

Breaking concrete is only part of the restoration equation.

Tile, hardwood, luxury vinyl, cabinets and other finishes can materially affect total project cost.

6. Emergency conditions

An actively leaking pipe that cannot be isolated may require faster intervention than a small, contained leak.

If water is escaping rapidly, shut off the appropriate water supply when it is safe to do so and arrange professional diagnosis.


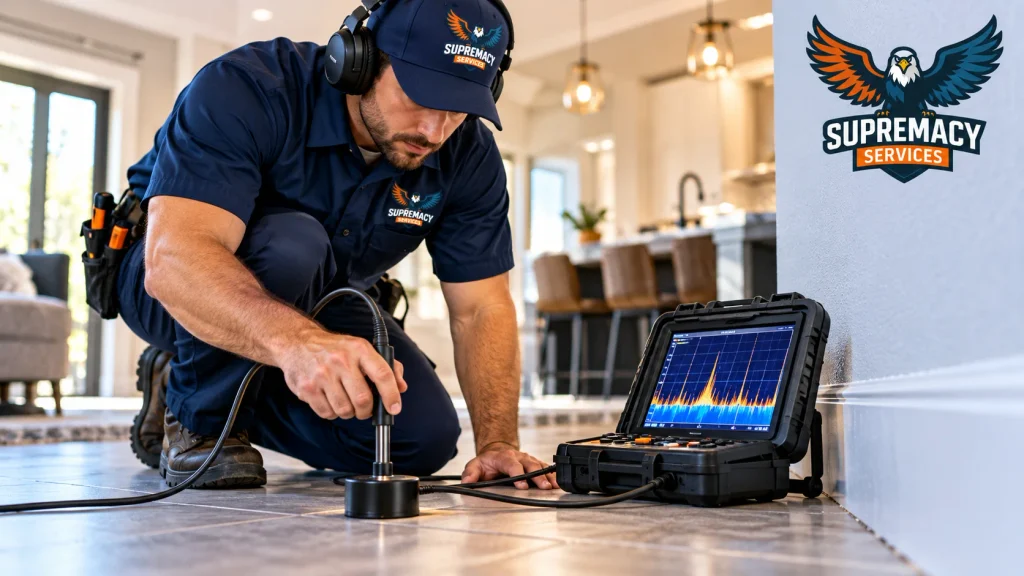
How Are Slab Leaks Detected?

Supremacy Services technician using acoustic equipment to locate a hidden water leak beneath a home's flooring.
Professional leak detection can help narrow down an under-slab leak before concrete or finished flooring is opened.

Professional slab leak detection usually begins by confirming that the plumbing system is actually losing water, then narrowing down the location before opening the slab.

The objective is to avoid unnecessary demolition.

Common diagnostic approaches include:

Water-meter testing

With all fixtures and water-using appliances turned off, unexpected meter activity can indicate water is still flowing somewhere in the system.

This test can suggest a leak, but it does not tell you where the leak is.

Pressure testing

A plumber can test sections of the water-supply system to determine whether pressure is being lost.

This can help distinguish a pressurized supply-line leak from other sources of moisture.

Acoustic leak detection

Escaping pressurized water creates sound and vibration.

Specialized listening equipment can help technicians narrow down the source beneath floors or concrete.

Thermal imaging

Temperature differences associated with leaking hot-water lines can sometimes produce patterns detectable with infrared equipment.

Thermal imaging is a diagnostic aid—not proof by itself of the precise location or cause of a leak.

Isolation testing

When necessary, sections of the plumbing system can be isolated to determine which branch contains the failure.

Supremacy’s existing Water Leak Detection service describes acoustic, infrared, electronic and pressure-testing approaches for locating hidden plumbing leaks before unnecessary cutting or demolition.

Suspect a hidden leak but do not know where it is? Schedule professional water leak detection before deciding how the slab should be repaired.


Slab Leak Repair Methods

Once the leak has been located, the plumber can recommend a repair based on the pipe condition, location and accessibility.

Direct access through the slab

This approach involves opening the flooring and concrete near the confirmed leak location, exposing the pipe and repairing the damaged section.

May make sense when:

  • the failure is highly localized;
  • the pipe is reasonably accessible;
  • the surrounding piping appears serviceable; and
  • opening the slab is less disruptive than rerouting the line.

Potential disadvantages:

  • concrete must be opened;
  • flooring may be damaged or removed;
  • dust/noise must be managed;
  • the slab and finishes require restoration afterward.

Rerouting the affected water line

Instead of reopening the original underground route, the plumber may disconnect or abandon the failed section and install a replacement line through an accessible route.

Depending on the home, that could involve walls, ceilings or other accessible spaces.

Rerouting may be considered when:

  • the leak is beneath an especially difficult area;
  • direct access would cause excessive damage;
  • the affected run can be replaced through a practical alternative route; or
  • the condition of the original line makes another localized underground repair unattractive.

Repiping a larger section

A single slab leak does not automatically mean a home needs to be repiped.

However, multiple failures or broader pipe deterioration can change the economics. Homeowners should ask whether the diagnosed problem appears isolated or whether there is evidence of a more widespread piping issue.


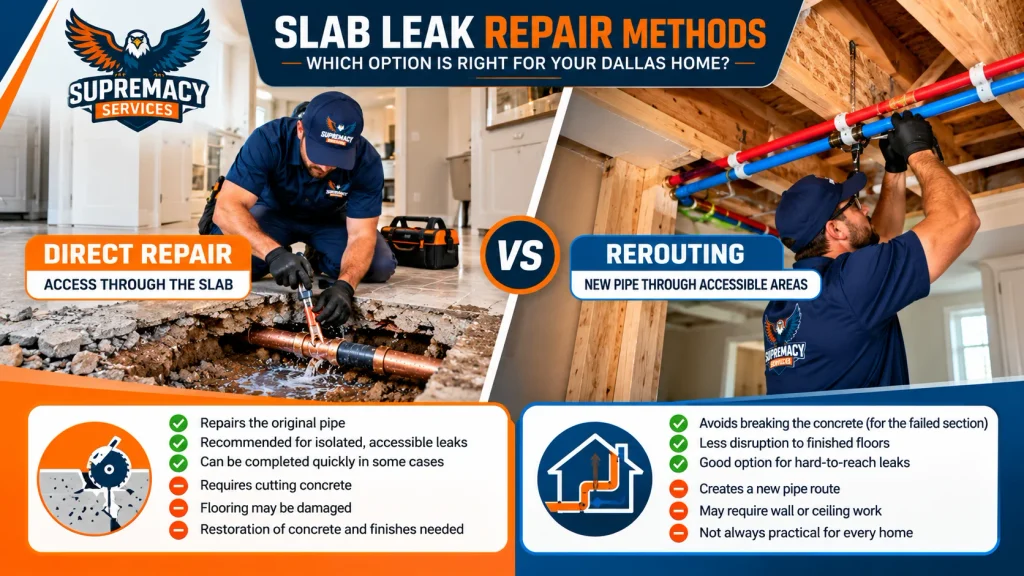
Repair Through the Slab vs. Rerouting

Comparison of direct slab access and pipe rerouting methods for repairing an under-slab plumbing leak.
Direct repair reaches the original pipe through the slab, while rerouting replaces the affected run through a more accessible path.
QuestionDirect slab accessRerouting
Does the original pipe get exposed?YesUsually no
Concrete opening required?UsuallyOften avoided for the failed section
Best for isolated accessible leak?OftenDepends
Can it avoid finished-floor demolition?Not alwaysPotentially
Changes pipe routing?NoYes
Restoration required?Concrete/flooringWalls/ceilings may require repair
Best option determined byLeak location and pipe conditionLayout and practical alternative route

There is no universally superior method.

A properly diagnosed leak beneath an accessible section of slab may be straightforward to repair directly. A leak under expensive flooring or difficult structural features may make rerouting more practical.

Have a confirmed under-slab leak? Ask Supremacy Services to compare direct repair and rerouting options based on the actual location and condition of your plumbing.


Warning Signs of a Slab Leak

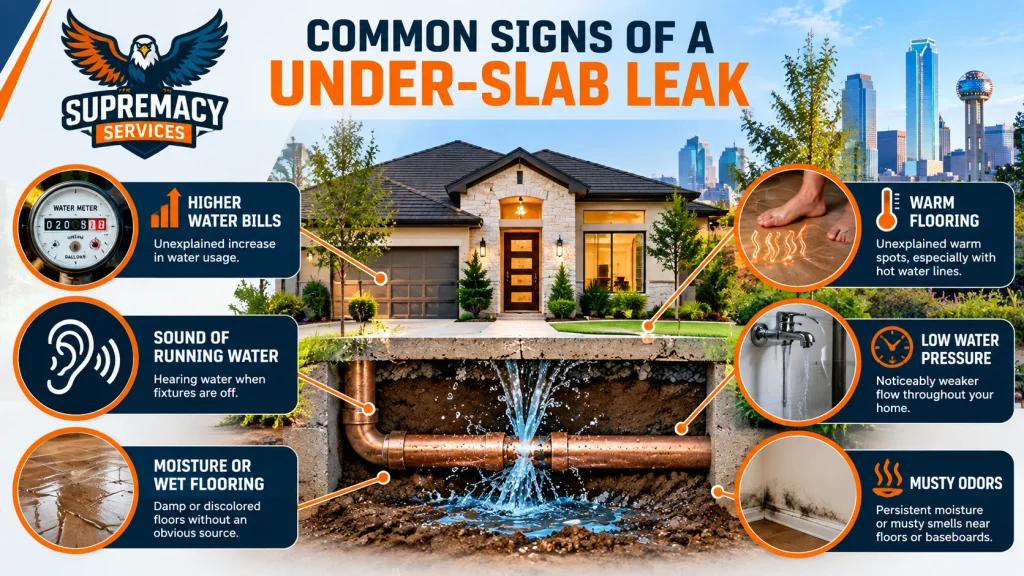
Infographic showing higher water bills, running-water sounds, wet flooring, warm floors, low pressure and musty odors as possible leak signs.
Unexplained water usage, moisture, warm flooring and running-water sounds can indicate a hidden plumbing leak that needs further investigation.

A slab leak can produce several symptoms, but none of these signs alone proves that the pipe beneath your foundation is leaking.

Unexplained increase in water usage

If household habits have not changed but water consumption rises, investigate for leaks.

Dallas Water Utilities notes that customers pay for water passing through the meter whether the water is intentionally used or lost through a leak.

Water meter movement when everything is off

Turn off faucets, fixtures and water-using appliances.

If the meter continues registering usage, water may be escaping somewhere downstream of the meter.

Sound of running water

Hearing water movement when fixtures are not operating can justify further investigation.

Warm flooring

An unexplained warm area can sometimes accompany a leaking hot-water line beneath the slab.

However, warm flooring alone is not sufficient to diagnose a slab leak.

Damp or discolored flooring

Moisture appearing without an obvious spill or fixture leak warrants investigation.

Reduced water pressure

A significant supply-line leak can affect available pressure, although low pressure has many other potential causes.

Musty odors or persistent moisture

Hidden moisture may affect flooring, baseboards and nearby building materials.

The source still needs to be identified before assuming it originates beneath the slab.


What Causes Slab Leaks?

Slab leaks can result from several different mechanisms rather than one single Dallas-specific cause.

Aging or deteriorated pipe

Plumbing materials can deteriorate over time depending on pipe type, installation, water conditions and service history.

Failed joints or fittings

The failure may occur at a fitting or connection rather than along a straight pipe section.

Installation-related problems

Improper installation, damaged pipe or excessive stress at a connection can contribute to premature failure.

Movement and mechanical stress

Pipes should be installed so that normal movement and expansion do not create damaging stress.

A professional diagnosis should focus on the actual failed component rather than assuming every under-slab leak has the same cause.


Slab Leak or Another Plumbing Problem?

Several common problems can imitate some of the symptoms of a slab leak.

SymptomPossible slab leakOther possibilities
High water billYesRunning toilet, irrigation leak, fixture leak
Wet floorYesAppliance, toilet, shower or supply-line leak
Low water pressurePossibleValve issue, main-line problem, fixture restriction
Wet yardLess typical for interior slab leakService-line or irrigation leak
Sewer odorNot typical of clean-water slab leakDrain/sewer problem
Warm floorPossible hot-water leakRadiant heat or environmental causes
Foundation moisturePossibleDrainage or exterior water intrusion

Slab leak vs. main water-line leak

A slab leak occurs beneath or within the foundation area.

A main/service water-line leak can occur between the municipal connection/meter and the house, often outside the slab.

Supremacy already has a dedicated Water Line Repair and Replacement service page for broader water-line failures, so homeowners with wet yards, service-line problems or whole-property pressure issues should be directed there rather than treating every underground leak as a slab leak.

Slab leak vs. sewer-line problem

A pressurized water-supply leak and a damaged sewer line require different diagnostic methods and repairs.

Recurring drain backups, widespread slow drains, sewage odors and wastewater appearing where it should not are stronger reasons to investigate the drainage/sewer system.


Can You Repair a Slab Leak Yourself?

Diagnosing and repairing a concealed under-slab plumbing leak is generally a poor DIY project because accurate location, pipe isolation, concrete access and code compliance may all be involved.

Texas does provide a homeowner exemption allowing qualifying property owners to perform plumbing work on their own homestead, but that does not eliminate applicable local permit, inspection or code requirements. The Texas State Board of Plumbing Examiners specifically advises homeowners to check municipal requirements.

The City of Dallas likewise states that qualifying homeowners performing their own plumbing work must obtain permits and inspections when required and comply with applicable plumbing codes.

A homeowner can still perform useful preliminary observations:

  • check whether all fixtures are off;
  • look at the water meter;
  • document unexplained water usage;
  • identify visible moisture;
  • note whether the problem appears associated with hot or cold water;
  • locate the main shutoff before an emergency occurs.

Avoid breaking flooring or concrete simply because a wet or warm area appears nearby. Water can travel away from the actual pipe failure.


What to Expect During Professional Slab Leak Repair

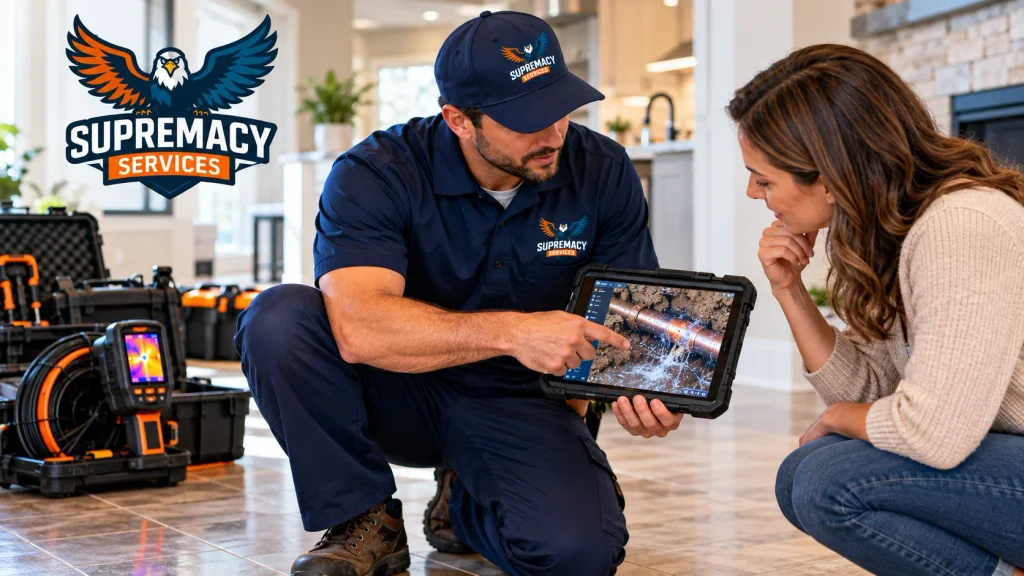
Supremacy Services technician explaining under-slab leak detection findings and repair options to a homeowner.
A professional assessment helps homeowners understand where the leak is located and compare appropriate repair options before work begins.

A well-planned slab leak project generally follows a diagnostic sequence rather than starting with demolition.

Step 1: Confirm the leak

The plumber determines whether the water-supply system is actually losing water.

Step 2: Narrow down the affected line

Testing helps determine which portion of the plumbing system is involved.

Step 3: Locate the leak

Diagnostic equipment and testing are used to narrow down the likely failure point.

Step 4: Evaluate the pipe and access

The plumber considers:

  • leak location;
  • pipe material;
  • accessibility;
  • surrounding finishes;
  • plumbing layout;
  • condition of the affected run; and
  • whether other failures are evident.

Step 5: Compare repair methods

The homeowner should receive an explanation of why direct repair, rerouting or a broader piping solution is being recommended.

Step 6: Obtain required permits when applicable

The permitting requirement depends on the work being performed.

Dallas currently uses the 2021 International Plumbing Code with local amendments.

Step 7: Complete the plumbing work

The damaged section is repaired or bypassed according to the selected method.

Step 8: Verify the repair

The system should be checked after repair to confirm that the diagnosed leak has been addressed.

Step 9: Restore affected finishes

Depending on the repair method, this may include concrete, flooring, drywall, paint or other finish work.


Dallas Permits and Water-Bill Considerations

Does slab leak repair require a permit in Dallas?

It depends on the scope.

The City of Dallas lists stopping a leak without replacing or rearranging valves, pipes or fixtures among work that may not require a permit. More substantial plumbing alteration or replacement may require permitting and inspection.

Because slab-leak projects can involve pipe replacement or rerouting, homeowners should verify the requirements for their specific repair rather than assuming the project is exempt.

For permitted professional plumbing work, Dallas states that a licensed Master Plumber registered with the city may obtain a plumbing permit.

Can Dallas homeowners get a water-bill adjustment after a leak?

Potentially.

Dallas Water Utilities operates a Leak Adjustment Program for qualifying leaks that cause substantial increases in water consumption. The city states that an approved adjustment is limited to one adjustment per 12-month period and a maximum of three months of affected usage.

The program adjusts eligible excess water consumption; it does not reimburse the plumbing repair itself. Repairs must be completed and supporting information is required.

Keep:

  • the repair date;
  • detailed description of the work;
  • plumber’s invoice;
  • property/service address; and
  • relevant account information.

These records can also help document when the problem was corrected.


How to Reduce the Risk of Future Leaks

Not every slab leak can be prevented, but early detection can reduce the amount of water lost before a hidden problem is found.

Watch your normal water usage

A sudden unexplained change deserves attention.

Investigate recurring leaks

If a property has experienced more than one piping failure, ask whether the leaks appear unrelated or indicate deterioration affecting a larger part of the system.

Do not ignore unexplained moisture

Water showing up around floors, baseboards or cabinets should have an identified source.

Know where your shutoff is

Being able to stop water quickly can be valuable during an active plumbing failure.

Keep plumbing records

Knowing the age, material and previous repair history of the plumbing system gives future plumbers useful context.


Questions to Ask Before Approving a Slab Leak Repair

Before signing a repair proposal, ask:

  • How was the leak confirmed?
  • How precisely has it been located?
  • Which pipe or branch has failed?
  • Is the failure isolated?
  • Why are you recommending direct repair or rerouting?
  • What areas of the home need to be opened?
  • Who restores the concrete, flooring or drywall?
  • Is restoration included in this estimate?
  • Does the repair require a permit?
  • What testing will be performed after repair?
  • What parts and labor warranties apply?
  • Could another section of the same piping system be at risk?

A clear diagnosis should come before a major repair recommendation.


Slab Leak FAQs

How much does it cost to repair a slab leak in Dallas?

There is no reliable flat Dallas price. As a national 2026 market benchmark, Angi reports many slab-leak projects between about $630 and $4,400, averaging roughly $2,280 including detection. Dallas pricing will depend on location, access, repair method and restoration requirements.

How do plumbers know where a slab leak is?

Plumbers can combine water-meter observations, pressure or isolation testing, acoustic equipment, electronic leak detection and other diagnostic methods. The goal is to narrow down the failed line before opening finished surfaces.

Do you have to break the concrete to fix a slab leak?

Not always. Some leaks are repaired by accessing the pipe through the slab. In other situations, the affected line can be rerouted through a more accessible location.

Is rerouting better than repairing a pipe under the slab?

Neither method is automatically better. The appropriate choice depends on the leak location, pipe condition, plumbing layout and amount of disruption each method would require.

Does homeowners insurance cover slab leaks?

Coverage depends on the policy, cause of loss and circumstances. Plumbing repair and resulting water damage may also be treated differently. Homeowners should review their policy and ask their insurer what documentation is required before assuming coverage.

Can a slab leak increase my Dallas water bill?

Yes. A leak in a metered water-supply line can increase recorded water consumption. Dallas Water Utilities notes that customers are responsible for water passing through their meter, although qualifying customers may request a leak adjustment after repairs.

How urgent is a slab leak?

An active leak should be investigated promptly. The urgency increases when water loss is significant, moisture is entering finished areas, pressure is dropping or the leak cannot be isolated.

Can I find a slab leak using my water meter?

The meter can help indicate whether water is flowing while fixtures are off, but it cannot identify the leak’s exact location. A running meter could indicate several types of plumbing leaks.

Should I repair one leak or repipe the house?

One isolated failure does not automatically justify repiping. If there have been repeated failures or widespread deterioration, however, comparing continued spot repairs with a broader piping solution may be worthwhile.


Need Help Locating an Under-Slab Leak in Dallas?

A slab leak repair should begin with evidence, not unnecessary demolition.

Supremacy Services provides leak detection and plumbing repair throughout Dallas and the DFW Metroplex. A professional assessment can determine whether the problem is actually beneath the slab, locate the affected line and compare repair approaches based on the home’s plumbing layout.

If the source has not yet been confirmed, start with professional water leak detection. If testing identifies a broader supply-line problem, review water line repair and replacement options before choosing the scope of work.

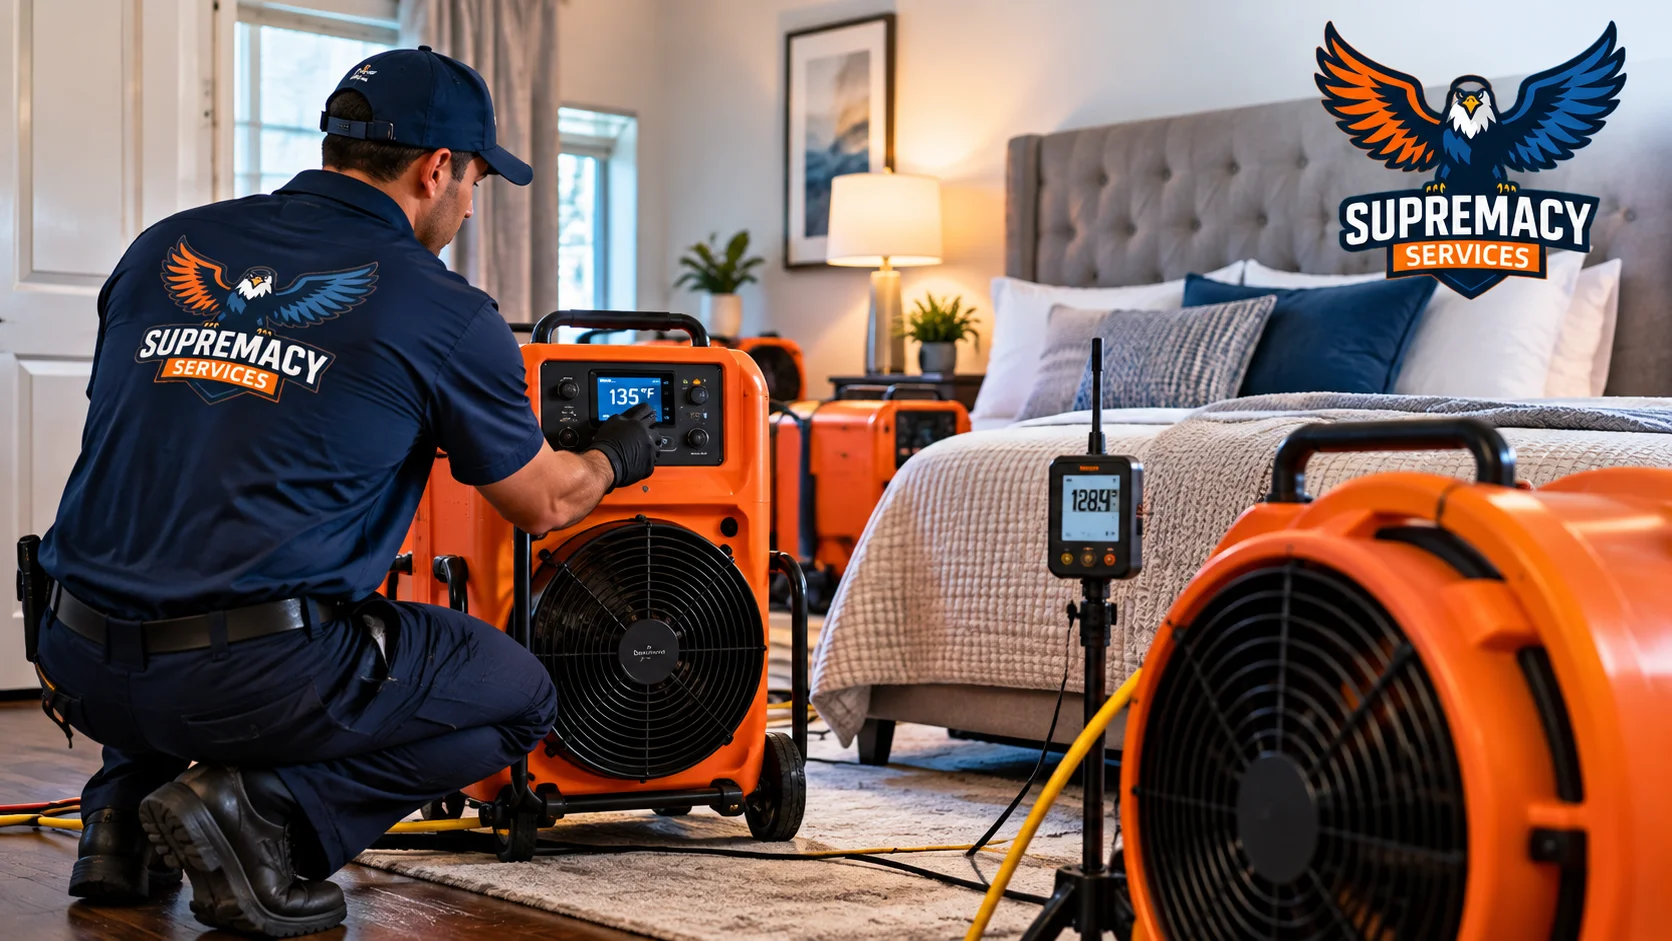
Supremacy Services technician setting up professional bed bug heat treatment equipment and temperature monitoring in a bedroom.

Bed Bug Heat Treatment Cost in Dallas: Does Heat Treatment Work?

Bed bug heat treatment in Dallas can be an effective professional treatment because sustained heat can kill bed bugs at every life stage, including eggs, when lethal temperatures reach their hiding places. The U.S. Environmental Protection Agency (EPA) recommends heating infested areas to at least 120°F for 90 minutes to ensure eggs are killed, while professional systems commonly operate at higher ambient temperatures so that cracks, furniture and other cooler areas reach lethal conditions.

Cost is less straightforward. Published 2026 consumer pricing data places professional bed bug extermination broadly around $1,000–$4,000 per home, while heat treatment is commonly estimated at approximately $1–$3 per square foot. These figures are national planning estimates—not Supremacy Services pricing or guaranteed Dallas rates. Your actual Dallas bed bug heat treatment cost depends on the size and layout of the property, how far the infestation has spread, preparation requirements and the treatment plan recommended after inspection.

If you are trying to decide whether heat treatment is worth the investment, here’s what Dallas and DFW homeowners should know before requesting a quote.

Table of Contents

  1. How Much Does Bed Bug Heat Treatment Cost in Dallas?
  2. What Affects the Cost?
  3. Does Bed Bug Heat Treatment Actually Work?
  4. How Does Professional Heat Treatment Work?
  5. Heat Treatment vs. Chemical Treatment
  6. Signs You May Have Bed Bugs
  7. Can You Heat-Treat Bed Bugs Yourself?
  8. How to Prepare for Treatment
  9. Can Bed Bugs Return After Heat Treatment?
  10. Choosing a Bed Bug Treatment Company in Dallas
  11. Frequently Asked Questions

How Much Does Bed Bug Heat Treatment Cost in Dallas?

Infographic showing property size, affected rooms, infestation extent, furniture and other factors that can influence bed bug treatment cost.
Property size, infestation extent, furnishings and treatment scope can all affect the cost of professional bed bug heat treatment.

There is no reliable single flat price for every Dallas property. As a national planning benchmark, Angi’s 2026 cost data places professional bed bug extermination around $1,000–$4,000 for a home and lists heat treatment at roughly $1–$3 per square foot. Actual Dallas quotes can fall outside these ranges.

Treat those figures as budgeting information rather than a quote.

Cost considerationHow it can affect your quote
Square footageLarger treatment areas require more equipment, energy and technician time
Number of affected roomsAn infestation limited to one area differs from activity throughout a home
Infestation extentWidely dispersed bed bugs can make treatment more involved
Home layoutClosets, furnishings and difficult-to-heat spaces can affect the treatment plan
PreparationHeat-sensitive possessions and clutter can require additional preparation
Treatment approachHeat-only and integrated treatment programs are not priced identically
Inspection/follow-upAsk whether these are included in the quoted program
Multi-unit propertyApartments and attached units may require additional investigation or coordination

A very low quote should therefore not automatically be treated as the best value. Ask what areas will be treated, how temperatures will be monitored, what preparation is required and what post-treatment verification is included.

Not sure how much of your home needs treatment? Schedule a professional bed bug inspection in Dallas and DFW before comparing treatment options.

What Affects Bed Bug Heat Treatment Cost?

1. Size of the treatment area

Heating a bedroom is different from heating several bedrooms or an entire home. Professional treatment requires sufficient equipment and airflow to raise temperatures throughout the target area rather than merely warming the air near a heater.

2. How far the infestation has spread

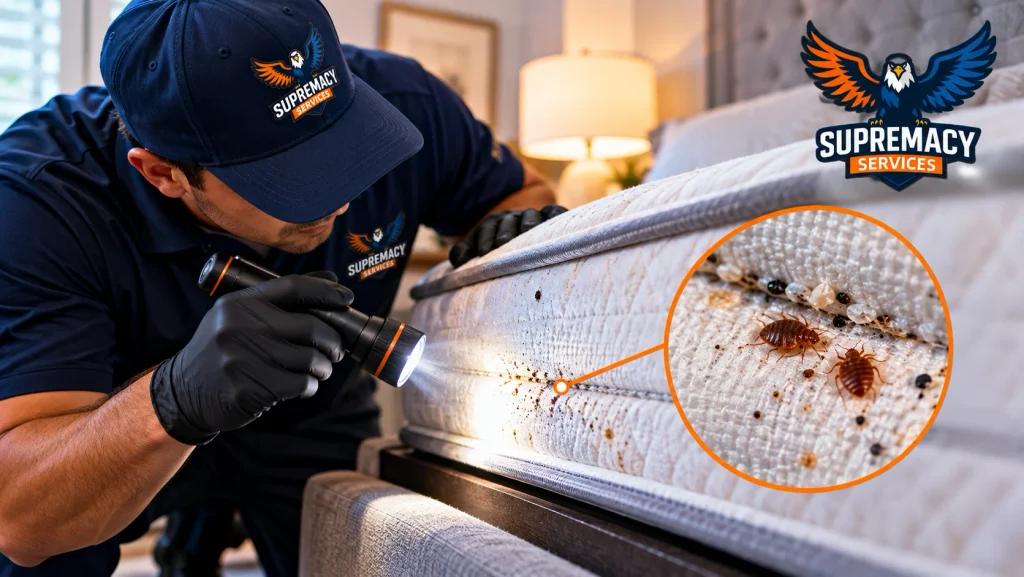
Bed bugs can hide in mattress seams, bed frames, upholstered furniture, baseboards and small cracks and crevices.

That makes the distribution of an infestation important. A professional inspection should establish where activity is present before determining the treatment scope.

3. Furniture and belongings

Heat needs to reach the places where bed bugs are hiding.

A heavily furnished room can therefore require more planning than an open room of the same size. Drawers, closets and furniture may need to be arranged according to the pest professional’s preparation instructions.

4. Heat-sensitive belongings

Some belongings should not remain in an area undergoing professional heat treatment. EPA specifically recommends properly handling heat-sensitive items that could be damaged.

Your provider should give you a preparation list rather than expecting you to guess what needs to be removed.

5. Inspection and follow-up

When comparing Dallas bed bug treatment quotes, ask:

  • Is inspection included?
  • Is the quote for one room or the entire affected area?
  • Is temperature monitoring included?
  • Are follow-up inspections included?
  • What happens if activity is detected afterward?
  • Are any additional pest-control methods part of the treatment plan?

Compare the complete treatment program—not simply the headline price.

Does Bed Bug Heat Treatment Actually Work?

Yes. Properly performed heat treatment can kill bed bugs, including eggs. The key is achieving a lethal temperature inside the actual hiding locations, not simply making the room feel hot.

EPA guidance states that infested articles or areas can be heated to at least 120°F for 90 minutes to ensure eggs are killed. University of Minnesota Extension guidance gives minimum professional control conditions of approximately 118°F for 72 minutes or 122°F for less than a minute.

That does not mean a technician merely sets the room thermostat to 120°F.

Mattresses, furniture, wall-floor junctions and cracks can heat at different rates. Professional treatment therefore relies on specialized heating equipment, air circulation and temperature monitoring.

Why temperature monitoring matters

Consider a bedroom where the open air is hot enough but a dense piece of furniture remains substantially cooler inside.

A bed bug hiding deep within that cooler location may not receive the same heat exposure as one sitting on an exposed surface.

Successful thermal remediation therefore depends on getting sufficient heat where the insects are actually hiding.

How Does Professional Bed Bug Heat Treatment Work?

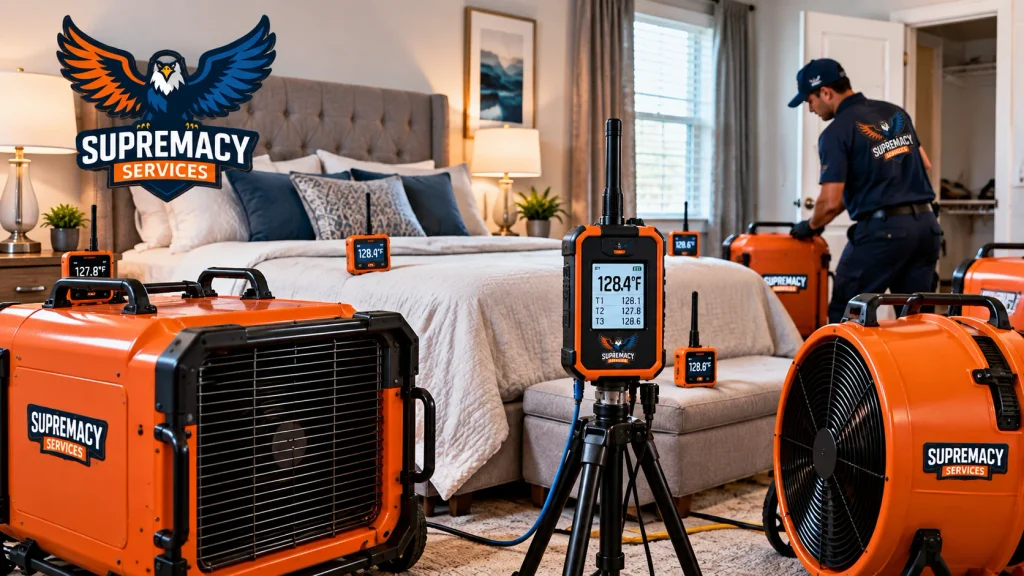
Professional thermal heaters, air movers and temperature sensors operating during bed bug treatment in a residential bedroom.
Professional thermal remediation combines controlled heating, air circulation and temperature monitoring throughout the treatment area.

A professional treatment generally follows several stages.

Step 1: Inspection

The technician first confirms evidence of bed bugs and determines which areas are affected.

Common inspection locations include:

  • mattress seams;
  • box springs;
  • headboards;
  • bed frames;
  • upholstered furniture;
  • baseboards;
  • nearby cracks and crevices; and
  • furniture close to sleeping areas.

Correct identification matters because bites alone do not prove that bed bugs are responsible.

Step 2: Preparation

The homeowner follows a preparation checklist.

Items vulnerable to elevated temperatures may need to be removed or handled separately. The exact instructions should come from the treatment company because moving belongings incorrectly can spread bed bugs into previously unaffected areas.

Step 3: Heating and air circulation

Specialized heaters raise the temperature while professional air-moving equipment circulates heated air throughout the treatment area.

Step 4: Temperature monitoring

Sensors or other temperature-monitoring equipment help technicians determine whether important areas have reached the treatment target.

This is one of the major differences between professional thermal remediation and trying to heat a room yourself.

Step 5: Cooling and post-treatment evaluation

After the required exposure has been achieved, the property is allowed to cool according to the treatment company’s procedures.

Monitoring afterward is important because heat does not provide residual protection against future bed bug introductions.

If bed bugs have been confirmed in your home, learn how Supremacy’s professional bed bug thermal treatment works across Dallas and the DFW Metroplex.

Heat Treatment vs. Chemical Treatment for Bed Bugs

Neither method should be chosen solely because it sounds more powerful. The appropriate strategy depends on the infestation, property and professional assessment.

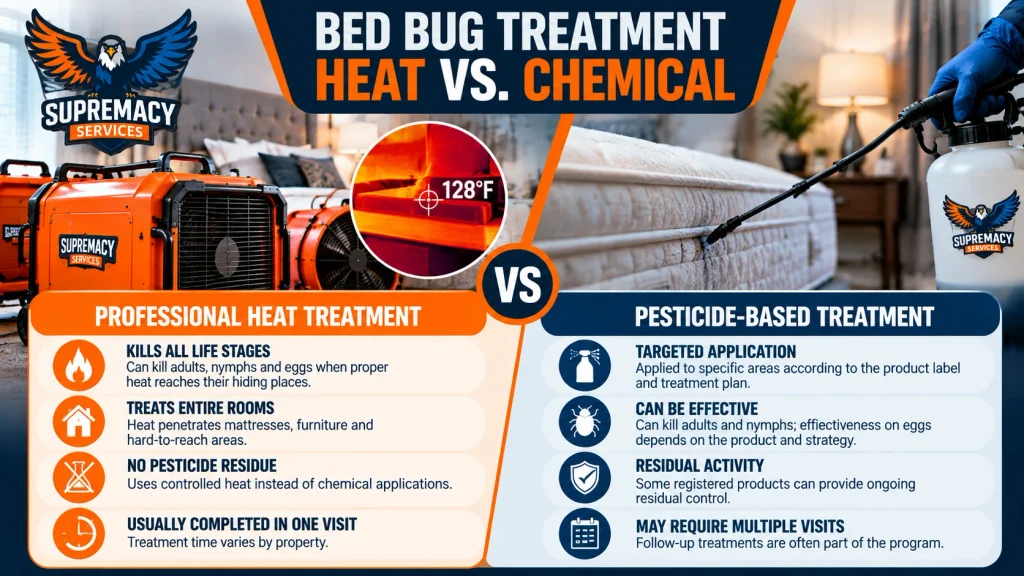
Comparison infographic showing professional heat treatment and pesticide-based treatment options for controlling bed bugs.
Heat and pesticide-based treatments work differently, and the appropriate approach depends on the infestation and professional treatment plan.
FactorProfessional heatPesticide-based treatment
Can kill adults and nymphs?Yes, with adequate exposureDepends on product and correct application
Can kill eggs?Yes, when lethal heat reaches themDepends on product/treatment strategy
Residual activityNoSome registered products can provide residual activity
Whole-room capabilityYesUsually targeted according to product label and treatment plan
Preparation requiredYesYes
Specialized equipmentExtensiveApplication equipment varies
Repeat treatment possibleYes, if neededMultiple visits may be part of the program
Best useDepends on property and infestationDepends on property and infestation

EPA recommends approaching bed bug control through integrated pest management (IPM) rather than assuming one technique is universally best.

An IPM strategy may combine inspection, monitoring, vacuuming, heat, encasements and appropriately selected pesticides.

Signs You May Have Bed Bugs

Supremacy Services pest control technician inspecting mattress seams with a flashlight for bed bugs, shed skins and dark spotting.
Mattress seams, bed frames and nearby hiding places should be inspected for physical evidence before choosing a treatment method

Do not schedule expensive treatment based solely on unexplained skin irritation.

Look for physical evidence such as:

  • live bed bugs;
  • small eggs or eggshells;
  • shed skins;
  • dark spotting or fecal evidence around hiding areas; and
  • bugs concealed around mattresses, bed frames or nearby furniture.

Bed bugs are small and can be difficult to identify, especially during the early stages of an infestation.

What can be confused with bed bugs?

Other insects or household problems can occasionally be mistaken for bed bugs. Fleas, carpet beetles and other small insects may cause confusion, while skin reactions have many possible causes.

That is another reason inspection should come before treatment.

Can You Heat-Treat Bed Bugs Yourself?

Trying to heat an entire room or home yourself is not recommended.

EPA specifically warns that turning up the thermostat or using space heaters will not reliably eliminate bed bugs. Improvised heating can also create serious safety hazards.

Professional whole-room treatment uses equipment specifically designed to create and monitor controlled treatment conditions.

Homeowners can, however, use heat safely for certain washable belongings. EPA notes that clothing and bedding can be placed in a dryer at high temperature for 30 minutes to kill bed bugs; washing alone generally will not.

Other useful homeowner measures can include:

  • reducing unnecessary clutter;
  • vacuuming affected areas carefully;
  • using appropriate mattress and box-spring encasements;
  • using bed bug interceptors for monitoring; and
  • storing cleaned belongings in sealed bags where appropriate.

These measures can support a larger control strategy, but they should not be mistaken for professional whole-home heat remediation.

How to Prepare for Bed Bug Heat Treatment

Bed bug heat treatment preparation showing sealed belongings, bedding, clothing and heat-sensitive items being organized before professional service. |
Follow your pest professional’s preparation checklist carefully before a scheduled bed bug heat treatment.

Always follow the preparation instructions provided by your pest professional because treatment protocols vary.

A typical preparation process may involve:

Confirm what must leave the treatment area

Ask specifically about:

  • pets;
  • plants;
  • medications;
  • pressurized containers;
  • candles and wax products;
  • heat-sensitive possessions; and
  • other items identified by the treatment provider.

Avoid moving infested belongings around the home

Moving bedding or furniture from an infested bedroom into another room can spread the problem.

EPA recommends using sealed plastic bags when transporting potentially infested items.

Dry appropriate fabrics

Bedding, clothing and other dryer-safe materials can be treated according to professional instructions. EPA recommends high dryer heat for 30 minutes for appropriate items.

Reduce clutter carefully

Removing unnecessary clutter can make inspection and treatment easier, but avoid carrying unbagged possessions from an infested area into another part of the property.

Follow the re-entry instructions

People and pets should remain outside the treatment area for the period specified by the provider and return only after the company says conditions are appropriate.

Do You Have to Throw Away Your Mattress?

Not automatically.

Discovering bed bugs does not mean every mattress, sofa or piece of furniture must be discarded.

Professional treatment and properly installed encasements may allow many items to remain in the home. Unnecessarily moving infested furniture outside can also spread bed bugs through common areas or expose other people to infested items.

Have the item evaluated before deciding to replace it.

If infested furniture must be discarded, follow local disposal requirements and make it obvious that the item should not be reused.

Can Bed Bugs Return After Heat Treatment?

Yes. Heat can kill bed bugs present during successful treatment, but it does not create lasting protection against a new introduction.

EPA specifically notes that heat treatments have no residual effect.

That distinction matters.

A successful treatment addresses the infestation present at the time. It cannot stop a bed bug from later hitchhiking into the property on luggage, furniture, clothing or other belongings.

Post-treatment monitoring can help identify renewed activity.

Dallas and DFW Considerations

Bed bugs are fundamentally an indoor hitchhiking pest, so Dallas’s outdoor climate is less important to treatment decisions than it is for mosquitoes, ants or many perimeter pests.

For DFW homeowners, more practical considerations include:

  • whether the property is detached or multi-unit;
  • the number of rooms involved;
  • whether neighboring units may require inspection;
  • the amount of furniture and belongings;
  • where residents travel or stay overnight; and
  • whether used furniture has recently entered the property.

Apartments, condominiums and other attached housing deserve particular attention because treatment planning may involve property management and potentially adjacent areas.

Texas licensing considerations

Texas regulates structural pest-control work. The Texas Department of Agriculture’s Structural Pest Control Service licenses and regulates pest-management professionals who perform structural pest-control services involving regulated pesticide work.

If pesticides are included in a bed bug program, homeowners should verify that the company and applicators meet applicable Texas requirements.

How to Reduce the Risk of Bringing Bed Bugs Home

Bed bug prevention is mostly about reducing opportunities for hitchhiking.

Useful habits include:

  • inspect secondhand upholstered furniture before bringing it indoors;
  • inspect luggage after travel;
  • keep travel bags away from beds when possible;
  • examine mattress seams and sleeping areas when you suspect activity;
  • use protective encasements where appropriate;
  • reduce clutter around sleeping areas; and
  • respond promptly when physical evidence appears.

Do not rely on cleanliness alone. Bed bugs are attracted to hosts rather than dirty homes.

Choosing a Bed Bug Treatment Company in Dallas

Before hiring a provider, ask more than “How much does it cost?”

Ask:

  1. How do you confirm that the property actually has bed bugs?
  2. Which rooms or areas will be treated?
  3. Why are you recommending heat for this infestation?
  4. How will temperatures be monitored?
  5. What preparation is required?
  6. What items must be removed?
  7. How long should occupants remain away?
  8. Is follow-up inspection included?
  9. What happens if activity is found afterward?
  10. Are pesticides also being proposed, and if so, why?
  11. What exactly is included in the written quote?

A professional should be able to explain the treatment plan rather than simply promise that making the house hot will solve the problem.

Is Bed Bug Heat Treatment Worth It?

For an appropriate property and a confirmed infestation, professional heat treatment can be a practical option because properly delivered lethal heat can kill adults, nymphs and eggs without depending solely on pesticide applications.

Its limitations matter too. Heat requires specialized equipment and careful preparation, can affect heat-sensitive possessions, and leaves no residual protection against reinfestation.

The right comparison is therefore not simply “heat versus chemicals.”

It is:

Which professionally designed treatment program gives this particular infestation the best chance of effective control?


Frequently Asked Questions

How much does bed bug heat treatment cost in Dallas?

Published 2026 consumer cost data places professional bed bug treatment broadly around $1,000–$4,000 for a home, with heat treatment estimates around $1–$3 per square foot. These are national market estimates, not Dallas quotes. Property size, infestation extent and treatment scope determine the actual cost.

Does heat treatment kill bed bug eggs?

Yes, when the eggs receive sufficient heat exposure. EPA recommends heating infested areas or articles to at least 120°F for 90 minutes to ensure eggs are killed.

Can bed bugs survive heat treatment?

Bed bugs can survive an inadequately performed treatment if their hiding location never reaches lethal conditions for sufficient time. This is why professional temperature monitoring and air circulation matter.

Is one heat treatment enough for bed bugs?

A properly performed heat treatment can potentially address all life stages during the treatment, but no responsible treatment plan should assume success without considering inspection and monitoring. The infestation’s scope and treatment conditions matter.

How long does professional bed bug heat treatment take?

Treatment time varies with the property and system used. Time is required to set up equipment, raise the structure and hiding areas to target conditions, maintain appropriate exposure and allow the property to cool. Ask your provider for a property-specific schedule.

Do I need to throw away my mattress?

Usually not automatically. Many mattresses and furnishings can potentially be treated. Have a pest professional inspect the item before deciding to discard it.

Can I stay home during heat treatment?

Occupants and pets should follow the treatment provider’s instructions and remain out of the treatment area during professional whole-room heating. Return only when the provider says it is appropriate.

Is heat treatment better than spraying?

Not universally. Heat offers whole-area penetration and can kill all life stages when properly performed, while certain pesticide treatments can provide residual activity. EPA recommends an integrated approach based on the individual infestation.

Will bed bugs come back after heat treatment?

They can be reintroduced. Heat has no residual effect, so a later bed bug brought into the property can begin another infestation. Monitoring and prevention remain important.


Need a Professional Bed Bug Inspection in Dallas?

If you have found live bed bugs, eggs, shed skins or other convincing evidence around sleeping areas, start by determining how far the infestation has spread.

Supremacy Services provides professional bed bug thermal treatments across Dallas and the DFW Metroplex, using controlled heating and temperature monitoring to target bed bugs hidden in mattresses, furniture and other difficult areas.

Supremacy Services technician inspecting a leaking underground residential water line in Dallas

Water Line Repair vs Replacement in Dallas: Which Does Your Home Need?

If your main water line is leaking, repair is usually appropriate when the damage is isolated and the rest of the pipe remains in good condition. Replacement becomes more reasonable when deterioration affects much of the line, leaks keep recurring, the pipe material is failing, or repairing one section would only postpone another failure.

For Dallas homeowners, the decision should be based on the condition of the entire service line—not simply the location of the current leak.

That distinction matters. A small, accessible break does not automatically justify replacing an entire water line. At the same time, repeatedly repairing an extensively deteriorated line can become expensive and disruptive.

This guide explains how plumbers evaluate water line repair vs replacement in Dallas, the warning signs to watch for, what influences cost, how Dallas-area conditions can affect buried pipes, and what homeowners should expect before approving either option.

Table of Contents

  1. Water Line Repair vs Replacement: Quick Comparison
  2. What Is Your Main Water Line?
  3. When Can a Water Line Be Repaired?
  4. When Should a Water Line Be Replaced?
  5. 7 Signs Your Water Line May Be Failing
  6. What Causes Water Lines to Fail in Dallas?
  7. Repair vs Replacement Comparison
  8. How Much Does Water Line Repair or Replacement Cost?
  9. Traditional vs Trenchless Replacement
  10. How a Plumber Determines Which Option You Need
  11. Could It Be Something Other Than the Main Water Line?
  12. DIY vs Professional Water Line Work
  13. How to Reduce the Risk of Future Water Line Problems
  14. FAQs

Water Line Repair vs Replacement: Quick Comparison

Comparison of localized water line repair and complete water line replacement
Localized damage may be repairable, while widespread or recurring deterioration can make replacement the better long-term option.

Repair fixes a specific damaged section of pipe. Replacement removes, bypasses or renews a larger portion—or all—of the failing service line.

The correct choice depends primarily on the extent of damage and the overall condition of the existing pipe.

SituationRepair May Make SenseReplacement May Make More Sense
One isolated leak✓
Otherwise sound pipe✓
Accessible damaged section✓
First significant failure✓
Multiple previous leaks✓
Widespread corrosion/deterioration✓
Several weak sections✓
Obsolete or badly deteriorated material✓
Long-term reliability is questionable✓
Repair cost approaches replacement cost✓

These are guidelines rather than automatic rules. The pipe should be evaluated before deciding.

The simplest way to think about it

Ask one question:

Are you dealing with one bad section of an otherwise serviceable water line, or a bad water line that happens to be leaking in one section?

The first situation often favors repair.

The second deserves serious consideration of replacement.

What Is Your Main Water Line?

Your home’s water service line carries potable water from the municipal supply toward your home’s plumbing system.

For Dallas Water Utilities customers, the service connection has public and private portions. Dallas Water Utilities states that the utility maintains the public side and meter, while the property owner is responsible for maintaining the private portion from the meter onto the property.

That distinction is important when an underground leak develops.

If the failure is on the homeowner’s private service line, repairs may generally be the property owner’s responsibility. If you are uncertain where the problem lies, confirm the location before authorizing excavation or replacement.

When Can a Water Line Be Repaired?

A localized water line repair is generally worth considering when the plumber can isolate one damaged area and determine that the surrounding pipe remains in usable condition.

Common examples include:

  • an isolated crack or split;
  • damage concentrated around a fitting or connection;
  • accidental physical damage;
  • a localized failure without evidence of widespread deterioration;
  • a relatively sound line with no history of recurring leaks.

Repairing the damaged section preserves the serviceable parts of the existing line and may reduce excavation and restoration.

One leak does not automatically mean you need a new line

A homeowner who discovers water pooling in the front yard may understandably assume the entire pipe has failed.

That is not necessarily the case.

The visible leak is only the symptom. The important question is why the pipe failed and what condition the surrounding line is in.

A plumber should determine whether the failure appears isolated before recommending a complete replacement.

If you suspect an underground service-line problem, Supremacy’s water line repair and replacement service can be used to diagnose the line and determine whether targeted repair or replacement is appropriate.

When Should a Water Line Be Replaced?

Replacement becomes more compelling when the problem is systemic rather than localized.

A complete or substantial water line replacement may deserve consideration when:

1. The line has developed repeated leaks

One isolated repair can be reasonable.

A sequence of leaks along different portions of the same aging line is different. Repeated failures can indicate that deterioration extends beyond the section currently leaking.

At that point, ask for the cost and expected outcome of both another repair and replacement.

2. Significant corrosion or deterioration is present

A repair restores one failed section. It does not restore the remaining pipe.

If inspection shows widespread corrosion, thinning, scaling or other deterioration, replacing only the visible failure can leave other vulnerable sections in service.

3. The existing pipe has multiple weak areas

The number of previous repairs matters.

A pipe containing several patched sections may eventually reach the point where continuing to repair individual failures is less attractive than renewing the line.

There is no universal number of repairs that automatically requires replacement. Condition matters more than an arbitrary threshold.

4. Water pressure problems accompany deterioration

Low pressure throughout the home can have many causes, so it should not be treated as proof of a broken main water line.

However, when testing confirms that the service line is leaking, restricted or deteriorated, pressure problems become another factor in the repair-versus-replacement decision.

5. The economics no longer favor another repair

The cheapest immediate solution is not always the least expensive long-term solution.

Homeowners should compare:

Cost of current repair + likelihood of another failure + future excavation/restoration

against:

Cost of replacement + expected condition of the renewed line

A reputable assessment should explain both options when both are technically reasonable.

7 Signs Your Water Line May Be Failing

Signs of an underground water line leak including wet yard areas, low water pressure and unexpected meter movement
Higher water use, wet areas, pressure changes and meter movement can indicate a hidden plumbing leak that needs investigation.

A buried water line can leak for some time before the exact location becomes obvious.

Watch for these signs.

1. Your water meter moves when everything is off

One useful homeowner test comes from EPA WaterSense.

Turn off faucets, irrigation, appliances and other water-using fixtures, note the meter reading, avoid using water for two hours, and check it again. EPA says a changed meter reading can indicate a leak.

This confirms unexplained water use; it does not tell you where the leak is.

2. Your water bill increases unexpectedly

An unusual increase in consumption without a corresponding change in household use can indicate a hidden leak.

Compare usage with previous billing periods rather than relying solely on the dollar amount, because rates and seasonal consumption can vary.

Dallas Water Utilities also maintains a leak-adjustment program for qualifying situations after repairs are completed, although the program does not reimburse plumbing repair costs.

3. Part of your yard stays unusually wet

Persistent wet or soft ground along the path between the water meter and house deserves investigation—particularly when rainfall or irrigation cannot explain it.

Do not assume every damp area is a water-line leak. Irrigation leaks and drainage problems can create similar symptoms.

4. Water pressure drops throughout the house

A single weak faucet often points toward a fixture-specific problem.

A noticeable pressure change affecting many fixtures deserves broader investigation. Possible causes include supply-line problems, valves, pressure-regulating equipment and utility-side conditions.

5. You hear water when fixtures are off

Water movement when the home should be using no water can indicate hidden consumption.

Combine this observation with a meter test rather than using sound alone to diagnose a buried line.

6. The line has already needed several repairs

Repair history is valuable diagnostic information.

Tell the plumber where previous leaks occurred, when they were repaired and whether different sections have failed. Multiple failures can change the economics of another localized repair.

7. Water appears near the meter or service-line route

Water surfacing between the meter and home may indicate a service-line problem.

Because responsibility depends on where the failure occurs, locating the leak accurately matters. Dallas Water Utilities identifies the meter and public/private portions separately.

What Causes Water Lines to Fail in Dallas?

Illustration of underground water pipe movement during wet and dry clay soil conditions
Expansive clay soil can shrink during dry conditions and swell when wet, creating movement around buried infrastructure.

There is rarely one universal cause. Buried service lines can fail because of pipe condition, installation, external forces or combinations of those factors.

Pipe age and deterioration

Pipe materials do not remain in identical condition indefinitely.

Corrosion, deteriorating joints and previous repairs can eventually make older sections more vulnerable.

Age by itself, however, is not enough to condemn a line. Actual condition matters.

Ground movement

North Texas homeowners should also understand soil movement.

Texas A&M resources explain that clay soil can swell when wet and shrink when dry, and research on expansive soils documents damage to service piping associated with differential soil movement.

That does not mean every Dallas water-line failure is caused by clay soil. It means ground movement is a legitimate factor for a plumber to consider when investigating buried infrastructure.

Installation or connection problems

Improper bedding, poor connections, inadequate support or other installation issues can contribute to premature failures.

The failure pattern should be evaluated rather than simply replacing the visibly broken fitting.

Physical damage

Excavation, landscaping and construction work can damage buried lines.

Before digging around underground utilities, proper utility-location procedures should always be followed.

Corrosion

Metallic piping may deteriorate through corrosion depending on the material and conditions surrounding the pipe.

Where corrosion is widespread rather than concentrated at one fitting, replacement can become more practical than repeated patches.

Unusual pressure conditions

Water pressure can contribute to stress on plumbing components, but homeowners should not assume high pressure caused a leak without testing.

Pressure should be measured as part of the diagnosis when appropriate.

Repair vs Replacement Comparison

FactorTargeted RepairWater Line Replacement
ScopeFailed sectionLarge section or complete private service line
Best suited forLocalized damageWidespread or recurring problems
Initial project sizeUsually smallerUsually larger
ExcavationOften limitedDepends on route and method
Existing pipe remainsMostly yesMuch less or none
Addresses widespread deteriorationNoYes
Future leak riskDepends on remaining pipeReduces dependence on deteriorated original line
Decision should depend onLocal conditionWhole-line condition

Which option lasts longer?

That question cannot be answered responsibly without knowing the condition of the original pipe.

A correctly performed repair can solve an isolated defect. But it cannot make the unrepaired portions of an old, deteriorated line new.

Replacement addresses a larger portion of that risk, but it also involves a larger project.

The goal should therefore be the least invasive solution that reliably addresses the actual condition of the line—not automatically the smallest repair or the largest replacement.

How Much Does Water Line Repair or Replacement Cost?

There is no responsible single price for a Dallas water line repair or replacement without knowing the site conditions.

Costs can change substantially based on:

  • length of damaged pipe;
  • repair versus complete replacement;
  • pipe material and diameter;
  • depth;
  • accessibility;
  • leak-location work;
  • excavation requirements;
  • driveway, sidewalk or patio crossings;
  • landscaping;
  • replacement method;
  • permit and inspection requirements;
  • restoration after excavation.

A 2026 Dallas cost guide from Angi provides market estimates for main water-line repairs, but those figures should be treated as third-party planning estimates rather than Supremacy pricing or a guaranteed local quote.

Why replacement can cost more upfront

Replacement normally involves more pipe, labor and site work than repairing one localized failure.

But initial price is only part of the decision.

If a deteriorated line has already failed repeatedly, homeowners should compare the cumulative cost of additional repairs with replacing the vulnerable line.

Get repair and replacement options in writing

The Texas State Board of Plumbing Examiners recommends obtaining written estimates and making sure homeowners understand exactly what work will be performed. The Board also notes that it does not regulate the prices plumbers charge.

For a significant water-line project, a useful proposal should identify:

  • what was found;
  • where the damage is;
  • repair scope;
  • proposed replacement scope, if applicable;
  • pipe material;
  • excavation or trenchless method;
  • restoration responsibilities;
  • permit considerations;
  • warranty terms;
  • total quoted price.

That makes competing proposals easier to compare accurately.

Traditional vs Trenchless Water Line Replacement

Trenchless water line replacement compared with traditional open-trench excavation at Dallas homes
Trenchless methods can reduce surface excavation on suitable projects, while traditional excavation provides direct access to the water line.

Water line replacement does not always mean opening a continuous trench across the entire yard.

Depending on the existing line, route, pipe condition and site, trenchless methods may reduce the amount of surface excavation required.

Supremacy’s current water-line service identifies both traditional excavation and trenchless options, including pipe bursting, where feasible.

Traditional excavation

Traditional replacement exposes the pipe by excavation.

It may be appropriate when:

  • the damaged line is readily accessible;
  • the route needs to change;
  • trenchless installation is unsuitable;
  • the existing line or surrounding conditions prevent trenchless work.

The plumbing cost should be considered alongside surface restoration if landscaping, paving or other improvements must be disturbed.

Trenchless replacement

Trenchless approaches can reduce surface disruption by using limited access points instead of opening the entire route.

However, trenchless is an option, not an automatic solution.

A plumber must evaluate whether the existing pipe, route, connections and surrounding utilities make the proposed method suitable.

How a Plumber Determines Which Option You Need

Supremacy Services technician using leak detection equipment to inspect a residential water service line
A professional assessment should locate the problem and evaluate the condition of the line before repair or replacement is recommended.

A repair-versus-replacement recommendation should follow diagnosis—not precede it.

A typical evaluation may involve the following steps.

Step 1: Confirm that a leak exists

The plumber reviews symptoms, water use and meter behavior and performs appropriate testing.

Step 2: Determine where the leak is

Locating the failure helps distinguish an underground service-line problem from an interior supply leak, irrigation issue or utility-side problem.

If the source remains unclear, professional water leak detection can help narrow down the problem before excavation.

Step 3: Evaluate the pipe condition

The plumber considers:

  • material;
  • visible deterioration;
  • previous repairs;
  • type of failure;
  • surrounding conditions;
  • pressure where relevant;
  • accessibility.

Step 4: Identify whether the failure is isolated

This is the key repair-versus-replacement question.

If evidence points toward one isolated defect in otherwise serviceable piping, repair may be sufficient.

If deterioration appears broader, replacement deserves consideration.

Step 5: Compare viable repair methods

Ask whether the proposed approach is:

  • localized repair;
  • partial replacement;
  • full service-line replacement;
  • traditional excavation;
  • trenchless replacement.

Step 6: Compare total project consequences

Do not compare plumbing prices in isolation.

Ask what happens to:

  • lawn;
  • irrigation;
  • landscaping;
  • sidewalks;
  • patios;
  • driveway areas;
  • access points.

The least expensive plumbing proposal can become less attractive if it creates substantial restoration work.

Step 7: Pressure-test and verify the completed work

After repair or replacement, the system should be appropriately tested and inspected as required for the work performed.

Could It Be Something Other Than the Main Water Line?

Yes.

Several problems can mimic a main water-line failure.

Irrigation leak

Wet ground or unexplained water use can originate from an irrigation system rather than the home’s domestic water service.

Interior plumbing leak

A leaking supply pipe behind a wall or beneath the home can also cause unexplained meter movement.

Supremacy has a separate water leak detection service focused on identifying difficult-to-locate leaks.

Fixture leak

Running toilets and leaking faucets can waste significant amounts of water without any underground service-line failure.

EPA recommends checking fixtures as part of household leak detection.

Sewer line problem

A water service line and sewer line perform completely different jobs.

The water line delivers pressurized potable water to the home.

The sewer line carries wastewater away.

Recurring drain backups, widespread slow drains and sewage odors point toward drainage or sewer investigation rather than automatically toward the incoming water service.

Utility-side problem

Pressure or service issues can sometimes originate upstream of the homeowner’s private line.

Before undertaking a major replacement, the location and ownership of the affected section should be established.

DIY vs Professional Water Line Work

Homeowners can perform basic observations safely:

  • monitor water bills;
  • check the water meter;
  • look for unexplained wet areas;
  • note pressure changes;
  • document previous repairs;
  • turn off fixtures and check for unexplained consumption.

Those steps can help establish whether further investigation is needed.

Excavating and repairing a buried water service line is different.

Texas regulates plumbing work and plumbing professionals. The Texas State Board of Plumbing Examiners advises consumers to verify the Responsible Master Plumber associated with a plumbing company and to check with the local municipality regarding permit and inspection requirements.

For a buried supply line—particularly around other underground utilities, pavement or a municipal connection—professional diagnosis and code-compliant work are appropriate.

Dallas Permits, Responsibility and Water-Leak Adjustments

Three local considerations are worth checking before work begins.

Know which portion of the line belongs to you

Dallas Water Utilities states that property owners maintain the private portion of the service line from the meter onto their property, while DWU maintains the public portion and meter.

Confirm permit requirements for your project

Requirements depend on the work being performed and jurisdiction.

The Texas State Board of Plumbing Examiners specifically recommends checking with the local municipal plumbing inspection department to determine whether the proposed work requires a permit and inspection.

DFW homeowners outside Dallas should check their own municipality rather than assuming Dallas requirements apply.

Keep documentation after a qualifying leak

Dallas Water Utilities operates a leak-adjustment program for qualifying water leaks that substantially increase consumption. DWU requires repair information, and the program is intended to adjust eligible water consumption charges—not reimburse plumbing repair expenses.

Keep invoices and repair documentation.

How to Reduce the Risk of Future Water Line Problems

Not every buried-pipe failure is preventable, but early detection can limit wasted water and help identify problems sooner.

Monitor your water consumption

Unexpected changes deserve investigation.

Compare similar billing periods rather than waiting for visible water to appear.

Learn where your shutoff valve is

Knowing how to stop water flow can be valuable during a significant plumbing emergency.

Do not wait for a burst pipe to locate the valve.

Use your water meter as a diagnostic tool

The meter can provide one of the simplest clues that water is flowing when it should not be.

EPA WaterSense recommends comparing readings during a period when no water is being used.

Consider leak-monitoring technology

EPA notes that leak-detection and flow-monitoring devices can identify unusual water-use patterns, alert homeowners to moisture and, depending on the system, potentially activate a shutoff valve.

Keep records of previous underground repairs

Record:

  • repair date;
  • location;
  • pipe material;
  • cause if established;
  • section replaced;
  • contractor;
  • warranty information.

If another failure occurs, that history helps determine whether you are dealing with an isolated problem or a pattern.

Questions to Ask Before Approving Repair or Replacement

Before authorizing a major project, ask:

  • Where exactly is the failure?
  • Is it on my private service line?
  • What caused the failure?
  • Is the problem isolated or widespread?
  • What condition is the remaining pipe in?
  • What material is currently installed?
  • Have other sections been repaired?
  • Can this section reasonably be repaired?
  • What would justify replacing the entire line?
  • Are both traditional and trenchless options feasible?
  • What surfaces must be disturbed?
  • Who handles restoration?
  • Are permits or inspections required?
  • What warranty applies to the proposed work?

A contractor should be able to explain why the recommended scope is appropriate.

Frequently Asked Questions

Is it better to repair or replace a water line?

Repair generally makes sense for an isolated failure in an otherwise serviceable pipe. Replacement becomes more reasonable when deterioration is widespread, leaks recur or the remaining pipe has a high risk of additional failure.

How do I know if my main water line needs replacing?

Repeated leaks, widespread corrosion or deterioration, several previous repairs and evidence that multiple sections are failing can all support replacement. Diagnosis of the overall line condition should come before the decision.

Can a leaking underground water line be repaired?

Yes. Many isolated underground water-line leaks can be repaired without replacing the entire service line. The suitability of repair depends on the location, cause and condition of the remaining pipe.

Does one water-line leak mean I need replacement?

No. One leak does not automatically mean the entire line is bad. An isolated damaged section may be repairable if the rest of the pipe remains in acceptable condition.

How many leaks are too many before replacing a water line?

There is no universal number. Two leaks in an otherwise healthy line may represent a different situation from two leaks caused by widespread deterioration. Consider the pipe’s condition, material, repair history and cost of future access rather than relying on a fixed number.

Can you replace a water line without digging up the whole yard?

Sometimes. Trenchless methods such as pipe bursting can reduce excavation for suitable projects. Whether trenchless replacement is possible depends on the existing pipe, route, connections, access and surrounding utilities.

Who is responsible for the water line from the street to my Dallas home?

Dallas Water Utilities states that the utility maintains the public portion and meter, while property owners are responsible for the private service-line portion extending from the meter onto their property.

Can I determine whether I have a leak using my water meter?

Yes. EPA recommends recording the meter when no water is being used and checking it again after two hours. A changed reading indicates water is being used somewhere, although further diagnosis is needed to locate the source.

Should I get another opinion before replacing a main water line?

For a significant replacement project, understanding the diagnosis, proposed scope and written estimate is sensible. The Texas State Board of Plumbing Examiners recommends obtaining estimates and ensuring warranties and costs are documented in writing.


Need Help Deciding Between Water Line Repair and Replacement?

The right answer is not automatically “repair” or “replace.”

It depends on where the failure occurred, why it happened, the condition of the remaining service line, previous leak history, accessibility and the long-term economics of each option.

If your Dallas or DFW home has unexplained water use, low pressure, a wet yard or a suspected underground leak, Supremacy Services can inspect the problem and determine whether a localized repair, partial replacement or complete water-line replacement is appropriate.

Schedule a water line inspection with Supremacy Services to identify the problem before deciding how much pipe actually needs to be replaced.

Supremacy Services technician inspecting a residential gas line with leak detection equipment in Dallas

Gas Line Repair Cost in Dallas: Leak Detection, Repairs & Replacement

Gas line repair costs in Dallas can range from a relatively modest repair at an accessible fitting to several thousand dollars when buried piping, multiple leaks or extensive replacement is involved. Recent published DFW contractor pricing guides put simple repairs broadly in the $250–$1,200 range, while larger buried-line repairs and whole-home replacement can run into the thousands. These figures should be treated as market planning ranges, not Supremacy Services pricing.

The biggest cost factors are where the leak is located, how much piping must be repaired, whether the pipe is underground or concealed, accessibility, testing requirements, permits and whether the existing gas system can safely be repaired or needs partial or complete replacement.

More importantly, a suspected natural gas leak is a safety issue before it is a pricing question.

If you smell natural gas, leave the area immediately. Do not try to locate the leak yourself or operate switches, phones or anything that could create a spark while inside the affected area. From a safe location, call 911 and your gas utility. Atmos Energy lists its 24-hour emergency number as 866-322-8667.

Table of Contents

  1. How Much Does Gas Line Repair Cost in Dallas?
  2. Gas Leak Detection Costs
  3. What Affects Gas Line Repair Cost?
  4. Signs You May Have a Gas Leak
  5. What to Do If You Smell Gas
  6. Repair vs. Replacement
  7. How Professionals Find Gas Leaks
  8. Dallas Permits and Gas Testing
  9. What Professional Gas Line Repair Includes
  10. DIY vs. Professional Repair
  11. How to Reduce Future Problems
  12. Frequently Asked Questions

How Much Does Gas Line Repair Cost in Dallas?

Dallas homeowners should expect gas line costs to vary substantially according to the location and extent of the problem. An exposed leaking connection may require a relatively limited repair, while an underground leak or deteriorated system can require excavation and substantial pipe replacement.

There is no responsible flat price that applies to every property.

Published 2026 DFW market guides provide useful planning ranges:

Type of workApproximate DFW market planning range
Basic gas leak testing$150–$450
Accessible single-point repair$250–$1,200
More extensive/buried leak repair$1,200–$3,500+
New line to an applianceRoughly $400–$2,000+
Extensive/whole-home replacementRoughly $3,500–$10,000+

Important: These are third-party market estimates rather than Supremacy Services quotes. Actual pricing depends on the specific property, diagnostic findings, pipe length and diameter, accessibility, materials, permits, inspections and repair method.

That distinction matters because two homes with what appears to be the same gas odor can have completely different problems. One might have a leaking accessible fitting near an appliance; another could have a leak somewhere along a buried yard line.

A proper inspection should determine the problem before the homeowner is asked to choose between repair and replacement.

Is gas leak detection included in the repair price?

Not necessarily.

Companies structure diagnostic and repair pricing differently. Some include testing in a repair package, while others price leak detection, pressure testing, excavation and repairs separately.

Ask for an itemized explanation of what the estimate includes, particularly:

  • diagnostic or service-call charges;
  • pressure testing;
  • electronic leak detection;
  • excavation or access work;
  • replacement pipe and fittings;
  • labor;
  • permit fees;
  • required inspections;
  • restoration of walls, flooring or landscaping;
  • final testing; and
  • coordination required before gas service can be restored.

If testing confirms a problem on your home’s gas piping, learn about Supremacy Services’ Dallas gas line repair and replacement service before deciding whether a localized repair or a larger replacement is appropriate.


How Much Does Gas Leak Detection Cost?

Gas leak detection in Dallas can range from a basic inspection of accessible piping to a more involved investigation requiring pressure testing, electronic detection and isolation of different branches of the gas system.

Recent Dallas-area published pricing examples generally place basic or standard detection in the low hundreds of dollars, with complex systems costing more.

The price can increase when a property has:

  • numerous gas appliances;
  • multiple piping branches;
  • underground gas lines;
  • detached structures;
  • outdoor kitchens;
  • pool heaters;
  • generators;
  • inaccessible piping;
  • intermittent leaks; or
  • multiple suspected leak locations.

A homeowner should distinguish between emergency utility leak response and a plumber’s subsequent diagnostic and repair work.

If you smell gas, do not remain in the property searching for the source simply to avoid a diagnostic charge.


What Affects Gas Line Repair Cost?

Infographic showing factors that can affect gas line repair costs, including leak location, pipe condition, access and permits
Gas line repair costs vary based on where the problem is located, accessibility, pipe condition, repair scope and applicable permitting or inspection requirements.

The largest cost variables are repair scope, location, accessibility, pipe condition, line length, excavation and code/inspection requirements.

1. Location of the leak

A fitting that can be reached directly is usually less complicated to repair than piping underneath a slab, behind finished construction or underground.

Accessibility affects both diagnosis and labor.

2. Amount of damaged piping

A localized defect may allow a section of pipe or fitting to be replaced.

If testing reveals deterioration or leakage at several locations, repeatedly repairing individual points may make less sense than replacing a larger portion of the system.

3. Underground vs. exposed piping

Buried lines can add costs for:

  • locating the line;
  • excavation;
  • protecting nearby utilities;
  • trenching or boring;
  • approved underground piping systems;
  • backfilling; and
  • landscape or hardscape restoration.

Homeowners should also remember that excavation around utilities carries its own safety requirements.

4. Pipe length and diameter

A longer replacement naturally requires more material and labor.

Diameter matters as well because gas piping must be sized for the connected appliance load and system configuration rather than simply matched by appearance.

This becomes particularly relevant when adding equipment such as a tankless water heater, generator, range, pool heater or outdoor kitchen.

5. Number of gas appliances

A property with a furnace and water heater has a simpler gas distribution layout than a property also supplying fireplaces, cooktops, dryers, pool equipment, generators and outdoor appliances.

More branches can make isolation and leak diagnosis more involved.

6. Pipe condition

The visible leak may not always be the only issue.

A professional may recommend evaluating more of the system when testing suggests multiple leakage points or broader deterioration.

That does not automatically mean the entire house needs repiping. The decision should be based on the condition and test results of the actual system.

7. Access and restoration

Opening a wall, excavating a yard or reaching piping in a difficult crawlspace can add labor.

Before approving the project, ask whether the quoted price includes restoring any surfaces disturbed during access.

8. Permit and inspection requirements

Dallas has specific requirements for fuel-gas work and testing. Depending on the circumstances, permit and inspection requirements can therefore become part of the project’s total cost and timeline.


What Are the Warning Signs of a Gas Leak?

Gas leak warning signs including unusual odor, hissing, damaged piping and dead vegetation near a buried gas line
Possible gas-leak warning signs can include an unusual sulfur-like odor, hissing sounds, damaged piping and unexplained vegetation changes

A sulfur-like or rotten-egg odor, unusual hissing, blowing dirt or unexplained dead vegetation near buried piping can indicate a natural gas leak.

PHMSA identifies smell, sound and visible environmental changes among the ways a pipeline release may be recognized.

Potential warning signs include:

  • a distinctive sulfur or rotten-egg-type odor;
  • hissing or roaring near gas piping;
  • blowing dirt near an underground line;
  • continuous bubbling in standing water;
  • dead or discolored vegetation in an otherwise healthy area; or
  • visible damage to gas piping or the meter area.

Natural gas itself is odorless. Gas distribution systems use odorant to make leaks easier to recognize.

However, absence of an odor should not be treated as proof that there is no leak. PHMSA notes that odor is not always a reliable detection method in every situation.

What about a high gas bill?

Unexpected consumption can justify further investigation, but a high bill alone does not prove that the gas piping is leaking.

Weather, heating demand, appliance usage and billing-cycle differences can also affect consumption.

If increased usage occurs alongside an odor, damaged piping or another warning sign, treat the safety concern seriously.


What Should You Do If You Smell Natural Gas?

Safety infographic explaining what to do when natural gas is suspected at a Dallas home
If you suspect a natural gas leak, leave the area, avoid potential ignition sources and contact emergency services and the gas utility from a safe location.

Leave the affected area immediately and contact emergency services and your gas utility from a safe location. Do not remain inside trying to identify where the smell originates.

Atmos Energy’s guidance says customers who smell natural gas should leave immediately and, from a safe distance, call 911 and Atmos Energy at 866-322-8667.

While in the affected area, do not:

  • switch lights on or off;
  • use a phone;
  • smoke;
  • light matches or candles;
  • operate equipment that may create a spark;
  • start or stop a nearby vehicle; or
  • attempt to locate or repair the leak yourself.

Do not treat an emergency gas odor as a normal plumbing appointment.

Once the immediate emergency has been addressed and the property is safe to evaluate, a qualified plumbing professional can diagnose and repair customer-owned piping where appropriate.


Gas Line Repair vs. Replacement

Comparison of localized residential gas line repair and larger gas line replacement work
A localized defect may require only a targeted repair, while extensive damage or broader piping problems can make replacement more appropriate.

Repair is generally appropriate when the defect is isolated and the surrounding piping remains serviceable. Replacement becomes more reasonable when damage is extensive, several leaks are present, the pipe is badly deteriorated or the system must be redesigned for new gas demand.

SituationLocalized repair may make senseReplacement may make sense
Single accessible leaking fitting✓
Short damaged pipe section✓
Multiple leakage points✓
Broad pipe deterioration✓
Damaged underground sectionPossiblyPossibly
New appliance requires system changesPossiblyPossibly
Existing piping cannot adequately serve planned load✓/redesign
Remodeling requires rerouting✓/reroute

The important point is that replacement should follow diagnosis, not simply the age of the house.

Partial replacement

Sometimes only one branch or section needs replacement.

For example, a problem affecting the line serving one appliance does not necessarily mean all gas piping throughout the property must be replaced.

Whole-system replacement

A more extensive repipe may be considered when inspection and testing reveal systemic problems rather than a single failed component.

Because this can become a substantial project, homeowners should ask the plumber to explain:

  1. what failed;
  2. how the failure was confirmed;
  3. which sections require replacement;
  4. whether alternatives exist; and
  5. what testing and inspections will follow.

If you’re comparing a spot repair with partial or complete replacement, schedule a gas line assessment with Supremacy Services so the scope can be based on testing rather than guesswork.


How Do Plumbers Find Gas Leaks?

Supremacy Services technician using professional gas leak detection and pressure testing equipment on residential piping
Professional diagnostic equipment helps technicians investigate suspected gas leaks and evaluate the integrity of gas piping.

Professional gas leak diagnosis can combine visual inspection, approved leak-detection instruments, pressure testing and isolation testing to determine whether the system leaks and narrow down the affected section.

The appropriate procedure depends on the property and circumstances.

Electronic gas detection

Sensitive instruments can detect combustible gas and help investigate suspected leakage.

Professional instruments are especially valuable because smell alone should not be used to prove that a system is leak-free.

Pressure testing

Pressure testing evaluates whether the piping system maintains the required test pressure.

In Dallas, the City’s published gas-test guidelines establish specific procedures for gas tests associated with restoring or establishing service.

Isolation testing

If a system contains several branches, technicians may need to isolate sections to narrow down where pressure loss is occurring.

This can be particularly useful in larger homes and properties with several gas appliances.

Inspection of fittings and appliance connections

Connections, valves, fittings and accessible piping can also be evaluated for signs of leakage or deterioration.

The goal is not simply to establish that gas is escaping. It is to determine where the problem is and what must be repaired before the system can safely return to service.


Do Gas Line Repairs Require a Permit in Dallas?

Depending on the work and circumstances, Dallas fuel-gas work can require a plumbing permit and City inspection.

The City of Dallas currently references the 2021 International Fuel Gas Code with Dallas amendments as part of its adopted construction-code framework.

Dallas’ published Gas Test Guidelines state that when specified conditions require gas testing and inspection, a plumbing permit must be obtained by a qualifying homeowner or a licensed plumbing contractor with a current Responsible Master Plumber license who is registered with the City.

The City’s November 2025 guidelines also specify that the applicable fuel-gas piping test uses an approved diaphragm test gauge and a 3 psi test witnessed by a Dallas plumbing inspector for at least 15 minutes for the circumstances covered by those guidelines.

That is an important reason not to assume that repairing the visible leak is the final step.

Depending on why gas service was interrupted and the scope of work, the process can involve:

Diagnosis → repair → required pressure test → City inspection/release → utility reconnection

Atmos Energy also advises customers whose service was turned off for a leak to have necessary piping or appliance repairs completed, satisfy applicable city inspection or permit requirements, and then arrange reconnection.

What about other DFW cities?

Dallas requirements should not automatically be applied to Plano, Frisco, Richardson, Carrollton, Fort Worth or another municipality.

Permitting and inspection procedures can differ by jurisdiction. A contractor should determine the requirements for the city where the property is actually located.


Dallas and DFW Considerations

Gas-line work in North Texas should be evaluated according to the actual property rather than generalized assumptions about every Dallas home.

Several local circumstances can affect a project.

Buried piping and excavation

Gas piping serving outdoor kitchens, detached structures, pool equipment or other exterior appliances may cross yards or landscaped areas.

Any excavation adds access considerations and the need to account for underground utilities.

Before digging, underground utilities should be located through the appropriate utility-location process.

Remodeling and new appliances

A Dallas homeowner replacing an electric range with gas, installing a gas tankless water heater or adding a generator may need more than a simple branch-line extension.

The existing system should be evaluated to determine whether it is appropriately configured for the proposed additional demand.

Severe weather and property damage

Storm damage, uprooted trees, construction and other physical disturbances can damage or expose gas infrastructure.

Atmos Energy specifically advises customers to leave the area and report exposed or damaged gas lines rather than attempting to handle them.


What Happens During Professional Gas Line Repair?

A gas-line project generally involves several distinct stages.

Step 1: Establish immediate safety

If there is an active suspected leak, emergency safety procedures come first.

Step 2: Diagnose the system

Once conditions permit professional work, the plumber determines what part of the customer-owned system needs attention.

Testing may include pressure testing and leak-detection equipment depending on the circumstances.

Step 3: Explain the repair scope

The homeowner should receive an explanation of:

  • the suspected or confirmed failure;
  • repair versus replacement options;
  • access requirements;
  • permit and inspection requirements;
  • expected restoration work; and
  • price.

Step 4: Complete the repair

The defective fitting, valve or pipe section is repaired or replaced according to the approved scope.

More extensive projects may involve rerouting or replacing larger sections of piping.

Step 5: Test the repaired system

Gas piping should not simply be repaired and assumed safe.

Required testing verifies system integrity.

Step 6: Complete required inspection procedures

Where the City requires inspection, the applicable process must be completed before service is restored.

Step 7: Coordinate restoration of service

When the utility has shut off service, reconnection follows the utility’s required process after repair and applicable inspection requirements have been satisfied.


Gas Leak or Something Else?

Not every unusual odor in a home comes from natural gas.

SymptomPossible source
Sulfur/rotten-egg-type odorPossible odorized natural gas
Sewer odor near drainDry trap or sewer/drain issue
Musty odorMoisture or microbial growth
Burning smell near furnaceHVAC/electrical issue requiring evaluation
Hissing near gas pipingPossible gas leak
Hissing at plumbing fixtureWater-supply issue
Dead vegetation over buried gas routePossible underground leak
Wet yardMore commonly water or drainage related

Do not use this table to dismiss a possible gas leak. If natural gas is reasonably suspected, follow emergency gas-safety procedures first.


Can You Repair a Gas Line Yourself?

Gas leak diagnosis and gas-piping repair are not appropriate trial-and-error DIY projects.

There is a significant difference between noticing a warning sign and proving that a fuel-gas system is safe.

Proper gas work may require:

  • correct pipe sizing;
  • approved piping and fittings;
  • specialized detection equipment;
  • pressure testing;
  • knowledge of fuel-gas code requirements;
  • permits;
  • inspections; and
  • utility coordination.

Texas also regulates plumbing work and plumbing licensing. The Texas State Board of Plumbing Examiners states that Journeyman Plumbers may install, change, repair, service or renovate plumbing under the supervision of a Responsible Master Plumber.

Dallas does provide a homeowner-permit pathway under qualifying conditions for certain residential work, but a homeowner pulling a permit is still responsible for meeting the applicable plumbing-code requirements.

For most homeowners, professional gas-line work is the practical choice because the question is not merely whether the pipe appears fixed—it is whether the complete affected system can pass the required safety testing.


How Can Homeowners Help Prevent Gas Line Problems?

You cannot prevent every piping failure, but several practices reduce avoidable risk.

Do not ignore minor warning signs

A recurring gas odor should never be normalized.

Follow emergency procedures when gas is suspected.

Protect exposed piping

Do not use gas piping as a support for stored materials or equipment.

Report visible physical damage rather than attempting a temporary repair.

Call before digging

Landscaping, fencing and outdoor construction can put buried utilities at risk.

Have underground utilities located before excavation.

Have new gas appliances properly connected

Adding a range, dryer, generator, pool heater, fireplace or tankless water heater can change the demands on a gas system.

The new installation should be evaluated as part of the entire piping system rather than treating the new appliance connection as an isolated fitting.

Maintain gas appliances

Gas piping and the appliances it supplies are related but distinct systems.

Manufacturer-recommended appliance inspection and maintenance can identify equipment problems that might otherwise be mistaken for piping problems.


Questions to Ask Before Approving a Gas Line Estimate

A useful estimate should make the scope understandable.

Ask:

  • Where was the leak or failure found?
  • How was it confirmed?
  • Is this a localized repair or a larger piping problem?
  • Does any additional section need testing?
  • Does the estimate include pressure testing?
  • Are permits and inspection included?
  • Is excavation required?
  • Who handles utility coordination?
  • Does the quote include restoration?
  • What could cause the price to change once work begins?
  • What documentation will I receive after testing or inspection?

Price matters, but comparing two gas-line estimates is difficult unless both estimates cover the same work.


Frequently Asked Questions

How much does a gas line repair cost in Dallas?

Simple accessible repairs may cost a few hundred dollars, while buried-line repairs and extensive replacement can cost several thousand. Recent published DFW contractor guides place common single-point repairs broadly around $250–$1,200, but the actual price depends on diagnosis, access, pipe condition, labor, permits and repair scope.

How much does gas leak detection cost in Dallas?

Published Dallas-area market examples generally place basic leak testing in the low hundreds of dollars, while complex investigations involving buried lines, multiple branches or several appliances can cost substantially more. Always confirm whether the diagnostic fee is separate from repair work.

Who should I call if I smell gas in Dallas?

Leave the affected area immediately. From a safe distance, call 911 and your gas utility. Atmos Energy currently lists 866-322-8667 as its 24-hour emergency number for suspected natural gas leaks.

Can a plumber repair a gas line after Atmos Energy shuts off the gas?

A qualified plumbing professional can perform applicable customer-side repairs. If service was shut off because of a leak, permit, testing, inspection and utility reconnection procedures may apply before service is restored.

Does Dallas require a pressure test after gas-line work?

The City of Dallas publishes Gas Test Guidelines describing circumstances in which gas piping must be tested and inspected. For the situations covered by those guidelines, Dallas specifies an approved diaphragm gauge and a 3 psi test witnessed by a City plumbing inspector for at least 15 minutes.

Is repairing an underground gas line more expensive?

It can be. Underground work may require line locating, excavation, additional labor, approved underground materials and property restoration. The actual difference depends on depth, distance and accessibility.

Should I repair or replace an old gas line?

Age alone should not determine the decision. A localized problem may be repairable, while multiple leaks, substantial deterioration or a system that requires major reconfiguration may make partial or full replacement more practical. Testing should guide the recommendation.

How long does gas line repair take?

An accessible localized repair may be completed relatively quickly, while underground replacement or extensive repiping can take considerably longer. Permit, inspection and utility reconnection requirements can also affect how soon gas service returns.

Can I use a home gas detector to find the leak myself?

A consumer detector can provide an additional warning, but it should not be used as permission to remain inside a building with a suspected leak or as proof that the piping system is safe. If gas is suspected, leave and report the emergency from a safe location.

Who is responsible for the gas line around my Dallas home?

Responsibility depends on which part of the distribution and customer-owned piping system is involved. Atmos Energy states that customer-owned gas piping and appliances are the customer’s responsibility and recommends qualified professional inspection and repair where necessary.


Gas Line Repair in Dallas: Know the Problem Before Choosing the Solution

Gas line repair cost in Dallas is ultimately determined by what failed, where it failed and how much of the system must be repaired to restore safe operation.

A single accessible leak can be very different from an underground failure or a system with several compromised sections. That is why online prices should be treated as budgeting guidance rather than a substitute for diagnosis.

If you smell gas now, leave the area and contact emergency services and your gas utility from a safe location.

For non-emergency gas-line diagnosis, repair or replacement, contact Supremacy Services for professional gas line service in Dallas and the DFW Metroplex. A proper evaluation can determine whether you need leak detection, a localized repair, a new appliance line or more extensive gas piping replacement.

Supremacy Services technician and property manager inspecting a commercial building for wildlife entry points in Dallas

Commercial Wildlife Removal in Dallas: Property Manager’s Guide

Wildlife inside an apartment community, office, warehouse, retail center or other commercial property is more than an inconvenient animal sighting. Property managers may need to determine where the animal entered, whether people or pets have been exposed, whether the building has been damaged and how the entry point can be corrected without creating another problem.

Professional commercial wildlife removal in Dallas should therefore be approached as a property-management problem rather than simply a trapping job. Depending on the species and situation, the response can involve inspection, appropriate removal or exclusion, identification of entry points, contamination assessment and structural prevention.

Texas rules also matter. Different wildlife species are subject to different requirements, and Texas maintains specific restrictions on the transportation of several animals associated with rabies risk.

For a property manager, the objective is straightforward: resolve the immediate wildlife problem while identifying why the building became accessible in the first place.

Table of Contents

  1. What Is Commercial Wildlife Removal?
  2. Why Wildlife Problems Matter to Property Managers
  3. Common Wildlife Problems in Dallas Commercial Properties
  4. Warning Signs Property Managers Should Investigate
  5. What to Do When Wildlife Is Reported
  6. What Professional Wildlife Removal Includes
  7. Trapping vs. Exclusion
  8. DIY vs. Professional Wildlife Removal
  9. Texas Wildlife Rules Property Managers Should Know
  10. How to Prevent Wildlife Problems
  11. Choosing a Wildlife Removal Provider
  12. Frequently Asked Questions

What Is Commercial Wildlife Removal?

Commercial wildlife removal is the process of identifying, controlling and preventing nuisance wildlife activity at a business, apartment community, managed property or other non-residential facility.

The important distinction is that effective wildlife management does not end when an animal disappears.

A commercial response may need to answer five separate questions:

  1. What species is involved?
  2. Where is it entering?
  3. Is an animal currently inside?
  4. Has it damaged or contaminated part of the building?
  5. What building correction will reduce the likelihood of recurrence?

That last question is particularly important for property managers responsible for multiple buildings or recurring maintenance calls.

A raccoon removed from an attic, for example, does not repair the opening that allowed it into the structure.

Dealing with wildlife inside a managed property? Explore Supremacy Services’ professional wildlife trapping and removal options for Dallas and the DFW Metroplex.


Why Wildlife Problems Matter to Property Managers

A wildlife complaint should be investigated according to its actual risk rather than treated automatically as an ordinary pest-control ticket.

Building damage

Animals can exploit or enlarge vulnerable building openings around soffits, vents, roof edges and other penetrations.

Once access is established, the immediate removal problem and the building-envelope problem become two separate maintenance issues.

Tenant and customer concerns

A scratching sound above an apartment ceiling may initially affect one tenant.

An animal appearing in a common hallway, customer area or occupied office is a different situation and may require a faster response.

The property’s response procedure should therefore distinguish between:

  • wildlife observed outdoors;
  • noises inside a wall or ceiling;
  • animals in unoccupied service areas;
  • animals inside occupied spaces;
  • possible human or pet contact.

Contamination

Nesting material, feces, urine and animal remains can create cleanup concerns in attics, roof cavities and other concealed areas.

Property managers should avoid assuming that removing an animal automatically resolves contamination associated with the infestation.

Recurring maintenance costs

Repeated trapping without correcting accessible entry points can leave a property vulnerable to additional wildlife.

That makes exclusion an important part of long-term wildlife management.

Common Wildlife Problems in Dallas Commercial Properties

Common wildlife problems at Dallas apartments, offices, retail centers, warehouses and industrial properties
Different commercial properties can experience different wildlife pressures, making property-specific inspection important.

Different species require different responses. Identification should come before trapping, exclusion or structural repairs.

WildlifeCommon property concernAreas worth inspecting
RaccoonsEntry into roof/attic areas, disturbance around wasteRoof edges, vents, soffits, dumpsters
SquirrelsActivity in attic/roof cavitiesRooflines, vents, tree-adjacent areas
OpossumsShelter beneath or around structuresCrawlspaces, decks, service areas
BatsRoosting in structural openingsRooflines, gaps and upper building areas
SkunksDenning and odor complaintsGround-level voids and sheltered exterior areas
RodentsInterior activity and structural entryUtility penetrations, doors, roofs and service areas

This table is a diagnostic starting point, not a species-identification substitute.

Apartments and multifamily communities

Multifamily properties add complexity because complaints may originate from one unit even though the access point is elsewhere.

Managers may need to coordinate access to occupied units, attics, utility spaces, roofs and exterior areas.

Warehouses and distribution properties

Large exterior perimeters, loading areas and utility penetrations create many locations that may require inspection.

Wildlife management should be coordinated with broader rodent and pest prevention where appropriate.

Offices and retail centers

Suspended ceilings, roof penetrations and shared structural spaces can make the location of an animal difficult to determine from the complaint alone.

In multi-tenant buildings, documenting exactly where noises or sightings occur can make inspection substantially more efficient.

Restaurants and food-service properties

Waste areas and exterior food sources deserve particular attention.

Wildlife activity should also be distinguished from conventional rodent or insect problems requiring a commercial pest-management program.

Warning Signs Property Managers Should Investigate

Repeated noises, droppings, damaged exterior openings, strong unexplained odors and direct wildlife sightings are all reasons to investigate a commercial property.

Look for:

  • scratching, movement or thumping above ceilings;
  • recurring tenant reports from the same building area;
  • droppings in attics or mechanical spaces;
  • nesting material;
  • damaged vents or screening;
  • gaps around roof edges or soffits;
  • disturbed insulation;
  • animal tracks around service areas;
  • persistent unexplained odors;
  • repeated activity around dumpsters;
  • visible wildlife entering or leaving a structural opening.

The location and timing of observations can help narrow the inspection.

For example, a manager should document whether noises occur during daylight or overnight, which floor is affected and whether the complaint is near a roof, exterior wall or utility area.


What Should a Property Manager Do When Wildlife Is Reported?

First isolate the immediate risk, document what was observed and avoid handling the animal. Then determine whether there has been human or pet contact before arranging appropriate professional inspection or animal-control assistance.

Step 1: Document the report

Record:

  • building and unit/suite;
  • date and time;
  • animal description if observed;
  • location;
  • photographs or video when safely available;
  • sounds reported;
  • known entry point;
  • possible contact with a person or pet.

This gives the wildlife professional considerably more useful information than a work order that simply says “animal in attic.”

Step 2: Keep people away from the animal

Do not encourage maintenance staff or tenants to capture wildlife by hand.

Texas DSHS advises people not to handle wildlife, whether it appears healthy or sick.

Step 3: Treat possible exposure differently

A wildlife sighting and an animal bite are not equivalent maintenance events.

If a person may have been bitten or exposed to saliva from a potentially rabid animal, follow public-health guidance rather than treating the event solely as a wildlife-removal call.

Texas DSHS advises washing a bite thoroughly with soap and water and obtaining medical advice promptly.

Step 4: Identify the species and access point

Species identification affects both the appropriate control strategy and the rules that may apply.

Step 5: Do not prematurely seal an active opening

An opening should not simply be closed without determining whether animals remain inside and whether dependent young could be present.

This is particularly important with bats. TPWD currently discourages bat exclusion from May 1 through August 15 because young bats may be unable to fly and can become trapped.

Step 6: Correct the building vulnerability

Once removal or exclusion is appropriately completed, address the structural condition that provided access.

That converts a reactive wildlife call into preventive property maintenance.

What Does Professional Commercial Wildlife Removal Include?

A professional wildlife-control visit should begin with inspection and identification before a removal method is selected.

The exact scope depends on the species and property, but a comprehensive process may involve:

1. Property inspection

The technician investigates reported activity and potential entry locations.

2. Species identification

Treatment decisions should be based on the actual animal involved rather than assumptions from noises alone.

3. Entry-point assessment

Common wildlife entry points on a commercial building including roof edges, soffits, vents and utility penetrations
Roof edges, damaged soffits, vents, utility penetrations and compromised screening can provide wildlife access to commercial properties.

Likely vulnerabilities may include vents, roof transitions, damaged screening, soffits and utility penetrations.

4. Removal or exclusion strategy

The appropriate technique varies by species, building and applicable regulations.

5. Follow-up inspection

The property may require confirmation that activity has stopped before final repairs are completed.

6. Entry sealing and prevention

Structural vulnerabilities are addressed where appropriate so the property is less accessible to future animals.

7. Contamination assessment

If nesting or waste is present, cleanup requirements can be evaluated separately from removal.

Supremacy’s existing wildlife service page describes its process as including trapping/removal, cleanup of nesting messes and exterior entry sealing.

Managing an apartment community, office, retail property or other DFW facility? Request a wildlife inspection to identify the animal, entry points and appropriate removal or exclusion strategy.


Wildlife Trapping vs. Exclusion: What Is the Difference?

Wildlife trapping and removal compared with exclusion and entry-point sealing at a commercial property
Trapping addresses wildlife currently causing problems, while exclusion helps prevent animals from gaining access again.

Trapping addresses an animal; exclusion addresses access to the building. A commercial wildlife plan may require one or both depending on the species and circumstances.

Trapping/removalExclusion
Addresses wildlife currently presentAddresses how wildlife enters
Species-specificBuilding-focused
May require monitoring/follow-upMay involve sealing or screening
Subject to wildlife rulesPrimarily preventive
Does not inherently repair an openingDesigned to reduce future access

This distinction is especially important for property managers comparing contractor proposals.

A bid for “animal removal” and a bid for “removal + exclusion + cleanup” may describe very different scopes of work.

What Affects Commercial Wildlife Removal Cost?

There is no responsible single Dallas price that applies to every commercial wildlife problem.

Pricing can depend on:

  • species;
  • number of animals;
  • building size and complexity;
  • height and roof access;
  • location of the animal;
  • number of entry points;
  • trapping or exclusion method;
  • required follow-up;
  • contamination;
  • structural repairs;
  • number of buildings;
  • after-hours or operational constraints.

For property managers, the better procurement question is therefore not simply “How much per animal?”

Ask what the quote actually includes.

Commercial wildlife proposal checklist

QuestionWhy it matters
What species was identified?Determines appropriate response
Where is the entry point?Helps prevent recurrence
Is trapping or exclusion proposed?Clarifies methodology
How many follow-up visits are included?Affects total scope
Is entry sealing included?Removal alone may leave access
Is cleanup included?Contamination may be separate
Are structural repairs included?Avoids comparing unequal quotes
How will occupied areas be handled?Important for tenant operations
What documentation is provided?Useful for property records
Are applicable wildlife rules considered?Species requirements differ

DIY vs. Professional Wildlife Removal for Commercial Properties

Property staff can perform prevention and documentation, but capture, handling and relocation should not be improvised when wildlife regulations, potential rabies exposure or occupied-building risks are involved.

Maintenance teams can appropriately help by:

  • documenting sightings;
  • inspecting obvious building damage;
  • securing waste;
  • correcting sanitation conditions;
  • keeping exterior doors closed;
  • repairing routine building-envelope defects once appropriate;
  • trimming vegetation where property policy permits;
  • reporting new activity.

The risk increases when staff attempt to:

  • grab or corner an animal;
  • handle bats;
  • relocate trapped wildlife without understanding transport rules;
  • seal an opening while animals remain inside;
  • work around potentially contaminated nesting areas without appropriate precautions.

For a commercial property, professional assistance becomes especially appropriate when wildlife is inside occupied areas, the species is uncertain, there is potential human/pet exposure, activity keeps recurring or the access point cannot be identified.


Texas Wildlife Rules Dallas Property Managers Should Know

Wildlife removal in Texas is species-specific. Property managers should not assume that every nuisance animal can simply be trapped and driven somewhere else.

Raccoons, skunks, foxes and coyotes

Texas DSHS maintains statewide transport restrictions on live raccoons, foxes, skunks and coyotes because of rabies concerns. The state identifies specific exemptions, including certain appropriately licensed pest-management professionals and authorized entities. Release under an applicable exemption is also geographically restricted.

That makes “we’ll catch it and release it somewhere else” an inadequate property-management plan unless the person handling the animal is operating within applicable requirements.

Bats

Bats have specific protections and considerations under Texas wildlife regulations. TPWD states that bats generally may not be hunted, killed or possessed, while providing exceptions involving bats inside or on human-occupied buildings. TPWD also discourages building exclusion between May 1 and August 15 because non-flying young may become trapped.

Rabies exposure

Texas DSHS identifies bats, coyotes, foxes, raccoons and skunks among wildlife of particular rabies concern and advises against handling wild animals.

Property managers should establish a clear escalation procedure for suspected bites or exposures instead of treating these incidents as routine maintenance tickets.

Important: Wildlife regulations can change and circumstances differ by species. Verify current TPWD/DSHS requirements for the animal and situation rather than relying solely on a general property policy.

Wildlife Removal vs. Rodent Control vs. Commercial Pest Control

Not every scratching noise requires the same contractor scope.

ProblemPrimary service
Raccoon in atticWildlife removal/exclusion
Squirrel entering roofWildlife removal/exclusion
Bat colony/entrySpecies-appropriate wildlife exclusion
Rats inside warehouseRodent control and exclusion
Cockroaches in break roomCommercial pest management
Ants around building perimeterPest-control program
Wildlife repeatedly exploiting structural openingWildlife exclusion/building correction

How Can Property Managers Prevent Wildlife Problems?

Wildlife prevention focuses on reducing access, shelter and attractants around the property.

Inspect rooflines

Include vents, roof transitions, soffits and visible exterior openings in routine building inspections.

Maintain waste areas

Keep dumpster and waste-management areas appropriately maintained and address recurring spillage.

Check utility penetrations

Inspect areas where pipes, cables and mechanical services pass through exterior walls.

Maintain doors and loading areas

Large commercial doors and loading areas should close correctly when operations allow.

Manage landscaping

Vegetation should not unnecessarily obstruct inspection of the building perimeter or create easy pathways to vulnerable areas.

Document previous wildlife incidents

Keep records of:

  • species;
  • building;
  • entry point;
  • corrective work;
  • dates;
  • recurring complaints.

For multi-property managers, those records can reveal patterns that isolated work orders do not.

A Practical Wildlife Response Plan for Property Managers

A standardized procedure makes wildlife calls easier for maintenance, tenants and vendors.

Seven-step commercial wildlife response plan for Dallas property managers
A structured response—from documenting the report through removal, repairs and follow-up—helps property managers manage wildlife problems effectively.

Report → Assess exposure → Document → Identify → Inspect → Remove/exclude → Repair → Verify → Record

A work-order template might capture:

FieldRecord
Property/buildingExact location
Unit/suiteIf applicable
Date/timeWhen activity occurred
Animal descriptionSpecies if confirmed
Photo/videoIf safely obtained
Human/pet contactYes / No / Unknown
Interior locationCeiling, attic, office, etc.
Suspected entryLocation
Vendor findingsDiagnosis
Removal methodDocumented response
Exclusion repairsCompleted/pending
Follow-upDate/result

That is far more useful operationally than repeatedly creating generic “wildlife problem” work orders.

How Should Property Managers Choose a Wildlife Removal Company?

Evaluate the scope and process, not merely the initial trapping charge.

Ask prospective providers:

  • How will you identify the species?
  • Will you inspect for entry points?
  • Is exclusion included?
  • How are follow-up visits handled?
  • How will you work around tenants or customers?
  • What happens if dependent young are present?
  • How is contamination handled?
  • Which structural repairs are included?
  • What documentation will management receive?
  • How do you comply with species-specific Texas requirements?

Supremacy already positions its commercial pest program around customized planning, discreet scheduling and reporting, while its wildlife page emphasizes removal plus entry sealing. Those existing pages make appropriate conversion destinations from this guide rather than duplicating their sales content here.

When Should a Dallas Property Manager Call for Wildlife Removal?

Arrange professional assessment when:

  • an animal is inside an occupied building;
  • repeated noises suggest animals inside ceilings or walls;
  • wildlife repeatedly enters the same structure;
  • roof or exterior damage suggests an entry point;
  • tenants repeatedly report wildlife activity;
  • an animal appears trapped or inaccessible;
  • the species cannot be confidently identified;
  • bats are inside or roosting in the structure;
  • contamination is present;
  • a bite or potential exposure has occurred.

Possible human or pet exposure should be handled according to appropriate public-health/animal-control guidance, not merely scheduled as an ordinary service appointment.


Frequently Asked Questions

What is commercial wildlife removal?

Commercial wildlife removal identifies and addresses nuisance wildlife at apartments, offices, warehouses, retail properties and other managed facilities. Effective service may combine inspection, removal or exclusion, entry-point identification and preventive repairs.

What animals commonly require wildlife removal from commercial buildings?

Problems can involve raccoons, squirrels, opossums, bats, skunks and other wildlife. Rats and mice are normally handled through rodent-control and exclusion programs rather than being treated identically to larger wildlife.

Can a Dallas property manager relocate a trapped raccoon?

Do not assume that a trapped raccoon can simply be transported elsewhere. Texas maintains statewide restrictions on transporting live raccoons and several other rabies-risk species, with specified exemptions and conditions.

Should maintenance staff remove a bat?

Staff should avoid handling bats directly. Texas has species-specific rules for bats, and possible human exposure also raises public-health considerations.

Can you seal a wildlife entry hole immediately?

Not necessarily. First determine whether animals remain inside and whether dependent young may be present. Premature sealing can trap animals within the structure.

What’s the difference between wildlife removal and wildlife exclusion?

Removal addresses the animal currently creating the problem. Exclusion addresses structural access points so animals are less likely to enter again.

Does commercial wildlife removal include repairs?

That depends on the contractor and proposal. Property managers should specifically determine whether trapping/removal, exclusion, cleanup and structural repairs are included or quoted separately.

How can apartment managers prevent recurring wildlife problems?

Track previous entry points, maintain rooflines and exterior openings, manage waste areas, inspect utility penetrations and correct structural access after wildlife activity is resolved.

Is commercial wildlife removal the same as commercial pest control?

No. They can overlap, but wildlife management often involves species-specific trapping or exclusion and building repairs, while conventional commercial pest management typically addresses insects and rodents through monitoring, sanitation, exclusion and targeted controls.


Get Commercial Wildlife Help in Dallas & DFW

Supremacy Services technician sealing a commercial roof vent to help prevent future wildlife entry
Wildlife exclusion addresses vulnerable building openings after animal activity has been resolved, helping reduce opportunities for recurrence.

Wildlife management is most effective when the property manager solves both sides of the problem: the animal currently creating the complaint and the building condition that allowed access.

If you manage apartments, offices, retail properties, warehouses or other commercial facilities in Dallas or across the DFW Metroplex, Supremacy Services can inspect the property, identify wildlife activity and determine an appropriate removal and exclusion strategy.

Supremacy Services wildlife control technician inspecting a Dallas home for raccoon, opossum and squirrel activity.

Wildlife Trapping Cost in Dallas: What Homeowners Should Expect

Wildlife trapping in Dallas can range from a relatively straightforward animal-removal visit to a much larger project involving multiple traps, return visits, attic cleanup and repairs to the openings animals used to enter the home.

As a current market reference—not a Supremacy Services price quote—Angi’s 2026 Dallas cost data puts professional wildlife removal at about $606 on average, with a reported range of approximately $225–$1,003. Its Dallas estimate for raccoon removal is roughly $415–$620. Actual quotes can fall outside these ranges because the species, number of animals, accessibility, required follow-up and exclusion work can substantially change the scope.

The most important thing for Dallas homeowners to understand is that trapping and complete wildlife control are not necessarily the same service. Catching an animal addresses the immediate intruder. Finding and securing the entry points addresses how it got inside.

Table of Contents

  1. How Much Does Wildlife Trapping Cost in Dallas?
  2. What Determines the Cost?
  3. Wildlife Trapping Cost by Animal
  4. What Does Professional Wildlife Trapping Include?
  5. Trapping vs. Wildlife Exclusion
  6. Signs You May Need Wildlife Removal
  7. DIY vs. Professional Wildlife Trapping
  8. Texas Wildlife Trapping Rules
  9. How to Prevent Wildlife From Returning
  10. What to Expect From a Wildlife-Control Visit
  11. Frequently Asked Questions

How Much Does Wildlife Trapping Cost in Dallas?

Current third-party Dallas market data places many professional wildlife-removal projects somewhere around $225–$1,003, with an average near $606. Treat those figures as general market benchmarks rather than a guaranteed price for your property.

A technician usually cannot determine the true project cost from the words “animal in my attic” alone.

A home with one readily accessible animal and no significant entry damage presents a very different project from a home with wildlife entering through several roof openings, nesting material in the attic and damaged vents or soffits.

Cost components homeowners should ask about

Cost componentWhat it coversWhy it affects the quote
InspectionIdentifying species, activity and entry pointsLarger or difficult properties require more investigation
Trap setupEquipment and strategic trap placementSpecies and location determine trapping method
Monitoring/follow-upsChecking or resetting trapsMultiple visits increase labor
Animal handlingRemoval after captureRequirements differ by species
ExclusionClosing wildlife entry pointsNumber, size and location of openings matter
CleanupRemoval of nesting/debris where offeredLarger contaminated areas require more work
RepairsRepairing damaged vents, soffits or other openingsDamage can range from minor to extensive

If you are hearing or seeing wildlife around your home, schedule a professional wildlife inspection to identify the animal, entry points and appropriate removal plan before deciding what work is actually necessary


What Determines Wildlife Trapping Cost?

Infographic showing animal type, number of animals, accessibility, service visits, repairs, cleanup and exclusion as wildlife removal cost factors
Wildlife removal pricing depends on the species, number of animals, access, follow-up visits and additional exclusion or cleanup work.

The biggest cost drivers are generally the animal involved, how many animals are present, where they are located, how many service visits are required, and whether the home needs exclusion or cleanup afterward. Current Dallas market guidance similarly identifies nesting location and the number of follow-up visits among important price factors.

1. Type of wildlife

A squirrel in an accessible area does not necessarily require the same equipment or handling process as a raccoon, skunk or animal beneath a structure.

Species identification matters for more than pricing. Texas wildlife regulations differ depending on the animal and what is done with it after capture.

2. Number of animals

One captured animal does not always mean one animal was present.

A professional inspection should look for evidence of continued activity, nesting and potential young before the job is considered complete.

3. Where the animal is located

Accessibility can dramatically affect labor.

Common problem areas include:

  • attics;
  • soffits and rooflines;
  • chimneys;
  • crawlspaces;
  • garages;
  • areas beneath decks or structures;
  • wall or ceiling cavities;
  • yards and landscaping.

An animal moving through an attic may be much easier to address than one whose exact location inside a wall cannot immediately be established.

4. Number of visits required

Wildlife control frequently involves a process rather than a single appointment.

Trap placement, monitoring, capture and verification can require return visits depending on the situation.

5. Entry-point repairs

This is where comparing quotes becomes particularly important.

A quote for trapping only should not automatically be compared with a quote covering trapping + exclusion + repairs + cleanup.

They are different scopes of work.

6. Attic or structural contamination

Supremacy Services technician inspecting a residential attic for wildlife droppings, damaged insulation and animal entry points.

A detailed attic inspection can reveal wildlife activity, contamination, damaged insulation and possible entry points.
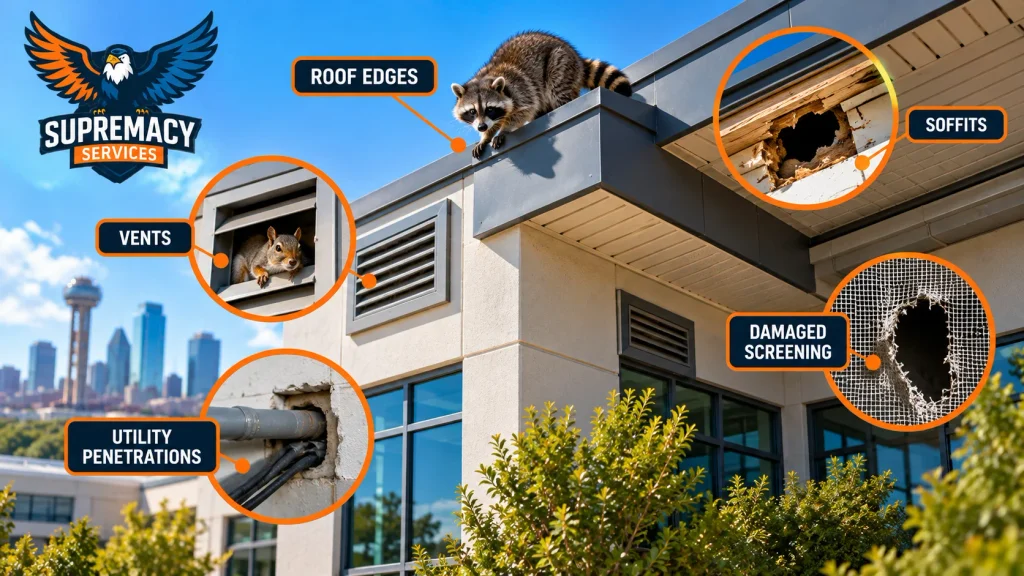
Nesting material, droppings, damaged insulation or other debris may create additional cleanup needs.

The amount of remediation should be determined from actual conditions rather than assumed simply because an animal entered the attic.

Does Wildlife Trapping Cost Differ by Animal?

Yes. Wildlife-removal prices can vary by species because the equipment, location, number of animals, handling requirements and amount of property damage differ.

For example, current Dallas market data from Angi estimates raccoon-removal projects at approximately $415–$620, while its broader wildlife-removal range is considerably wider. These are third-party market estimates, not Supremacy pricing.

AnimalCommon homeowner concernPotential additional work
RaccoonAttic or roof activityEntry repair, attic assessment
OpossumAttic, garage or crawlspace activityExclusion and cleanup
SquirrelScratching around roof/atticRoofline entry sealing
SkunkActivity beneath structures or around yardSpecies-appropriate removal strategy
ArmadilloDigging around lawn or landscapingIdentifying recurring access/activity
Rats/miceAttics, walls and interior spacesRodent trapping plus comprehensive exclusion

Rats and mice deserve their own distinction. Supremacy already has a dedicated Rodent Control & Exclusion service page, so homeowners primarily dealing with rats or mice should be directed there rather than treating every rodent problem as general wildlife trapping.


What Does Professional Wildlife Trapping Include?

A professional wildlife-control plan generally begins with identification and inspection, followed by an appropriate removal strategy and an assessment of how the animal gained access.

Supremacy’s current wildlife service describes its process as a property/roofline inspection, live trapping where appropriate, animal handling and subsequent entry sealing and cleanup.

A practical process looks like this:

Step 1: Identify the animal. Tracks, droppings, noises, damage and visual sightings help determine what is present.

Step 2: Find the entry points. Roof intersections, soffits, vents, chimneys, gaps and foundation-level openings should be inspected.
Step 3: Determine the removal strategy. The appropriate approach depends on species, location and applicable rules.

Step 4: Monitor the situation. Additional activity should be ruled out before openings are permanently closed.

Step 5: Exclude future wildlife. Vulnerable openings are repaired or secured where appropriate.

Step 6: Assess cleanup needs. Nesting material, droppings, odors or damaged materials may need attention depending on the infestation.

Wildlife Trapping vs. Exclusion: What’s the Difference?

Comparison of wildlife trapping and exclusion showing a raccoon trap and technician sealing roofline entry points.
Trapping addresses active wildlife, while exclusion focuses on securing the openings animals use to enter the home.

Trapping removes an animal that is currently causing a problem. Exclusion addresses the openings and conditions that allow wildlife to enter the structure.

TrappingExclusion
Addresses active wildlifeAddresses access into the building
Uses species-appropriate capture/removal methodsSeals or repairs entry points
May require monitoringUsually follows an inspection
Solves the immediate animal problemHelps reduce repeat entry
May be only one part of the jobFocuses on longer-term prevention

This distinction is critical when homeowners compare wildlife-removal prices.

A $300 trapping proposal and a $900 trapping-and-exclusion proposal cannot fairly be compared from price alone without examining what each includes.

Why exclusion can matter after trapping

Imagine a raccoon entered through a damaged roof vent.

Removing that raccoon eliminates the immediate animal. Leaving the damaged vent unchanged leaves the access route available.

That is why Supremacy’s commercial wildlife page emphasizes both removal and exterior entry sealing rather than presenting trapping as the entire solution.

Need to know whether your problem requires trapping alone or trapping plus exclusion? Request a wildlife inspection from Supremacy Services to identify active wildlife and potential entry points


What Are the Signs You May Need Wildlife Removal?

Raccoon, opossum, squirrel, skunk and armadillo associated with residential wildlife problems in Dallas.
The type of animal involved can affect the trapping method, service process and overall removal cost.

Common clues include unexplained attic noises, visible animal entry, damaged vents or soffits, nesting material, droppings, disturbed insulation and recurring animal activity around potential openings.

Pay particular attention to:

  • scratching, movement or heavier thumping overhead;
  • damaged roof or attic vents;
  • gaps around soffits or fascia;
  • nesting material;
  • droppings in attic or garage spaces;
  • insulation that appears disturbed;
  • repeated animal sightings near one part of the house;
  • unusual odors;
  • digging around foundations or landscaping.

The type and timing of noises can provide clues, but sound alone is not enough for reliable species identification.

Wildlife or rodents?

Small scratching sounds inside walls or attics can sometimes indicate rats or mice rather than larger wildlife.

Supremacy maintains a separate rodent-control service specifically focused on mice and rats, including trapping and exterior exclusion.

Can You Trap Wildlife Yourself in Texas?

Homeowners should check the rules for the specific species and intended method before attempting wildlife capture, transport or relocation.

Texas law is more nuanced than simply buying a live trap and releasing an animal elsewhere.

For example, Texas Parks and Wildlife states that landowners or their agents may take nuisance fur-bearing animals on their land under specified circumstances without a hunting or trapping license. But relocation is subject to additional requirements, including authorization and permission involving the release property. TPWD also states that transporting live raccoons, foxes and coyotes within Texas is prohibited under rabies-quarantine rules.

TPWD separately states that anyone trapping and relocating nuisance fur-bearing animals must obtain authorization from its Wildlife Division.

That makes DIY relocation particularly important to research before, not after, an animal has been captured.

DIY may also create practical problems

Even where a particular capture method is lawful, homeowners must still consider:

  • correct species identification;
  • young animals that may remain behind;
  • safe trap placement;
  • handling risks;
  • what can legally be done after capture;
  • whether additional animals are present;
  • locating the original entry point.

The trap itself is often the simplest part of a wildlife problem.

What Texas Wildlife Rules Should Dallas Homeowners Know?

Texas wildlife laws vary according to species, circumstances, method and what happens to the animal after capture.

TPWD currently states that nuisance fur-bearing animals may be taken by landowners or their agents under specific conditions, while capture and relocation require additional authorization. Texas also restricts transport of certain live rabies-vector species, including raccoons.

For nongame wildlife, TPWD publishes separate rules. Its current regulations identify animals including armadillos among nongame species and specify applicable requirements for take.

Texas also regulates structural pest-control businesses. The Texas Department of Agriculture says businesses performing structural pest control for compensation are subject to licensing requirements, and its definition includes inspection, recommendations and control of pest animals in and around structures.

Homeowner takeaway: don’t assume every wild animal can legally be trapped, transported and released wherever you choose. Check the current rule for the particular species and situation.


How Can Dallas Homeowners Reduce Future Wildlife Problems?

Wildlife exclusion technician securing roof vents, soffits, roofline openings, chimney and foundation access points on a home
Securing vulnerable vents, soffits, rooflines, chimneys and foundation openings can help reduce recurring wildlife entry.

The most effective prevention strategy is usually to reduce access to the structure and correct vulnerable openings identified during inspection.

Check areas such as:

Roof and soffit openings

Inspect damaged soffits, fascia, roof transitions and other openings where animals could gain access.

Vents

Damaged or unsecured vents can create access into attic or structural spaces.

Chimneys

Appropriate chimney protection can help prevent animal entry while maintaining the ventilation the system requires.

Foundation and crawlspace openings

Inspect damaged covers, gaps and other accessible openings around the lower structure.

Food attractants

Secure trash and avoid unintentionally providing easily accessible food sources around the property.

Tree and roof interaction

Branches touching or overhanging roofs can provide wildlife with easier access to parts of a home’s exterior.

The objective isn’t to make a property “wildlife-proof” in an absolute sense. It is to identify and correct realistic entry vulnerabilities.


What Should You Expect From a Professional Wildlife-Control Visit?

A good wildlife-control visit should help answer five questions:

  1. What animal is causing the problem?
  2. Where is it active?
  3. How is it getting into or around the property?
  4. What removal method is appropriate?
  5. What needs to change to reduce the chance of recurrence?

Before approving work, ask whether your quote includes:

  • inspection;
  • trap setup;
  • trap monitoring;
  • follow-up visits;
  • captured-animal handling;
  • exclusion;
  • minor entry-point repairs;
  • cleanup;
  • attic remediation;
  • warranty or follow-up terms, where offered.

Getting these details in writing makes price comparisons much more meaningful.

Questions to Ask Before Accepting a Wildlife-Trapping Quote

Use this checklist:

☐ What animal do you believe is present?
☐ How was the species identified?
☐ How many traps or removal devices are expected?
☐ Are follow-up visits included?
☐ What happens after an animal is captured?
☐ Does the price include exclusion?
☐ Which entry points need repair?
☐ Is attic cleanup actually necessary?
☐ Are repairs included or separately quoted?
☐ What could cause the final price to change?

This helps prevent a low initial trapping price from being mistaken for the total cost of resolving the wildlife problem.


Frequently Asked Questions

How much does wildlife trapping cost in Dallas?

Current third-party Dallas market data from Angi reports wildlife removal at about $606 on average, with a broad range of approximately $225–$1,003. Actual prices vary according to species, location, follow-up visits and additional services.

Is wildlife trapping the same as wildlife removal?

Not necessarily. Trapping focuses on capturing an active animal. Complete wildlife control may also include inspection, follow-up, exclusion, repairs and cleanup.

Does wildlife trapping include sealing entry holes?

It depends on the provider and proposal. Ask specifically whether exclusion is included rather than assuming entry-point repairs are part of the trapping price.

How much does raccoon removal cost in Dallas?

Angi’s current Dallas market guide estimates approximately $415–$620 for raccoon removal. This is a third-party market estimate rather than a Supremacy Services quote.

Can I relocate a raccoon after trapping it in Texas?

Texas places restrictions on the transport of live raccoons. TPWD’s nuisance fur-bearing animal guidance states that transporting live raccoons within the state is prohibited under rabies-quarantine rules. Check current TPWD requirements rather than assuming relocation is permitted.

Why do wildlife-removal companies inspect the attic?

The inspection can help identify the animal, evidence of additional wildlife, nesting areas, possible entry points and damage that may affect the removal and exclusion plan.

Why does wildlife exclusion cost extra?

Exclusion can involve locating and repairing multiple openings around rooflines, vents, soffits or other parts of a structure. Its scope therefore depends heavily on the condition and construction of the individual property.

Are rats and mice considered wildlife trapping?

For service and SEO purposes, they are better treated separately. Supremacy has a dedicated Rodent Control & Exclusion service specifically targeting rat and mouse problems.

How do I compare two wildlife-removal quotes?

Compare the scope rather than the bottom-line number alone. Determine whether inspection, trapping, follow-up visits, animal handling, exclusion, repairs and cleanup are included in each proposal.


Finding an animal is only the first part of solving a wildlife problem. Identifying what is present, how it entered and whether other animals remain helps determine whether trapping alone is sufficient or whether exclusion and cleanup should also be considered.

For Dallas and DFW homeowners dealing with activity in an attic, roofline, crawlspace or around the home, request a wildlife inspection from Supremacy Services to determine the appropriate removal and exclusion plan.

Supremacy Services wildlife technician inspecting a crawl-space entry point with an opossum outside a Dallas home

Opossum Removal Cost in Dallas: Trapping, Exclusion & Repair Costs

Opossum removal cost in Dallas can range from a relatively small trapping job to a much larger wildlife-exclusion and restoration project. Current third-party 2026 pricing data puts straightforward professional opossum removal around $150–$350 nationally, while broader Dallas wildlife-removal projects average about $606, with reported Dallas projects spanning roughly $225–$1,003 depending on the animal, location, severity and number of visits. Local DFW market pricing published by one wildlife-control provider lists basic opossum removal around $200–$500, with removal plus exclusion, repairs or cleanup potentially costing substantially more.

Those figures are market estimates, not Supremacy Services pricing. The actual cost depends on where the opossum is living, whether there are young present, how many visits are necessary, how the animal entered the home, and whether the attic, crawl space, soffit, vent or foundation needs cleaning or repair.

For Dallas homeowners, the most useful question is therefore not simply “How much does it cost to trap an opossum?” It is:

What will it cost to remove the animal, correct the entry point and restore any affected part of the house?

Table of Contents

  1. How Much Does Opossum Removal Cost in Dallas?
  2. What Is Included in Opossum Removal?
  3. What Affects Opossum Removal Cost?
  4. Trapping vs. Exclusion vs. Repairs
  5. Why Is an Opossum Living Around Your House?
  6. Signs You May Have an Opossum
  7. Can You Remove an Opossum Yourself?
  8. Texas Rules for Trapping and Relocating Opossums
  9. Opossum vs. Raccoon vs. Rat
  10. How Professional Opossum Removal Works
  11. How to Help Prevent Opossums From Returning
  12. Frequently Asked Questions

How Much Does Opossum Removal Cost in Dallas?

Infographic showing trapping, exclusion, cleanup and repair components that can affect opossum removal costs in Dallas
The total cost of an opossum problem may include removal, wildlife exclusion, cleanup and repairs—not trapping alone.

For a straightforward situation involving one accessible animal, a few hundred dollars is a reasonable market-planning range, but the cost can rise when removal involves an attic or crawl space, repeated trap checks, exclusion work, contaminated materials or building repairs.

The following table combines currently published third-party market information. It should be treated as a budgeting reference rather than a Supremacy quote.

SituationPublished Market ReferenceWhat Can Affect the Final Cost
Straightforward opossum removalAbout $150–$350 nationallyMethod, animal count, visits
Local DFW basic opossum removalAbout $200–$500Accessibility and removal complexity
Dallas wildlife removal generallyAbout $225–$1,003Species, nesting location and follow-up visits
Attic/crawl-space opossum removalLocal provider reports $400–$1,000Confined access, labor and location
Removal + exclusionLocal provider reports roughly $600–$2,500+Number of openings, repairs and property conditions
Cleanup/restorationSite-specificContamination, insulation, odor and damaged materials

The most important distinction is between removing the animal and solving the property problem that allowed it inside.

A low trapping price can become poor value if an entry opening remains accessible and wildlife simply enters again.


What Is Included in Opossum Removal?

Professional wildlife removal can involve considerably more than putting a cage in the yard.

Depending on the property and scope, service may include:

  • inspection of the attic, crawl space, garage, roofline and foundation;
  • identification of the animal and activity areas;
  • locating possible entry and exit points;
  • selecting an appropriate removal strategy;
  • trap placement and required monitoring;
  • checking for dependent young;
  • removal of the animal;
  • evaluation of contaminated or disturbed materials;
  • sealing accessible wildlife entry points;
  • repairing damaged vents, soffits or other components when included in the proposal; and
  • recommendations for reducing future wildlife attraction.

Supremacy’s dedicated wildlife service page describes its service around inspection, wildlife removal, entry sealing and cleanup rather than trapping alone.

Have an opossum in an attic, crawl space or garage? Schedule a wildlife inspection with Supremacy Services to identify the animal, locate entry points and determine the appropriate removal and exclusion scope.


What Affects Opossum Removal Cost?

Dallas home showing possible opossum entry areas including roof gaps, soffits, attic vents, garage gaps, crawl-space vents and utility openings
Opossums may take advantage of accessible openings around crawl spaces, garages, vents and other vulnerable exterior areas.

1. Where the opossum is located

An opossum walking across the backyard is very different from one denning:

  • beneath a deck;
  • underneath a shed;
  • inside a crawl space;
  • behind stored items in a garage;
  • inside an attic; or
  • in a difficult structural void.

Hard-to-access locations generally require more inspection and labor.

2. How many animals are present

What appears to be one animal may involve a female with young.

That matters because closing an opening without determining whether animals remain inside can turn an exclusion project into a much more difficult problem.

3. Number of service visits

Trap-based removal may require return visits.

Texas regulations specify inspection requirements for traps used to take fur-bearing animals. TPWD states that snares, foothold traps, body-grip traps and live or box traps used for fur-bearing animals must be examined at least once every 36 hours and animals removed.

More visits can therefore increase labor and project cost.

4. Number and size of entry points

Finding the opossum does not necessarily reveal how it entered.

A technician may need to inspect:

  • crawl-space vents;
  • damaged vent covers;
  • openings around foundations;
  • garage-door gaps;
  • soffit damage;
  • roof transitions;
  • utility penetrations; and
  • damaged exterior components.
The larger the exclusion scope, the more material and labor the project can require.

5. Cleanup requirements

Opossums can occupy areas where droppings, urine, nesting debris or odors accumulate.

Cleanup pricing depends on the affected area and materials involved rather than simply the presence of the animal.

6. Property repairs

An exclusion estimate and a repair estimate are not always the same thing.

For example, sealing an accessible wildlife opening may be relatively straightforward, while repairing damaged siding, soffits, crawl-space vents, insulation or another building component can require additional materials or another trade.

Ask for a written estimate identifying exactly what is—and is not—included.


Trapping vs. Exclusion vs. Repairs

Wildlife technician removing an opossum with a live trap and sealing a home entry point with metal screening
Trapping addresses the active animal, while exclusion helps close the entry points wildlife used to access the home.

These three services solve different parts of the problem.

ServiceMain PurposeDoes It Solve the Current Animal Problem?Does It Help Prevent Re-entry?
Trapping/removalRemove active wildlifeYesNot by itself
ExclusionClose wildlife access pointsHelps complete the solutionYes
CleanupRemove affected debris/materialNoIndirectly
Repair/restorationRestore damaged building componentsNoSometimes
PreventionReduce food, shelter and accessNoYes

Why trapping alone may not be enough

If an opossum entered through a damaged crawl-space vent, removing that animal leaves the underlying access point unchanged.

That is why a complete wildlife-control plan should answer two separate questions:

  1. How will the animal be removed safely?
  2. How will the access point be corrected afterward?

Why Is an Opossum Living Around Your House?

Opossums are opportunistic omnivores and can be attracted to food and shelter around residential properties.

Texas A&M AgriLife specifically notes attractants including pet food, fruit, pecans, bird seed and garbage.

Around a DFW home, potential attractants can therefore include:

  • pet food left outside overnight;
  • accessible trash;
  • fallen fruit;
  • bird-feeding areas;
  • sheltered spaces beneath decks or sheds;
  • accessible crawl spaces;
  • open garages; and
  • existing structural openings.

An opossum passing through the yard does not automatically mean the home has an infestation. The concern increases when there is repeated activity around the same structural opening or evidence that an animal is denning inside or beneath the building.


Signs You May Have an Opossum

Possible signs include:

  • heavier movement or thumping at night;
  • repeated activity beneath a deck or porch;
  • an animal entering a crawl-space opening;
  • disturbed insulation or stored materials;
  • droppings in a sheltered area;
  • persistent animal odors;
  • damaged vent screens;
  • repeated sightings around the garage; or
  • pet reactions around one particular wall, crawl space or exterior opening.

Do not identify the animal from sound alone

Nighttime noises can also come from rats, mice, raccoons, squirrels or other wildlife.

The size, timing, location of the noise, droppings, tracks and entry-point evidence can help with identification, but visual confirmation or a professional inspection is more reliable than guessing from scratching sounds.


Can You Remove an Opossum Yourself?

A homeowner may be able to address simple outdoor attractants without trapping—for example, securing garbage or removing overnight pet food.

An opossum inside an attic, crawl space or structural void is a different situation.

DIY trapping can create several problems:

  • capturing the wrong animal;
  • separating a mother from dependent young;
  • handling a frightened wild animal;
  • failing to monitor a trap appropriately;
  • not knowing where a captured animal may legally be released;
  • sealing an opening while another animal remains inside; or
  • removing one animal while leaving the entry point available.

Wild animals can bite or scratch when frightened. CDC advises avoiding contact with wildlife and obtaining medical/public-health guidance after potential bites or scratches. Although opossums are not among the wildlife species CDC identifies as the principal U.S. rabies reservoirs, any mammal can potentially acquire rabies.

If someone has been bitten or scratched, treat that as a health issue rather than a pest-control question and seek appropriate medical/public-health guidance.


Texas Rules for Trapping and Relocating Opossums

Opossums are classified by the Texas Parks and Wildlife Department as fur-bearing animals.

For nuisance situations, Texas rules deserve particular attention.

TPWD states that landowners or their agents may take nuisance fur-bearing animals causing damage on their land without a hunting or trapping license. However, Texas also places specific restrictions on possession and relocation.

Can you simply trap an opossum and release it somewhere else?

Not automatically.

TPWD states that nuisance fur-bearing animals may be captured and relocated when the person has:

  • authorization from the department; and
  • permission from the owner of the property where the animal will be released.

TPWD also requires reporting for authorized nuisance relocation.

That is an important reason homeowners should not assume that driving a trapped opossum to a park, creek or vacant property is automatically lawful.

Regulations can change, so verify current TPWD requirements before trapping or relocating wildlife.


Opossum vs. Raccoon vs. Rat: What Might Be in Your Attic?

Visual comparison of an opossum, raccoon and rat with common sounds, locations and identification features for Dallas homeowners
Opossums, raccoons and rodents can produce similar nighttime noises, making correct wildlife identification an important first step.

Correct identification affects both the removal method and the cost.

ClueOpossumRaccoonRats/Mice
Typical soundHeavier movementHeavy movement/thumpingLight scratching/scurrying
Common residential shelterCrawl spaces, decks, garages, sometimes atticsAttics, chimneys, roof areasAttics, walls and utility openings
Animal sizeMediumMedium-largeSmall
Exclusion needOftenOftenUsually
Identification from sound alone reliable?NoNoNo

Supremacy has a separate Rodent Control & Exclusion service for rats and mice, while opossums and raccoons belong under the broader wildlife-removal service. Keeping those service intents separate helps both users and search engines understand the site architecture.


How Professional Opossum Removal Works

Six-step opossum removal process showing property inspection, checking for young, removal, exclusion, cleanup and repairs
A complete opossum-control plan may progress from inspection and removal to entry-point exclusion, cleanup and necessary repairs.

Step 1: Inspect the property

The first objective is to confirm the species and determine where the animal is entering or sheltering.

Inspection may include the roofline, attic, garage, crawl space, vents and foundation.

Step 2: Determine whether young are present

Wildlife removal should account for dependent young before openings are permanently closed.

Step 3: Choose the appropriate removal method

The correct method depends on the animal’s location, building configuration and applicable wildlife rules.

Step 4: Monitor the removal

If traps are used, they need appropriate placement and inspection.

Step 5: Confirm the structure is clear

Closing an entry point before confirming animals are out can trap wildlife inside.

Step 6: Complete exclusion work

Once appropriate, accessible openings can be secured using materials suitable for the particular building component.

Step 7: Evaluate cleanup and repairs

The final inspection should determine whether there are:

  • contaminated materials;
  • damaged insulation;
  • odor issues;
  • damaged vents;
  • soffit or fascia problems; or
  • other components requiring repair.

If the opossum is already inside your attic or crawl space, request a Dallas wildlife inspection before sealing the opening. Supremacy Services can evaluate removal, entry-point exclusion and any visible cleanup or repair needs as one coordinated scope.


How to Help Prevent Opossums From Returning

The best prevention strategy combines food-source control with structural exclusion.

Around the yard

  • Keep garbage containers secured.
  • Avoid leaving pet food outside overnight.
  • Clean up fallen fruit when practical.
  • Manage accessible food around bird-feeding areas.
  • Avoid intentionally feeding wildlife.

Texas A&M AgriLife advises against feeding wildlife such as opossums and identifies human food sources as a factor bringing these animals into human environments.
Around the house

Check accessible areas for:

  • damaged crawl-space vents;
  • loose vent covers;
  • gaps around utility penetrations;
  • damaged soffits;
  • garage-door gaps;
  • openings beneath decks or additions; and
  • deteriorated exterior materials.
Do not permanently seal an active opening until you are confident no wildlife or dependent young remain inside.
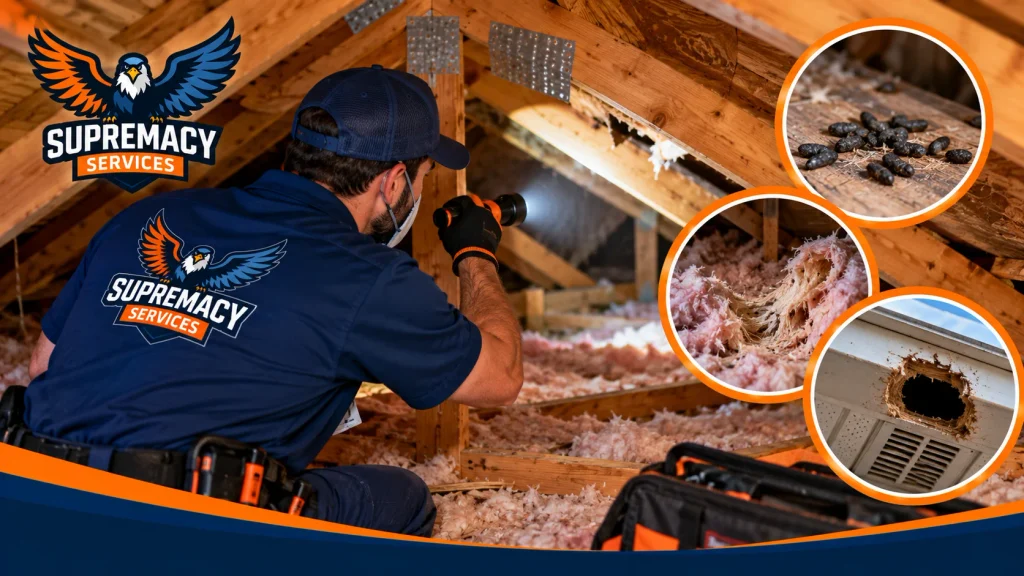

Is an Opossum Around the Yard Always a Problem?

No.

Seeing an opossum outdoors does not automatically justify removal. Opossums are native wildlife and can simply be moving through a property.

Professional intervention becomes more relevant when the animal:

  • is living inside the structure;
  • repeatedly enters a crawl space or garage;
  • is causing property damage;
  • cannot safely exit;
  • has young in a structure;
  • is creating contamination or persistent odor; or
  • creates a situation where people or pets may come into close contact with it.

The objective should be to solve an actual wildlife conflict rather than remove every opossum that passes through a Dallas yard.


What Should a Dallas Opossum Removal Estimate Include?

Before comparing quotes, ask whether the estimate includes:

  • species/activity inspection;
  • removal or trapping;
  • trap monitoring and return visits;
  • checking for young;
  • entry-point identification;
  • exclusion materials;
  • roofline or crawl-space work;
  • cleanup;
  • odor treatment if needed;
  • insulation removal or replacement if needed;
  • structural repairs;
  • final inspection; and
  • any applicable service warranty or follow-up terms.

A $250 trapping quote and a $900 removal-and-exclusion proposal may not represent competing prices for the same scope.

Compare the work included, not just the headline price.


Frequently Asked Questions

How much does it cost to remove an opossum in Dallas?

Published 2026 market data suggests straightforward opossum removal often costs a few hundred dollars, while projects involving attics, crawl spaces, multiple visits, exclusion, cleanup or repairs can cost considerably more. The property should be inspected before relying on a fixed estimate.

How much does it cost to remove an opossum from an attic?

Attic removal generally costs more than removing an easily accessible animal because access, inspection, trapping, exclusion and cleanup may all be involved. One DFW market source publishes approximately $400–$1,000 for more involved attic/crawl-space opossum removal, but that is a third-party market estimate rather than Supremacy pricing.

Is trapping enough to stop opossums from coming back?

Not necessarily. If the animal entered through a structural opening, removal solves the immediate animal problem while exclusion addresses the access point.

Can I relocate a trapped opossum in Texas?

Relocation is regulated. TPWD says nuisance fur-bearing animals may be relocated with department authorization and permission from the owner of the release property, along with applicable reporting requirements.

Do opossums carry rabies?

Any mammal can potentially acquire rabies, but CDC does not list opossums among the primary wildlife rabies reservoirs in the United States; bats, raccoons, skunks and foxes are the major wildlife groups identified. Avoid handling wildlife regardless.

What attracts opossums to Dallas homes?

Accessible food and shelter can attract them. Texas A&M AgriLife specifically identifies pet food, fruit, pecans, bird seed and garbage as food sources associated with nuisance opossum activity.

Should I seal an opening if I see an opossum using it?

Not until you know the structure is clear. Closing an active opening can trap an animal—or dependent young—inside.

Is an opossum in my yard an emergency?

Usually, simply seeing an opossum outdoors is not an emergency. The situation deserves more attention when wildlife is inside the home, trapped, injured, behaving unusually, causing damage or creating close-contact risks.

What is the difference between opossum removal and exclusion?

Removal gets the active animal out. Exclusion closes the access points that allowed wildlife into the structure. For a long-term solution, a property may require both.

Get an Opossum Problem Properly Assessed

The cheapest opossum removal is not necessarily the lowest-priced trap.

For a homeowner with wildlife inside a Dallas-area house, the real objective is to determine:

What animal is present? How did it get in? Are there young? What needs to be removed? What needs to be sealed? And what, if anything, needs to be cleaned or repaired?

Supremacy Services’ wildlife service is designed around that broader removal-and-exclusion approach for opossums, raccoons, squirrels, skunks and other nuisance wildlife in the Dallas–Fort Worth area.

Need an opossum removed from your Dallas-area home? Schedule Wildlife Trapping & Removal with Supremacy Services for an inspection of the animal activity, entry points and appropriate exclusion scope.

Pest control technician inspecting an active wasp nest beneath the roof eave of a Dallas home

Wasp Nest Removal Cost in Dallas: 2026 Pricing Guide

Wasp nest removal in Dallas generally costs about $309 to $722 in 2026, with a reported local average around $541. The actual price can be lower for a small, exposed paper-wasp nest and considerably higher when yellowjackets or other stinging insects are nesting underground, inside a wall, in an attic or high above the ground. Current Dallas market data places a typical mid-sized removal at roughly $515.

The biggest cost factors are not simply the size of the nest. Species, nest location, accessibility, number of nests, treatment requirements and whether structural access is needed can all change what a Dallas homeowner ultimately pays.

This guide explains what homeowners should reasonably expect to pay, what makes some removals more expensive, when DIY removal may be inappropriate and what professional wasp removal should actually include.

Table of Contents

  1. How Much Does Wasp Nest Removal Cost in Dallas?
  2. Wasp Removal Cost by Type
  3. What Affects Wasp Nest Removal Cost?
  4. Why Hidden Nests Cost More
  5. How to Tell What Kind of Wasp Nest You Have
  6. DIY vs. Professional Wasp Removal
  7. What Professional Wasp Removal Includes
  8. How to Prevent Wasps From Returning
  9. When Should You Call a Professional?
  10. Frequently Asked Questions

How Much Does Wasp Nest Removal Cost in Dallas?

Infographic showing how wasp species, nest location, colony size, accessibility and number of nests affect removal cost
Wasp removal pricing can vary based on the species, location, size, accessibility and number of active nests.

For Dallas homeowners, a useful 2026 market benchmark is approximately $309–$722 for professional wasp nest removal, with an average around $541 according to current Dallas-specific pricing data from Angi. These are market estimates rather than regulated prices or a Supremacy Services price list.

National cost guides provide a similar benchmark. HomeAdvisor reports a typical professional range of roughly $300–$700, while HomeGuide also places average removal around $300–$700.

Removal situationUseful 2026 market benchmark
Small/simple accessible nestMay begin around $100–$150 nationally
Typical professional removal$300–$700
Dallas reported range$309–$722
Dallas reported averageAbout $541
Difficult yellowjacket removalCan exceed the normal range
Hidden wall/attic nestOften higher because of access complexity

These figures should be treated as planning estimates rather than quotes. A technician needs to identify the insect and determine exactly where the colony is located before an accurate price can be established.

Why can two wasp nests have very different prices?

Imagine one small paper-wasp comb hanging beneath a first-floor porch roof and another colony disappearing through a gap beneath a second-story soffit.

Both homeowners might say, “I have a wasp nest.”

They are not necessarily the same job.

The first colony is visible and readily accessible. The second may extend into a concealed structural void, requiring additional investigation, treatment and access precautions.

That difference is why nest location and accessibility often matter as much as visible size.

Not sure whether the nest is exposed or hidden inside your home? See how professional wasp and hornet nest removal in Dallas works before attempting to disturb it.


Wasp Removal Cost by Type

The species matters because different wasps have different nesting habits and defensive behavior.

Current consumer pricing guides report substantial variation between paper-wasp, hornet and yellowjacket jobs. For example, HomeGuide reports paper-wasp removal at roughly $150–$350 nationally while more difficult yellowjacket work can run considerably higher. These are third-party market estimates, not fixed Dallas rates.

Paper wasps

Paper wasps commonly construct an exposed, open-cell paper nest beneath sheltered surfaces.

Texas A&M AgriLife describes paper-wasp nests as open underneath rather than surrounded by a papery envelope. They commonly nest under eaves and other protected locations.

Because the nest may be visible and accessible, a straightforward paper-wasp job can fall toward the lower end of professional removal pricing.

However, accessibility still matters. A nest beneath a two-story roofline is a different safety problem from one attached to an easily reached fence.

Yellowjackets

Yellowjackets can make removal substantially more complicated.

Texas A&M notes that southern yellowjackets may establish colonies underground, in walls or even indoors. They can sting repeatedly, and their concealed nesting behavior means homeowners may see only an entrance rather than the actual colony.

Consequently, underground and structural-void yellowjacket colonies can cost more to address than a small exposed paper-wasp nest.

Hornets and aerial nests

Some social wasps construct enclosed aerial nests in trees or beneath building surfaces. Height, colony activity and the equipment required to reach the nest safely can all affect the service scope.

Mud daubers and solitary wasps

Not every intimidating wasp around a Dallas home represents an aggressive social colony.

Many solitary wasps have very different behavior. University Extension guidance notes that solitary wasps generally do not defend their nests in the same way yellowjackets do. Mud-dauber nests, for example, may sometimes simply be removed when inactive.

Correct identification can therefore prevent homeowners from paying for — or attempting — treatment that is unnecessary.


What Affects Wasp Nest Removal Cost?

Six factors usually have the greatest effect on what a wasp-removal job costs.

1. Nest location

Location is one of the strongest pricing factors.

An exposed nest beneath a first-floor eave is normally easier to inspect and access than one located:

  • inside a wall void;
  • behind siding;
  • beneath a roof or soffit;
  • inside an attic;
  • underground;
  • inside a chimney;
  • high in a tree or roofline.

Hidden nests can require a different treatment approach because the visible opening may not be where the colony itself is located.

2. Height and accessibility

Second-story rooflines, steep roofs and confined areas can increase the amount of equipment, time and safety preparation required.

Avoid thinking of a high nest as simply “the same nest with a taller ladder.” Working at height while dealing with defensive stinging insects introduces another hazard.

3. Wasp species

Paper wasps, yellowjackets and solitary wasps do not behave identically.

Identification helps determine:

  • whether treatment is actually necessary;
  • how defensive the colony may be;
  • where the nest is likely located;
  • the appropriate treatment strategy;
  • whether physical nest removal is possible.

4. Colony and nest size

A newly developing exposed nest and a mature colony are different service calls.

Social-wasp colonies begin with queens establishing nests and increase as workers are produced. Texas A&M documents the seasonal colony development of common Texas wasps, making early identification useful before a nest becomes larger and more active.

5. One nest vs. multiple nests

A property inspection may reveal more than the nest that originally attracted attention.

Porches, sheds, fences, eaves and other sheltered areas can provide multiple potential nesting locations.

Ask whether the estimate covers:

  • one nest only;
  • inspection of the surrounding structure;
  • additional nests discovered during service;
  • nest removal after treatment;
  • follow-up treatment if activity remains.

6. Structural access or repairs

A colony behind siding or inside a wall may require more than exterior treatment.

If opening and subsequently repairing part of a structure is necessary, clarify whether that work is included in the pest-control quote or handled separately.


Why Hidden Wasp Nests Can Cost More

Wasps entering a damaged soffit opening with a concealed nest inside the roof cavity
Repeated wasp traffic through a soffit or wall opening can indicate a concealed nest inside the structure.

A hidden nest is usually more difficult because technicians must determine where the colony is located without relying solely on the visible entry point.

Yellowjackets can establish nests in wall voids, attics and other cavities. Extension guidance specifically describes hidden yellowjacket colonies inside buildings as more challenging to control and generally better suited to professional pest management.

One particularly important mistake to avoid is immediately sealing an active entry hole.

If insects are still using a structural cavity, blocking their normal route does not necessarily eliminate the colony. Extension guidance warns against sealing the opening until yellowjacket activity has been eliminated because displaced insects may seek another exit.

Signs the nest may be inside the structure

Look for repeated wasp traffic entering and leaving:

  • a soffit gap;
  • siding;
  • an attic vent;
  • a crack around exterior trim;
  • a wall penetration;
  • a roof intersection;
  • another small structural opening.

Seeing individual wasps indoors can also warrant further investigation, particularly when repeated activity occurs near the same wall or ceiling area.

If wasps are repeatedly entering a wall, soffit or roof opening, avoid sealing the opening until the colony has been assessed. Schedule a wasp-nest inspection with Supremacy Services to determine where the activity is coming from.


How to Tell What Kind of Wasp Nest You Have

Comparison of paper wasp, yellowjacket, hornet and mud dauber nests found around Dallas homes
Identifying the type of wasp and nest helps determine the appropriate approach to removal.

Identification matters because homeowners often use “wasp,” “hornet,” “yellowjacket” and even “bee” interchangeably.

What you seePossible identificationTypical nesting pattern
Open umbrella-like paper combPaper waspEaves, porches, sheltered structures
Heavy traffic through a ground openingYellowjacketUnderground cavity
Repeated traffic through siding/soffitYellowjacket or another cavity-nesting waspStructural void
Enclosed paper aerial nestSocial wasp/hornet-type colonyTree, shrub or structure
Mud tubes/cellsMud dauberSheltered wall, garage or eave
Hairier insects entering wax-comb colonyPossibly honey beesTree or structural cavity

Texas A&M notes that honey bees tend to have hairier bodies, while wasps generally appear smoother and have more distinct narrow waists. Their nests also differ: honey bees construct wax comb, while social wasps construct paper-like nests.

Don’t automatically treat bees as wasps

A cluster of flying insects entering a building does not prove that you have yellowjackets.

If the insects appear to be honey bees, proper identification should come first. Texas A&M specifically recommends identifying the insects before deciding how a colony should be managed.


DIY vs. Professional Wasp Nest Removal

Comparison of homeowner DIY wasp removal from a ladder and a protected pest control technician treating a nest
High, concealed or heavily active nests can make professional wasp removal a safer option than attempting treatment from a ladder.

A small, readily accessible nest is very different from an active colony inside a wall or underground.

SituationDIY considerationProfessional service
Small, accessible exposed nestRetail products may exist for labeled applicationsOptional depending on risk
High roof/eave nestFall and sting risk increaseStrongly preferable
Underground yellowjacket colonyDifficult to judge colony position/sizeStrongly preferable
Nest inside wall/atticHidden colony complicates treatmentRecommended
Multiple active nestsHarder to assess extentRecommended
Known sting allergyAvoid disturbing nestProfessional assistance appropriate
Uncertain insect identificationAvoid unnecessary treatmentIdentification first

Anyone considering a pesticide should read and follow the product label exactly.

The Texas Department of Agriculture regulates structural pest-control businesses and professionals who provide pest-control services for compensation. TDA states that structural pest-control businesses must be licensed and have appropriately certified personnel for the categories in which they operate.

When DIY becomes a bad trade-off

The cost of an aerosol can is not the only variable.

Consider whether reaching the nest requires you to:

  • climb a ladder;
  • approach a highly active colony;
  • work near a doorway used by family members;
  • enter an attic;
  • disturb a concealed nest;
  • identify an insect you are uncertain about.

When several of those conditions apply, professional service is less about buying a stronger spray and more about managing access, identification and exposure safely.


What Does Professional Wasp Removal Include?

Supremacy Services wasp removal process showing inspection, targeted treatment, nest removal and prevention follow-up
Professional wasp control typically begins with identification and inspection, followed by appropriate treatment, nest removal when suitable and prevention recommendations.

The exact scope varies with the company and nest, so homeowners should ask what is included in the estimate.

A thorough service may involve:

1. Inspection and identification

The technician determines what insect is present and searches for active nesting locations.

2. Nest-location assessment

Visible nests are straightforward. Hidden activity may require tracing flight patterns to identify entry points and likely nesting cavities.

3. Appropriate treatment

The treatment method should match the species, nest location and pesticide label.

4. Confirmation of reduced activity

Physical nest removal should occur only when it can be performed safely.

5. Nest removal when appropriate

Accessible nest material may be removed after the colony has been controlled.

6. Inspection for additional activity

Nearby eaves, porches, rooflines and sheltered surfaces can be checked for additional nests.

7. Prevention recommendations

The technician may identify structural gaps or recurring nesting areas that can be addressed after active colonies have been eliminated.

Supremacy Services’ dedicated Dallas wasp and hornet service describes a process involving property and roofline inspection, targeted treatment, physical nest removal and preventative spot treatment.


Is Wasp Removal Included With Regular Pest Control?

It depends on the pest-control plan.

This is worth asking because prevention and emergency nest removal are not necessarily identical services.

Supremacy Services’ current Perimeter Pest Control program includes exterior inspection and high-reach sweeping of wasp nests and spider webs around windows and eaves.

That type of routine exterior service can help address small developing nests, while an established, concealed or difficult stinging-insect colony may require dedicated removal.

This distinction is useful when comparing quotes: ask whether you are buying one-time active-nest removal, ongoing exterior pest prevention, or both.


Dallas and DFW Wasp Considerations

North Texas homeowners can encounter several kinds of social and solitary wasps, including paper wasps and yellowjackets.

Rather than relying on calendar dates alone, pay attention to actual activity around the structure.

Repeated flight into the same opening is more informative than occasionally seeing a wasp cross the yard.

Common inspection points around Dallas-area homes include:

  • roof eaves;
  • soffits;
  • patio covers;
  • porch ceilings;
  • sheds;
  • fences;
  • attic and roof vents;
  • exterior light fixtures;
  • wall penetrations;
  • landscaping near high-traffic areas.

The concern becomes greater when an active nest is close to a doorway, patio, children’s play area or another location where people repeatedly pass near it.


How to Prevent Wasps From Returning

Prevention starts with making the property less attractive for nesting and detecting new nests early.

Inspect sheltered areas regularly

Look beneath eaves, porch roofs, patio structures and other protected surfaces for early nest construction.

Repair appropriate exterior gaps

After confirming that no active colony remains inside, repair openings that could provide access to wall or attic cavities.

Keep waste covered

Outdoor garbage and food residues can attract scavenging yellowjackets. Extension guidance recommends keeping food covered and using tightly closed garbage containers when yellowjackets are active.

Watch recurring nesting areas

If wasps repeatedly establish nests beneath the same porch or roofline, include that location in routine exterior pest inspections.

Consider perimeter pest management

Homeowners who repeatedly deal with insects around eaves, windows and the foundation may benefit from treating the problem as part of a broader exterior pest-management strategy rather than waiting for each individual infestation.


When Should You Call a Professional for a Wasp Nest?

Professional help is particularly appropriate when the nest is hidden, high, difficult to reach, aggressively defended or located where people cannot safely avoid it.

Consider calling a professional when:

  • wasps are entering a wall or soffit;
  • you suspect an underground yellowjacket colony;
  • the nest requires a ladder to reach;
  • activity is concentrated beside a doorway or patio;
  • multiple nests are present;
  • the species cannot be identified confidently;
  • wasps are appearing repeatedly inside the house;
  • someone who may encounter the nest has a history of severe sting reactions.

University Extension guidance similarly recommends professional pest management for difficult hidden nests and warns people with sting allergies not to attempt nest management themselves.


What Should You Ask Before Hiring a Wasp Exterminator?

Price matters, but the lowest number is difficult to compare unless the scope is identical.

Ask:

  • Is inspection included?
  • Does the quote cover treatment and physical nest removal?
  • Is the price for one nest or the entire inspected area?
  • What happens if another nest is discovered?
  • Is follow-up included?
  • Does the estimate include high-access work?
  • Are structural repairs separate?
  • What prevention work is included?
  • Is the pest-control business properly licensed in Texas?

Texas requires businesses performing structural pest control for hire to meet state licensing requirements.

A written estimate that clearly defines the work is more useful than comparing headline prices without knowing what each company includes.


Frequently Asked Questions

How much does wasp nest removal cost in Dallas?

Current 2026 Dallas market data puts typical professional wasp removal around $309–$722, with an average near $541. Small accessible nests may cost less, while concealed or difficult colonies can cost more.

What is the cheapest type of wasp nest to remove?

A small, exposed and easily accessible paper-wasp nest is generally among the simpler removal situations. Species, height and accessibility still affect the final quote.

Why does yellowjacket removal cost more?

Yellowjackets frequently establish colonies underground or inside structural cavities. Those concealed locations and the colony’s defensive behavior can make treatment more complicated than removing a visible paper-wasp nest.

Does the exterminator remove the actual nest?

It depends on accessibility and the service scope. Ask specifically whether physical nest removal is included rather than assuming treatment and removal mean the same thing.

Can I remove a wasp nest myself?

Some small, exposed nests may be manageable with a product specifically labeled for that application, but high, concealed, underground or aggressively defended nests present substantially greater risk. Anyone with a known serious sting allergy should not attempt removal.

Should I seal the hole where wasps are entering my wall?

Not while an active colony is still using it. Extension guidance warns that prematurely sealing an active yellowjacket entrance can cause insects to seek another exit, potentially toward the building interior.

Are wasps and yellowjackets the same thing?

Yellowjackets are a type of social wasp. Their nesting behavior differs from common paper wasps: many yellowjackets use underground or enclosed cavities, while paper wasps commonly build exposed open-comb nests.

What if I actually have honey bees?

Get the insect identified before treatment. Honey bees and wasps differ in appearance, nesting material and colony behavior, so the appropriate management approach may be different.

Is routine pest control enough to prevent wasp nests?

Routine exterior inspection can help catch developing nests early. Supremacy’s perimeter program currently includes exterior nest and web sweeping, while an established or concealed colony may require dedicated wasp-removal service.


Get a Dallas Wasp Nest Assessed Before It Gets Harder to Ignore

A visible nest beneath an accessible eave may be relatively straightforward. A stream of yellowjackets disappearing behind siding, into a soffit or underground can represent a much more complicated problem.

The most useful first step is determining what insect is present, where the colony is located and what the removal actually requires.

For homeowners across Dallas and the DFW Metroplex, Supremacy Services provides dedicated wasp and hornet nest removal alongside broader exterior pest-control services.